Think burning DVDs is a thing of the past? Think again! Whether you are archiving important files, backing up family memories, or sharing media, creating a data DVD is still a highly reliable and practical solution in 2026.
In this fast and easy tutorial, we will show you exactly how to get your files securely onto a disc in no time using Nero Express.
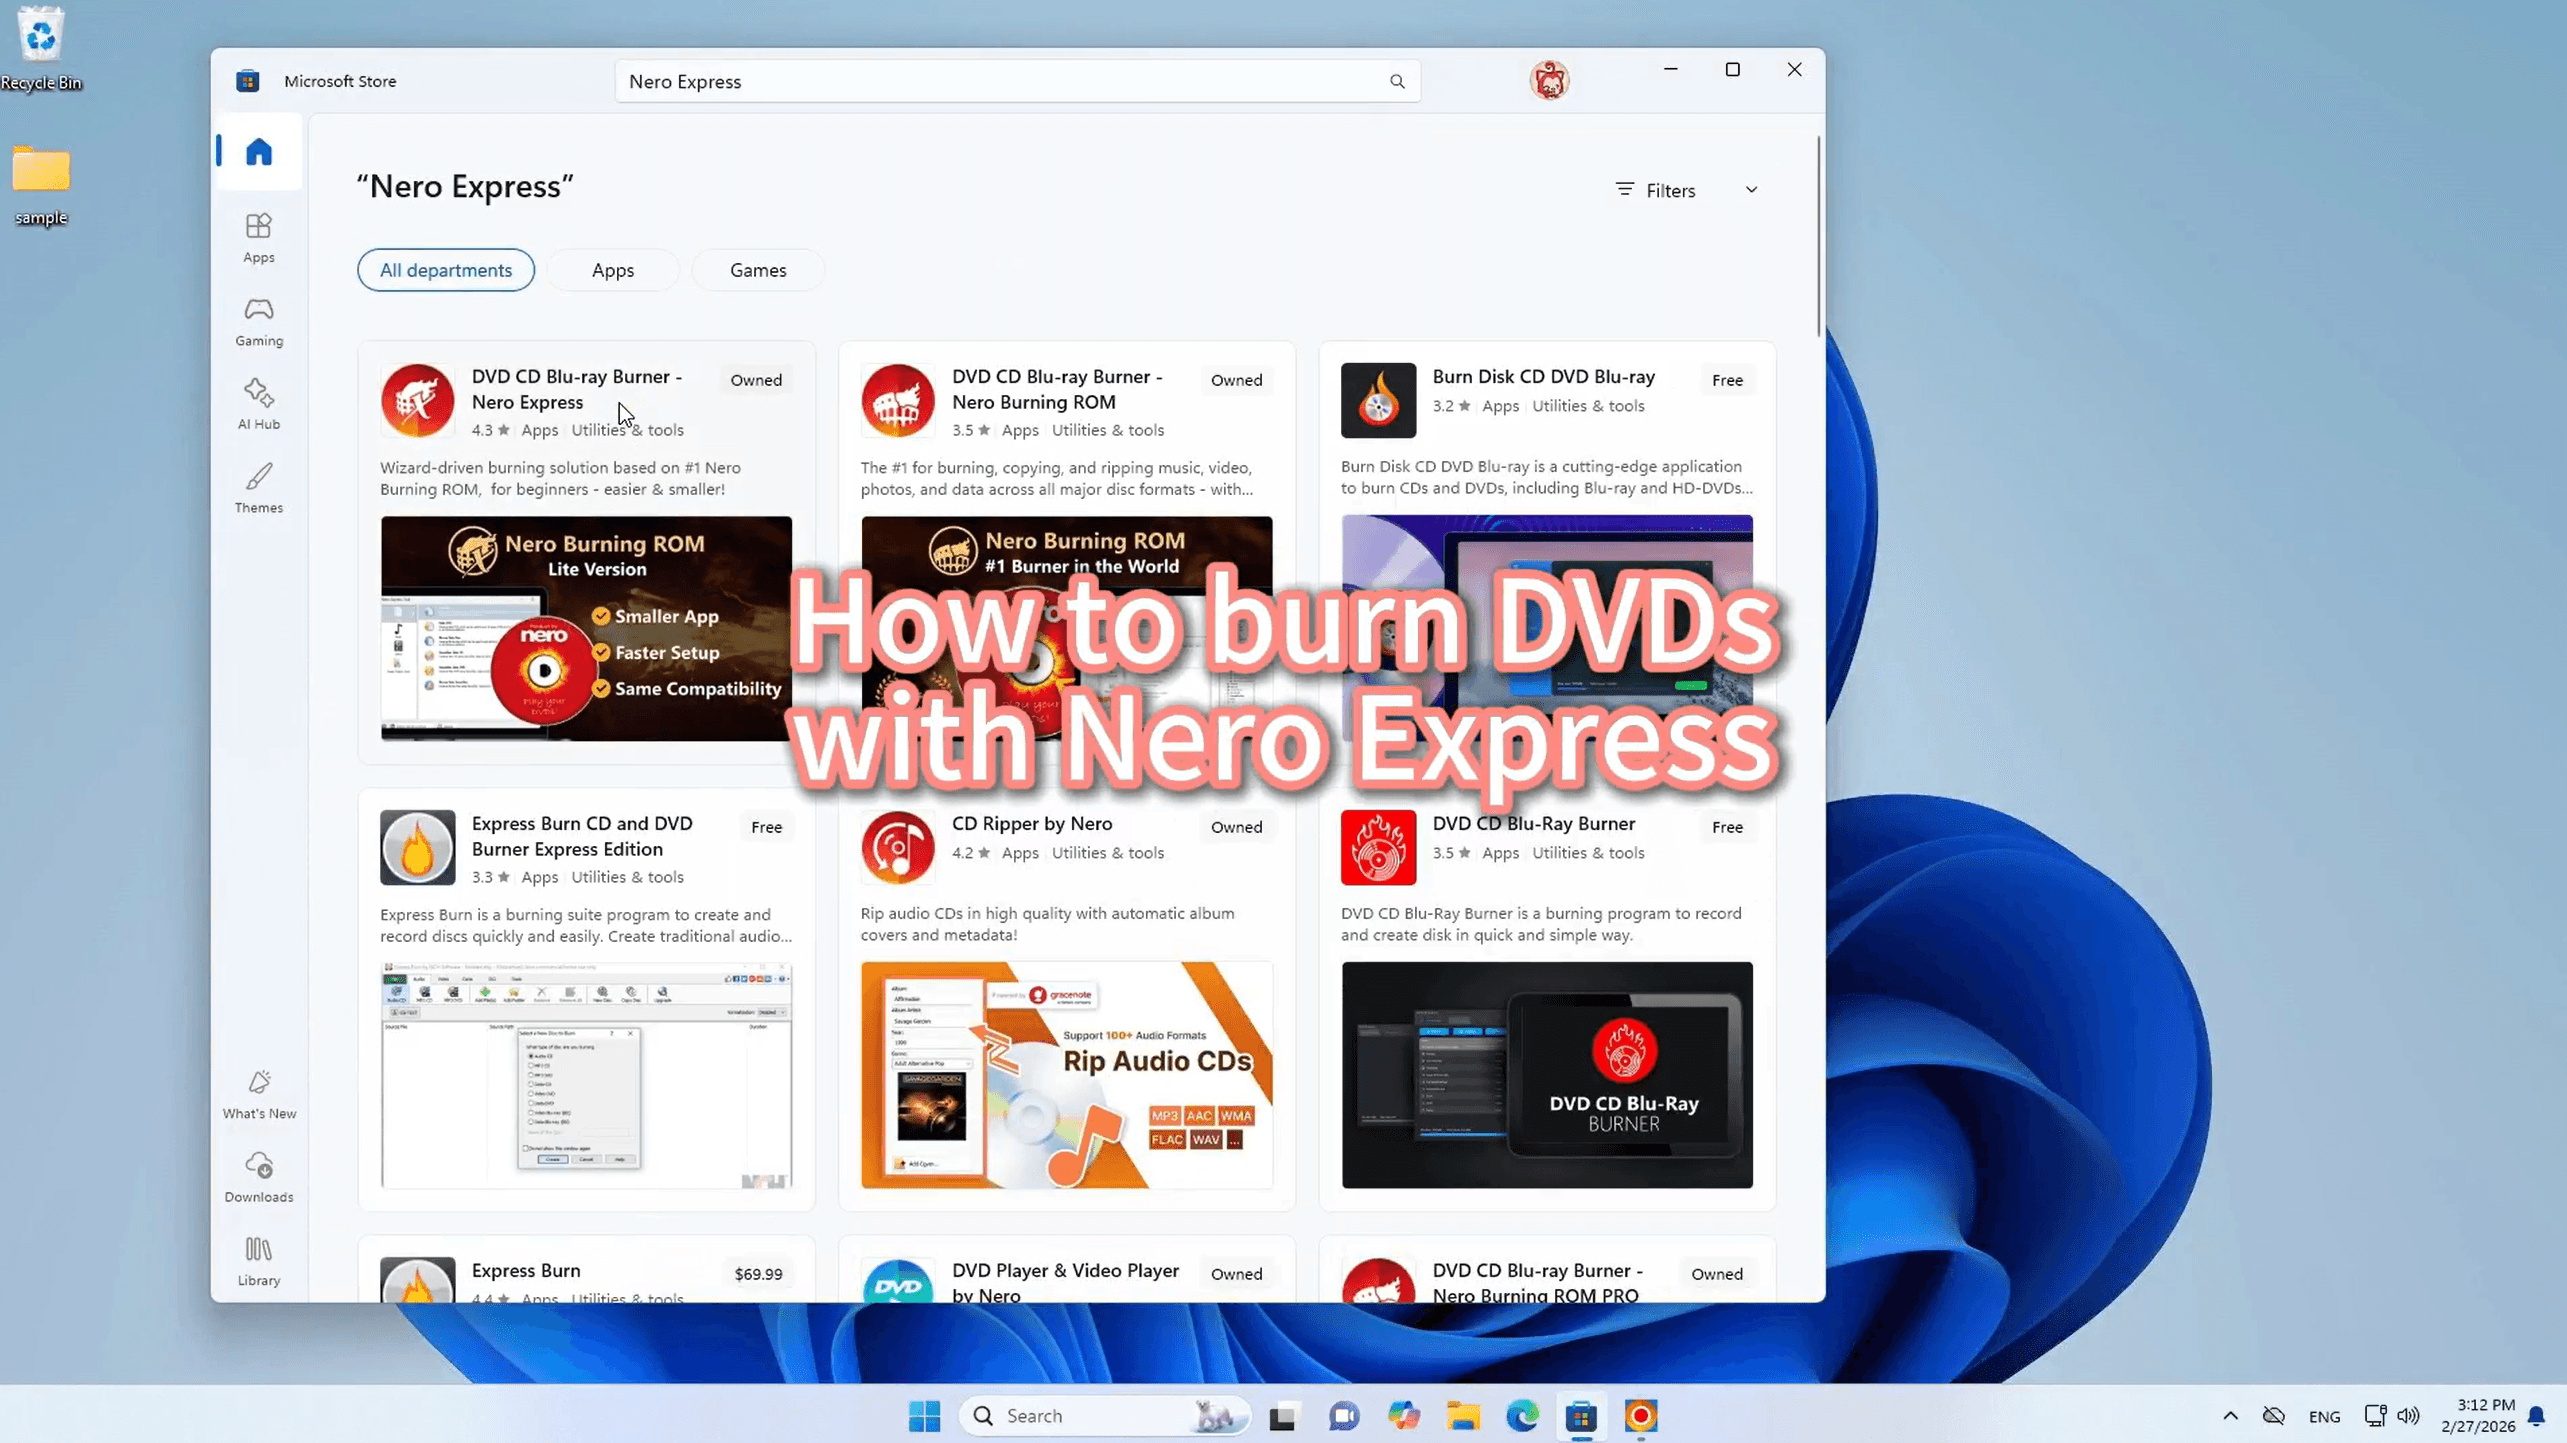
Step 1: Download Nero Express
First, you need the right tool for the job. Head over to the Microsoft Store on your Windows PC and search for "Nero Express" (listed as DVD CD Blu-ray Burner - Nero Express). Download and install the application to get started.
We chose Nero Express for this tutorial after testing five burning tools — see the full DVD burning software comparison for 2026 to find out which one fits your needs.
👇 Learn More
https://pcai.nero.com/nero-express
👇 Free Download
https://apps.microsoft.com/detail/9p2sqmhpmkcx?cid=pcai&mode=direct
Step 2: Choose Your Project Type
Launch the Nero Express application.
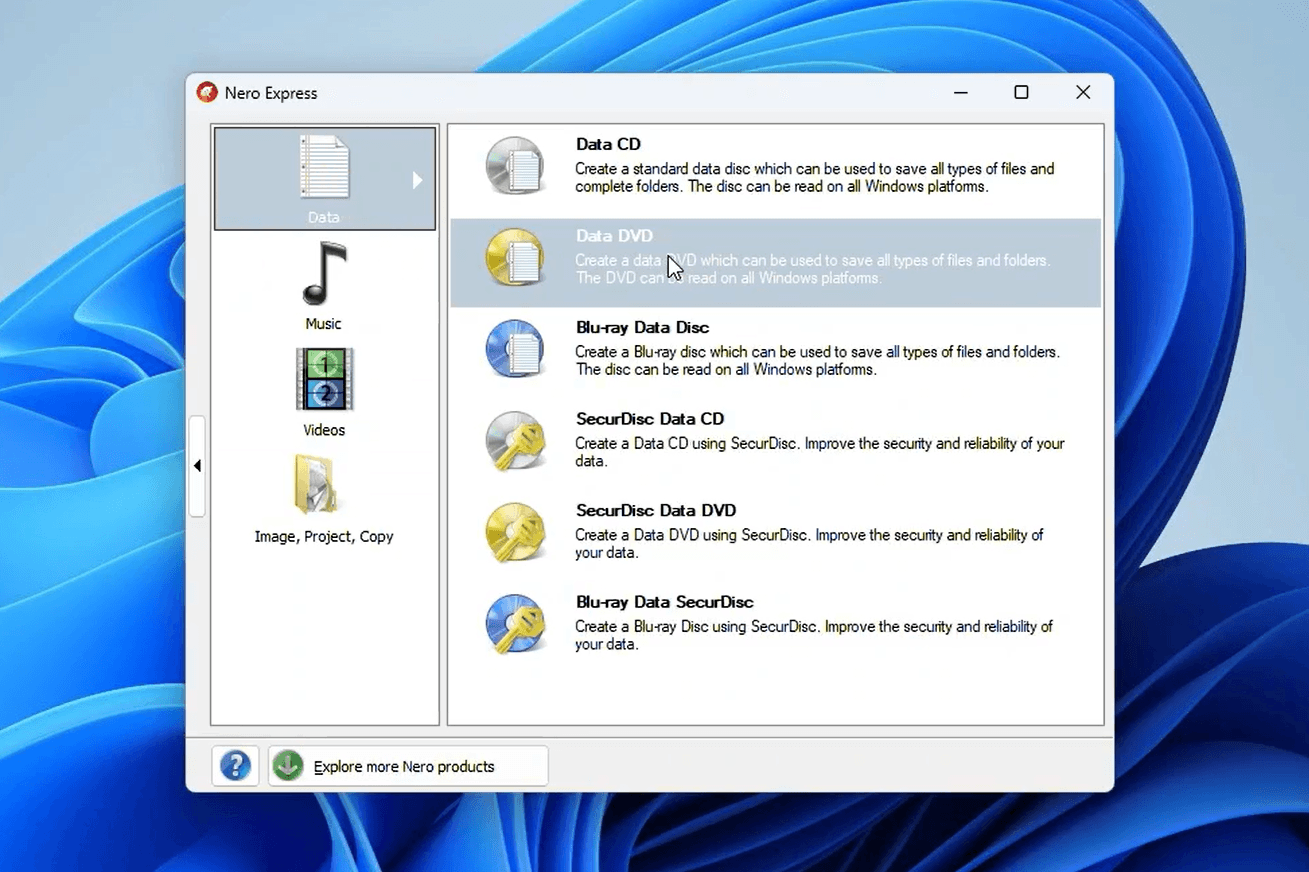
On the left-hand menu, click on the "Data" category.
From the options that appear on the right, select "Data DVD". This specific option lets you create a standard data disc used to save all types of files and folders, which can easily be read on all Windows platforms.
Step 3: Add Your Files
Next, you will be taken to the "Disc Content" window, where you can add data to your disc.
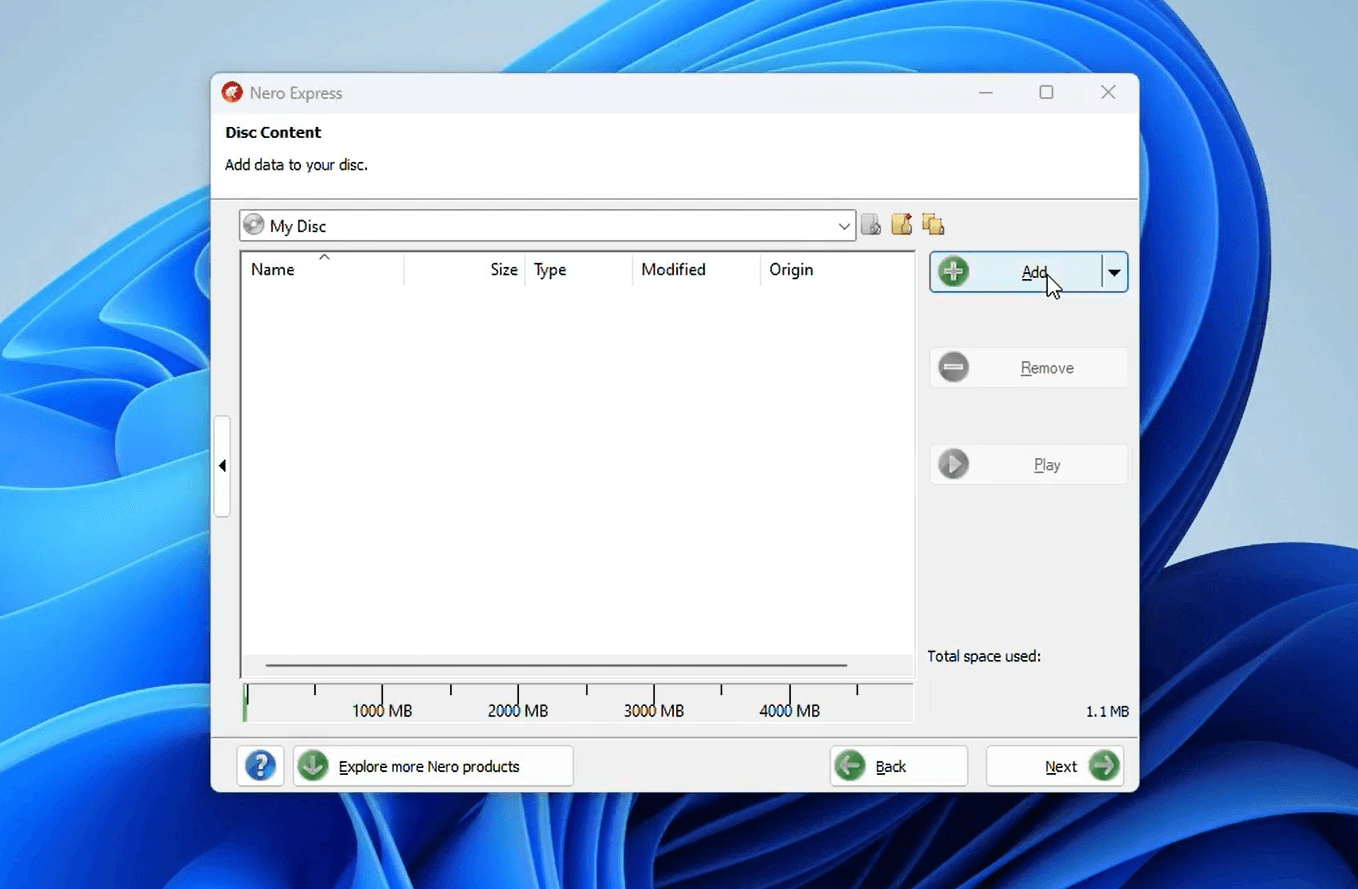
Click the "Add" button (the icon with the green plus sign) on the right side of the screen to browse your computer and select the files or folders you want to burn.
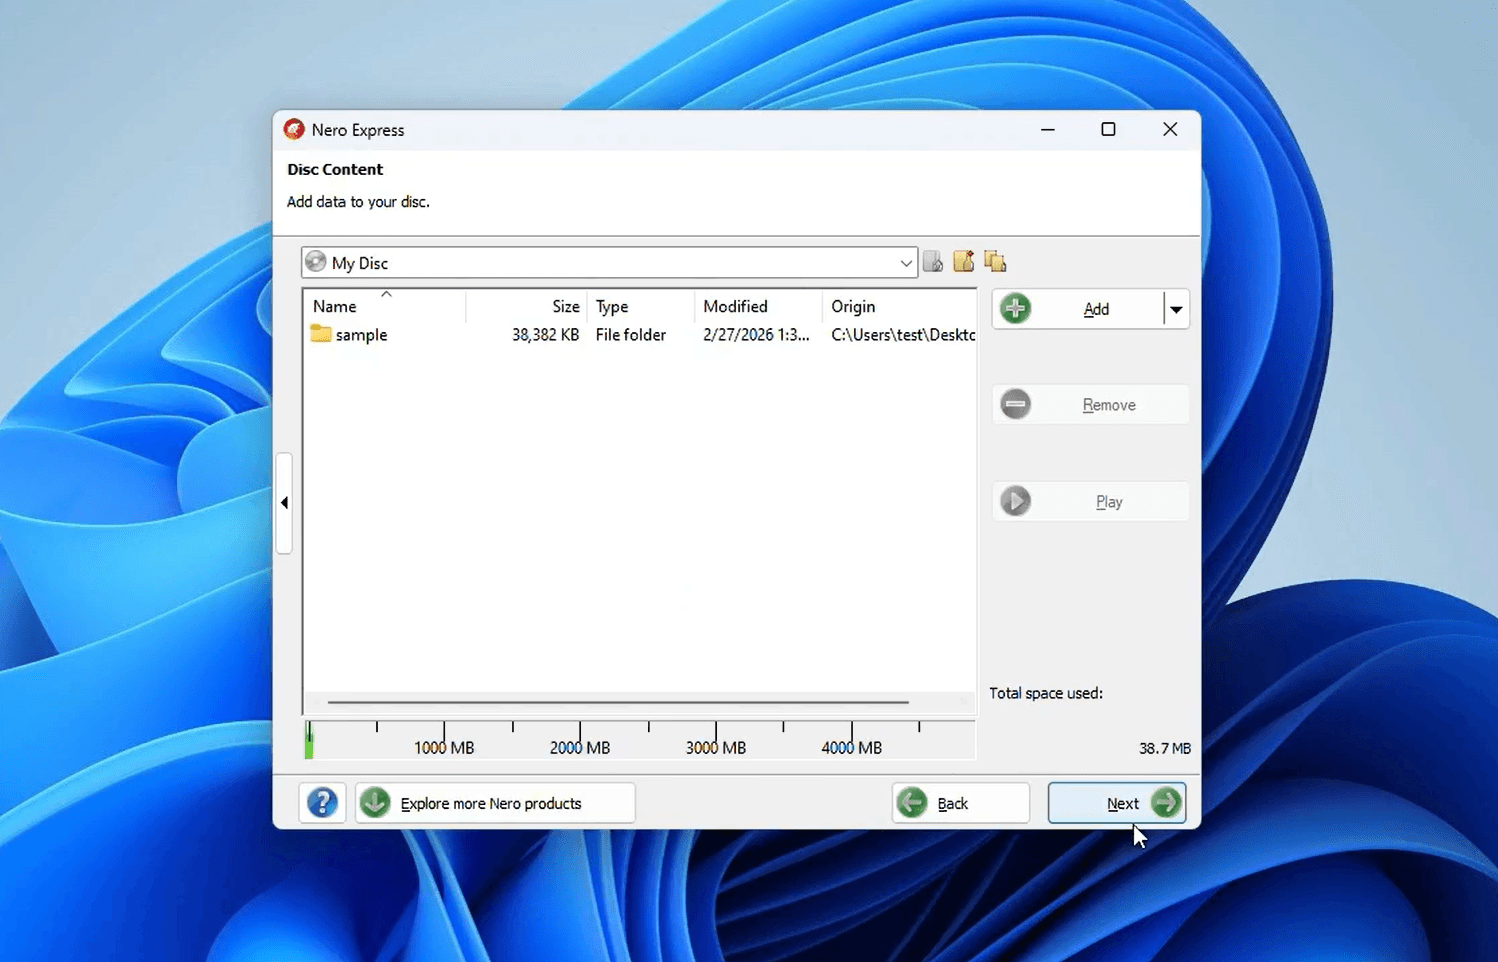
For example, we added a folder named "sample".
Keep an eye on the storage capacity bar at the bottom of the window; it shows you exactly how much space your files are taking up (in our case, just 38.7 MB out of a standard 4000+ MB DVD).
Once you have added everything you need, click the "Next" button in the bottom right corner.
Step 4: Configure Final Burn Settings
You are almost done! On the "Final Burn Settings" screen, you can tweak a few important details before creating your disc:
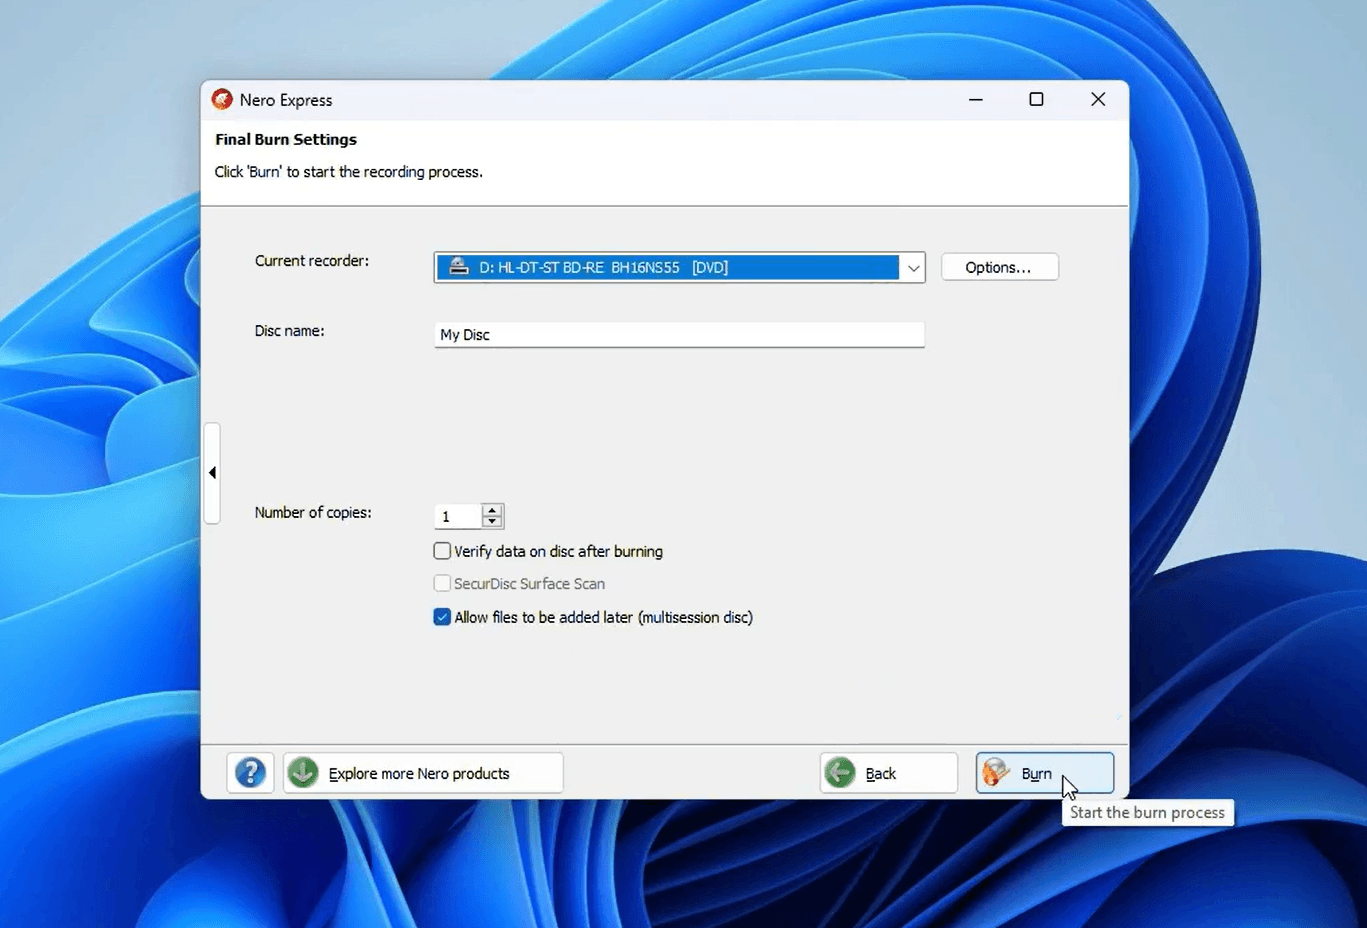
Current recorder: Select your DVD/Blu-ray drive from the drop-down menu (e.g.,
D: HL-DT-ST BD-RE).Disc name: Give your DVD a recognizable name in the text field, such as "My Disc".
Multisession disc: If you think you might want to add more files to this same DVD in the future, make sure to check the box next to "Allow files to be added later (multisession disc)".
When you are happy with your settings, click the "Burn" button to start the recording process.
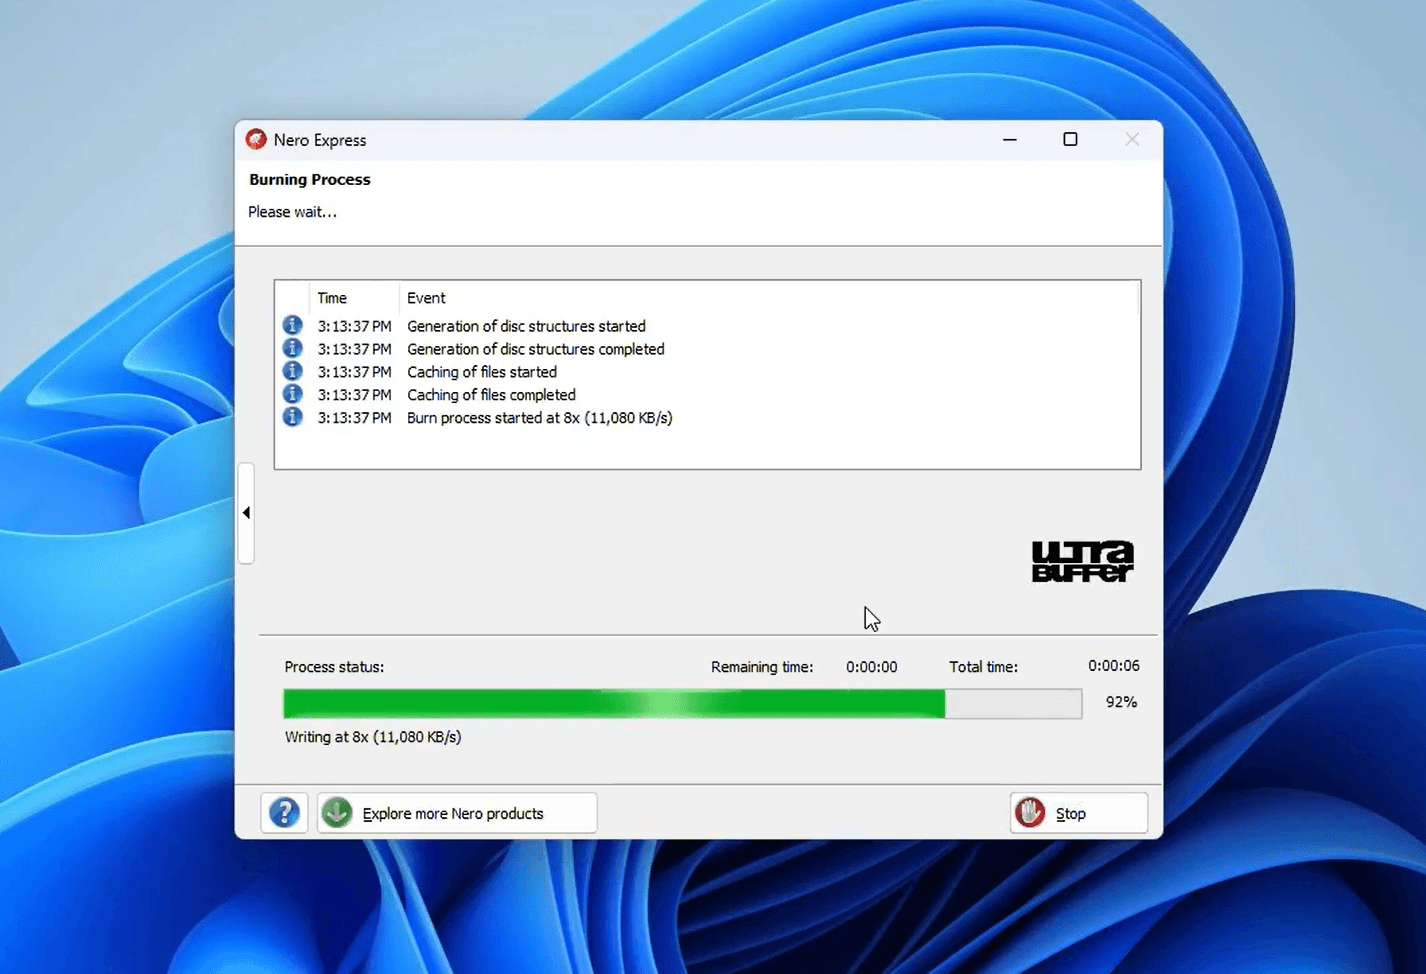
Step 5: The Burning Process
A new window will pop up showing the "Burning Process". You will see a green progress bar, the writing speed, and the remaining time. Simply wait a few moments for the software to finish caching your files and writing them to the disc.
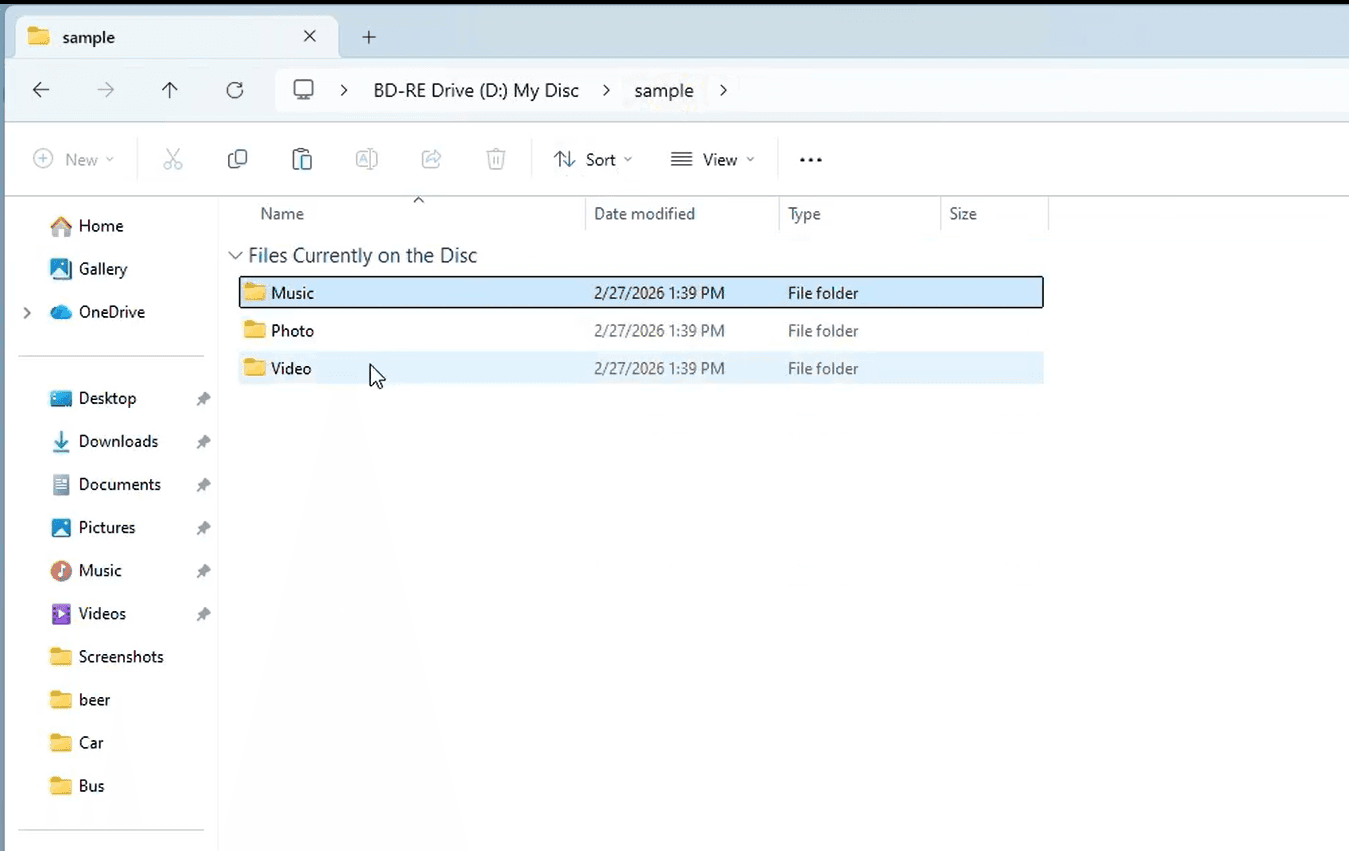
Step 6: Access Your New DVD
Once the burn is complete, you are all set! You can open Windows File Explorer and navigate to your disc drive (which will now display your chosen disc name, like "My Disc"). Inside, you will find all your successfully burned files and folders ready to go.
Why Burn a DVD in 2026?
While cloud storage is everywhere, creating a physical data DVD remains one of the most reliable and secure ways to manage your digital life. Here is why you might want to keep a stack of blank DVDs on your desk:
True Digital Ownership: Monthly subscription fees for cloud storage can quickly add up, and accounts can be compromised. A DVD is a one-time, low-cost physical backup that you completely own and control.
Archiving Heavy Files: DVDs are perfect for safely cold-storing large files offline. You can easily archive old software projects, raw video footage, or high-res design assets to free up space on your primary computer.
Preserving Important Memories: Keep your favorite moments safe from accidental deletion, hardware failure, or phone crashes by creating a dedicated, physical archive for your photos and home videos.
Easy Physical Sharing: Sometimes it is simply easier (and more professional) to hand a client, colleague, or family member a physical disc rather than dealing with massive email attachments or expiring download links.
Final Thoughts
Physical media isn't obsolete; its purpose has just evolved. Having a reliable way to create offline backups is a smart move for anyone who wants to ensure their data remains safe, accessible, and firmly in their own hands. As you can see from the steps above, software like Nero Express takes all the guesswork out of the process, making DVD burning just as straightforward today as it ever was.
👇 Learn More
https://pcai.nero.com/nero-express
👇 Free Download
https://apps.microsoft.com/detail/9p2sqmhpmkcx?cid=pcai&mode=direct


