Your physical CD collection holds irreplaceable memories — live recordings, limited pressings, albums that never made it to streaming. Converting them to FLAC ensures those memories survive in perfect digital fidelity, without a single bit of audio quality lost. In this guide, we'll walk you through exactly how to do it using Nero Express, one of the most trusted disc management tools available on Windows.
What Is FLAC — and Why Does It Matter?
FLAC (Free Lossless Audio Codec) is an open-source audio format that compresses audio files without discarding any data. Unlike lossy formats such as MP3 or AAC, FLAC preserves every single sample from the original recording. When you decode a FLAC file, you get back a bit-for-bit identical copy of the source audio — which is exactly what you want when archiving a CD.
FLAC vs. Other Audio Formats
Format | Type | Quality | File Size | Best For |
|---|---|---|---|---|
FLAC | Lossless | ✅ Perfect (CD-quality) | Medium (~25 MB/track) | Archiving, audiophile listening |
WAV / AIFF | Lossless | ✅ Perfect | Large (~50 MB/track) | Studio editing, no metadata support |
MP3 | Lossy | ⚠️ Degraded | Small (~5 MB/track) | Casual listening, streaming |
AAC | Lossy | ⚠️ Degraded | Small (~5 MB/track) | Apple ecosystem, streaming |
Ogg Vorbis | Lossy | ⚠️ Degraded | Small (~5 MB/track) | Open-source streaming |
The key advantage FLAC holds over WAV and AIFF — despite all three being lossless — is its support for rich metadata tags (artist, album, track number, album art) and its roughly 50% smaller file size compared to uncompressed formats. Compared to MP3 or AAC, FLAC simply cannot be beaten on audio quality: once audio data is thrown away during lossy compression, it is gone forever. FLAC keeps everything, making it the gold standard for CD archiving.
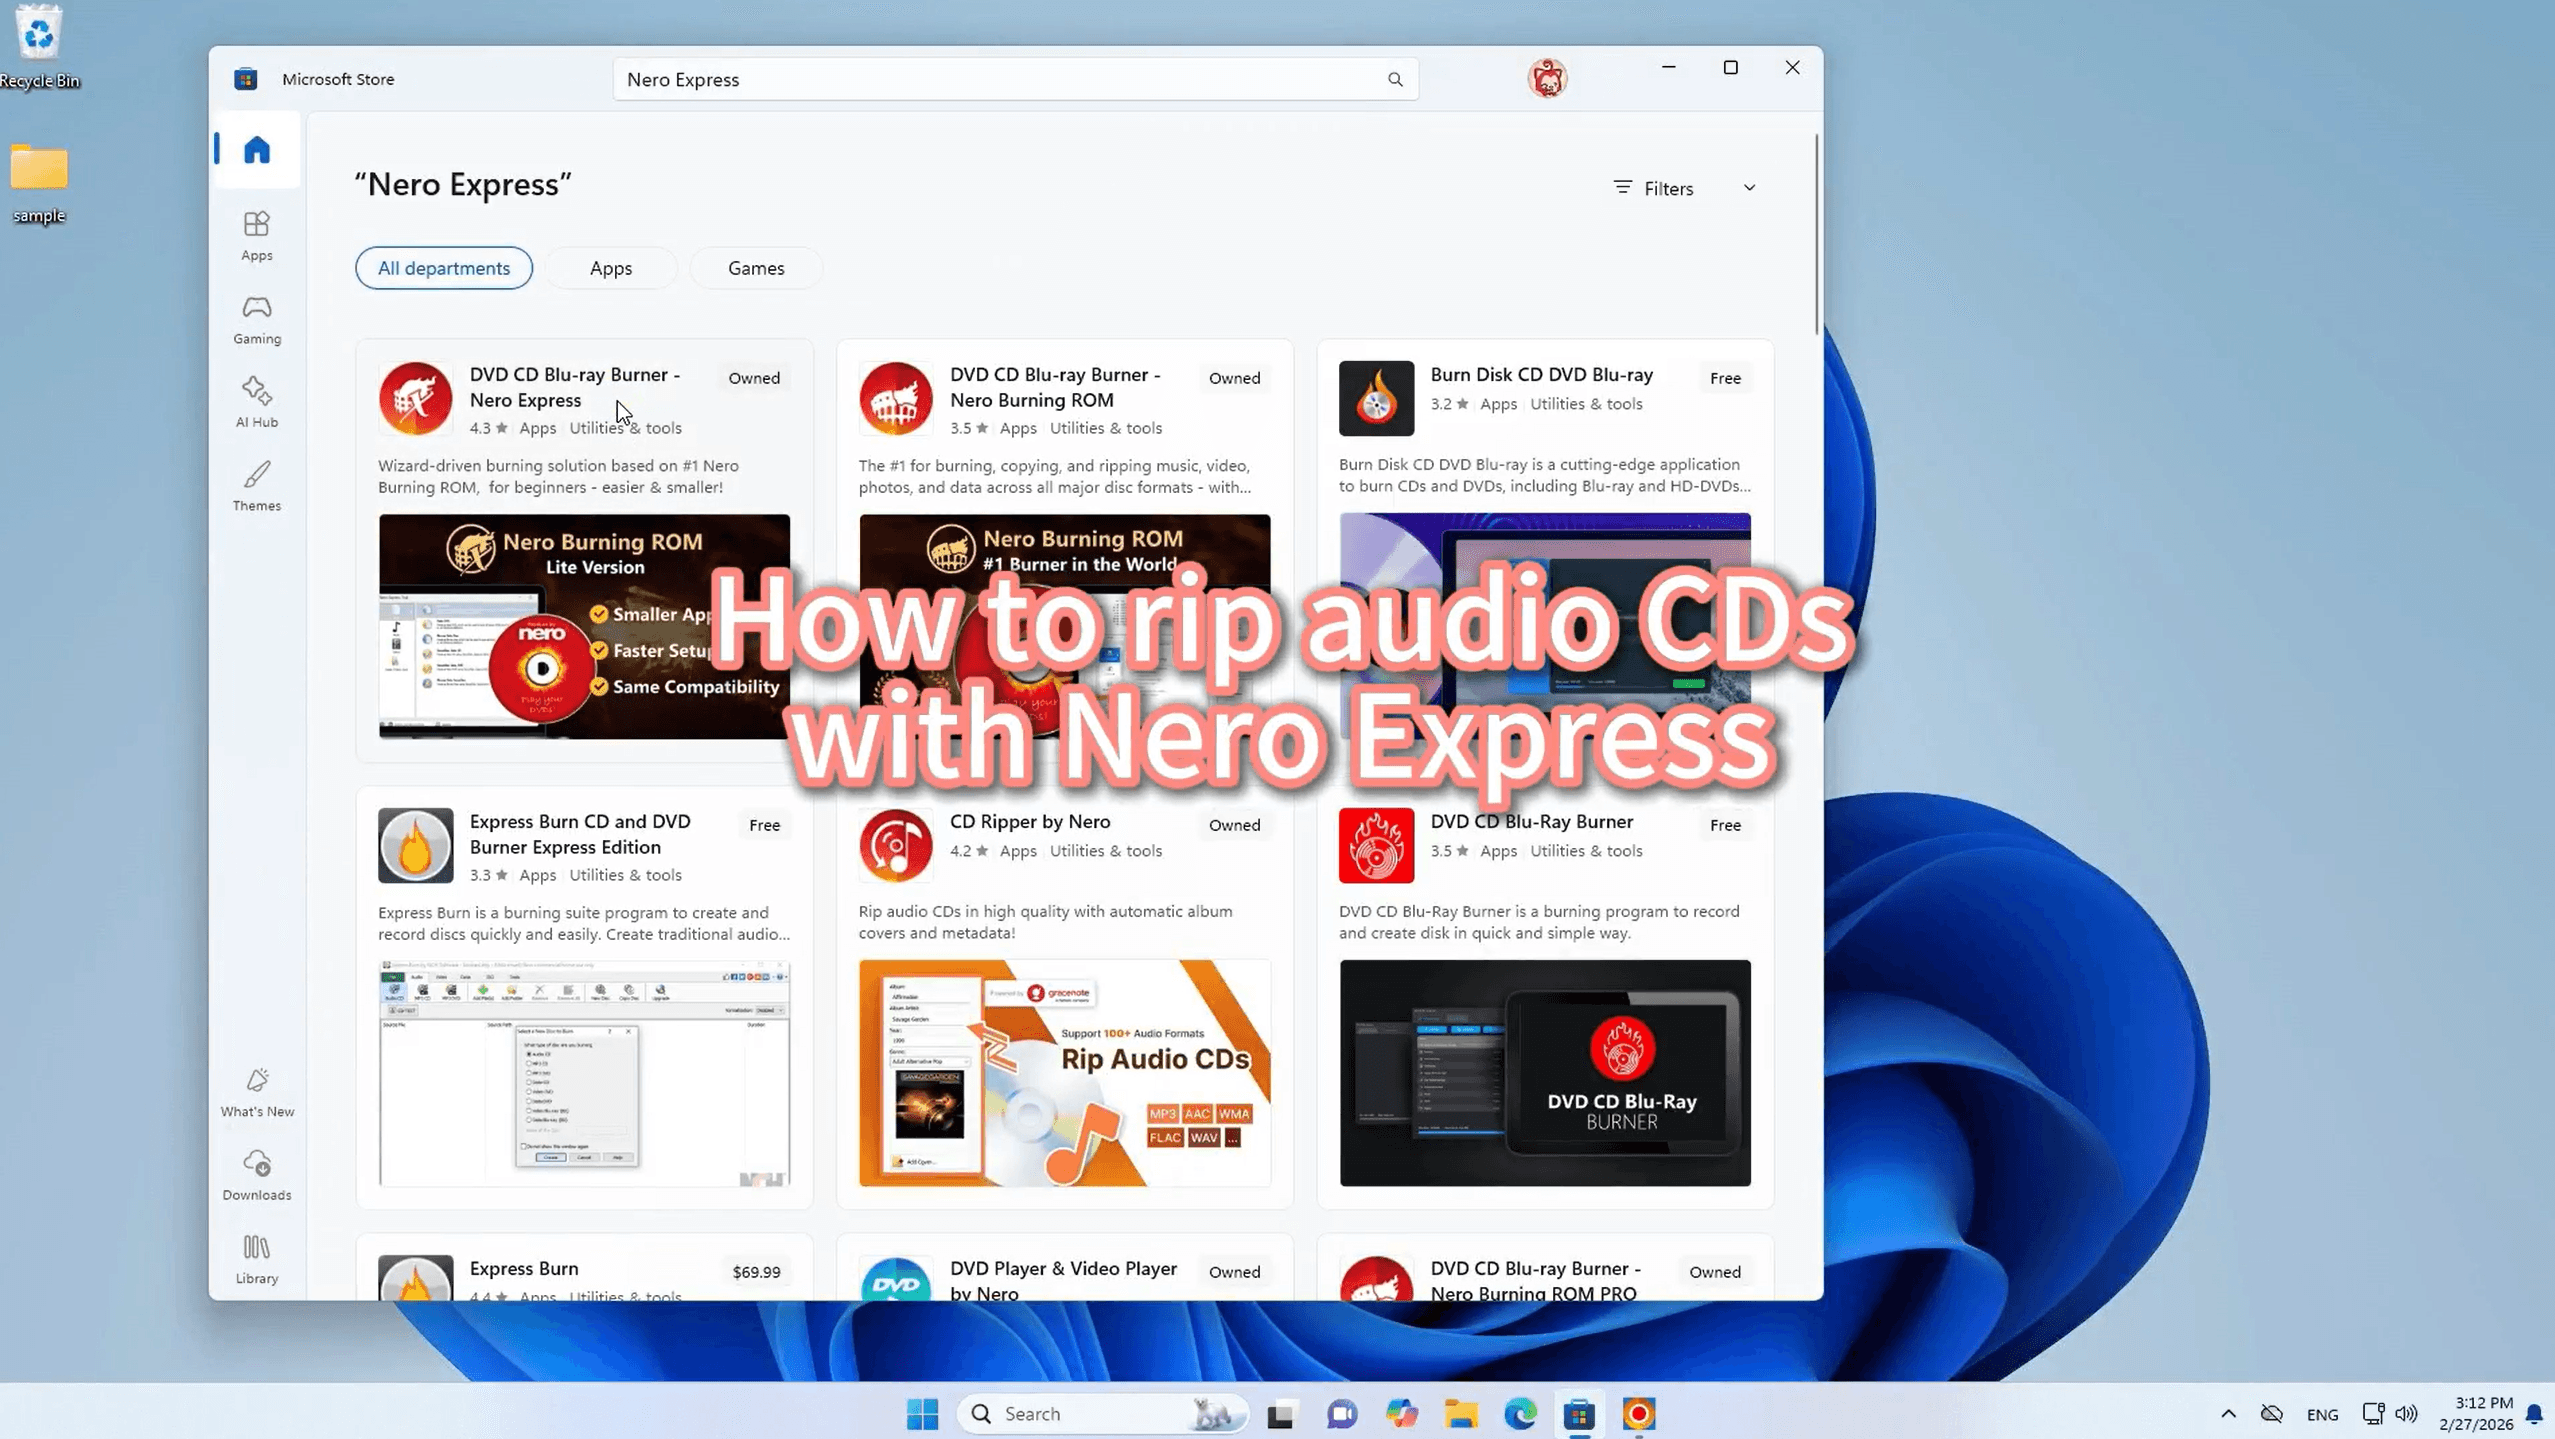
Step 1 — Download Nero Express
Head to the Microsoft Store and search for Nero Express, or click the direct download link below. The app is free to download and installs in just a few clicks. Once installed, launch it and you're ready to start ripping.
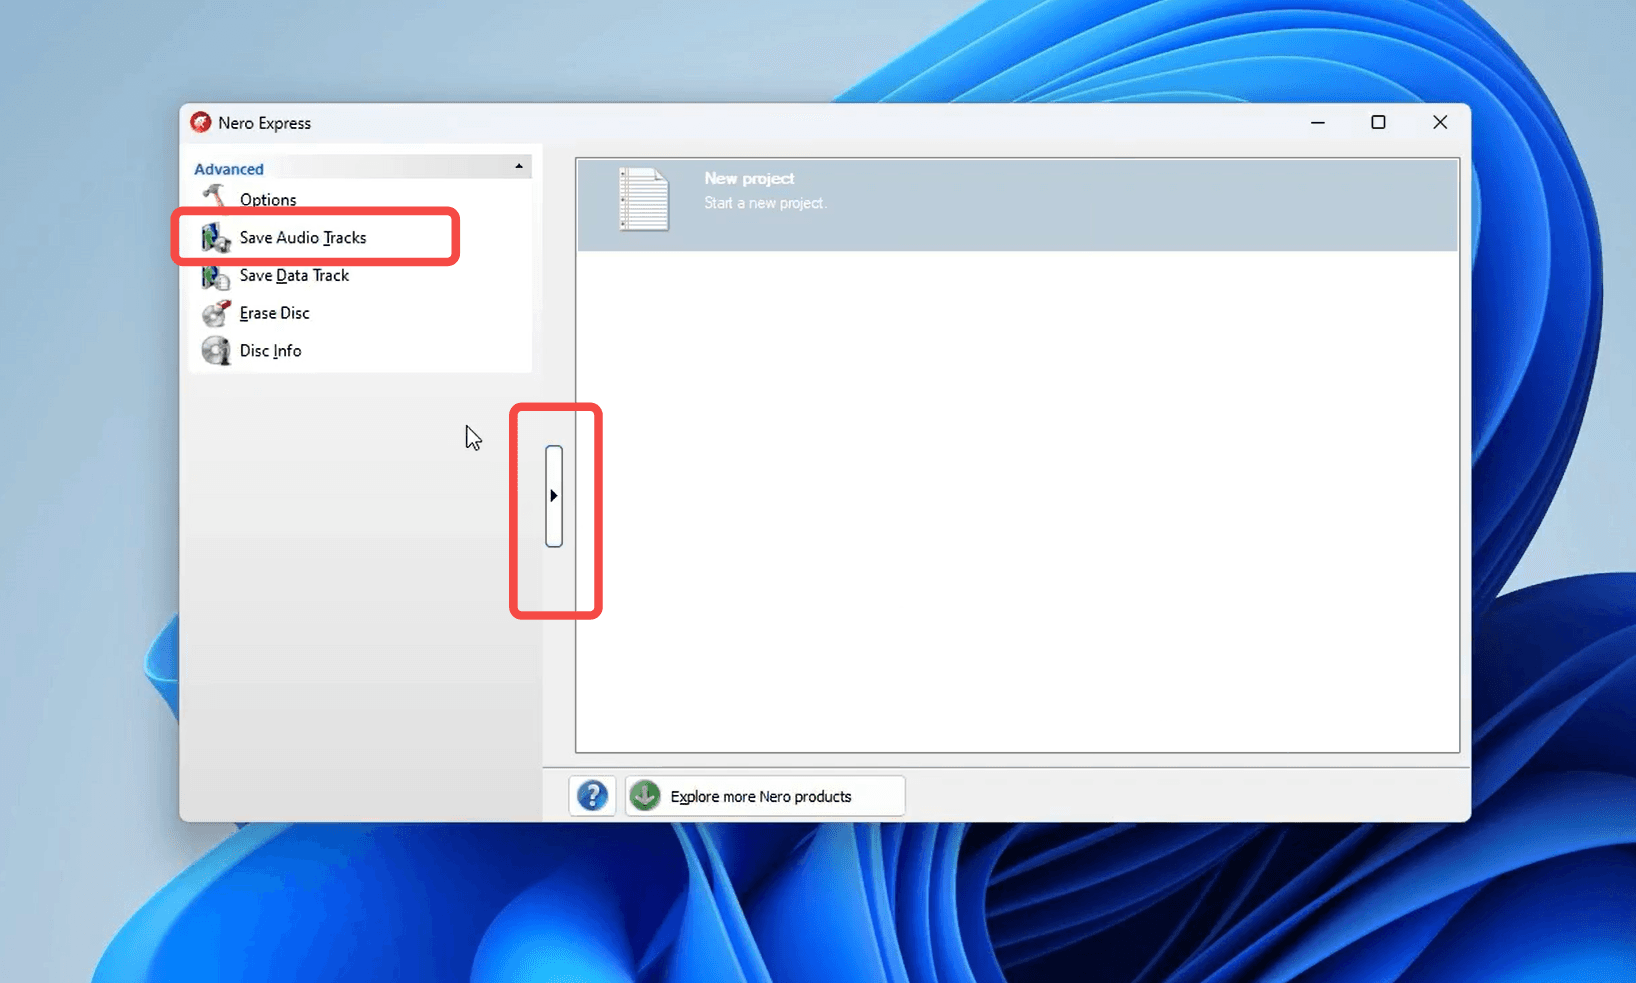
Step 2 — Select "Save Audio Tracks"
Launch Nero Express after installation. In the left-hand panel under Advanced, you will see several options. Click on "Save Audio Tracks" — this is the dedicated ripping function that reads audio data directly from your CD and saves it to your hard drive in your chosen format.
Step 3 — Insert Your CD and Select the Album
Insert your audio CD into the disc drive. Nero Express will automatically detect the disc and query an online music database to retrieve album metadata — track titles, artist names, album art, year, and genre. In the Source tab, use the CD dropdown to confirm the correct album is selected. If multiple entries appear, choose the one that best matches your disc.
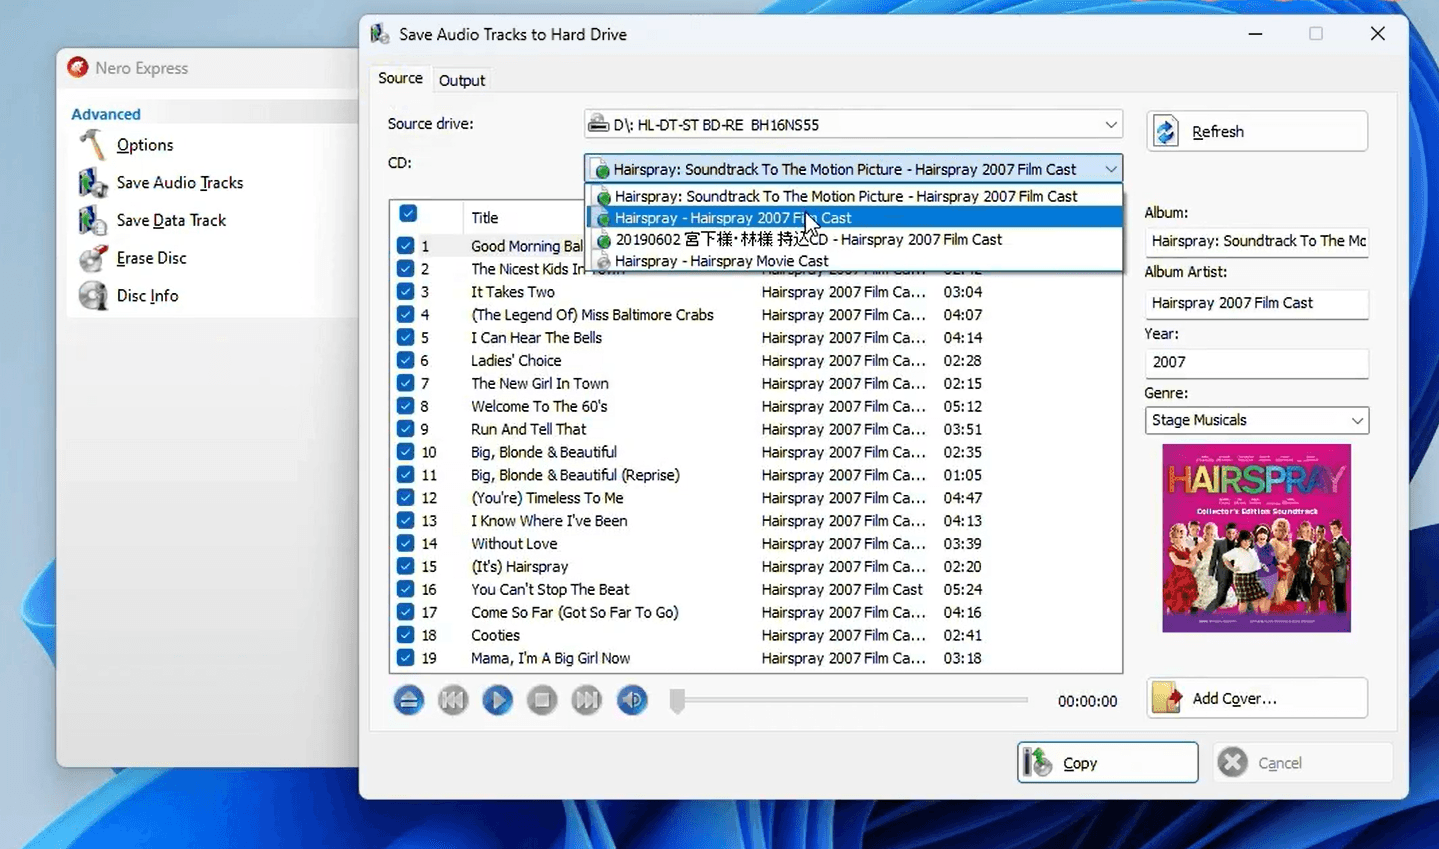
Step 4 — Choose Your Tracks
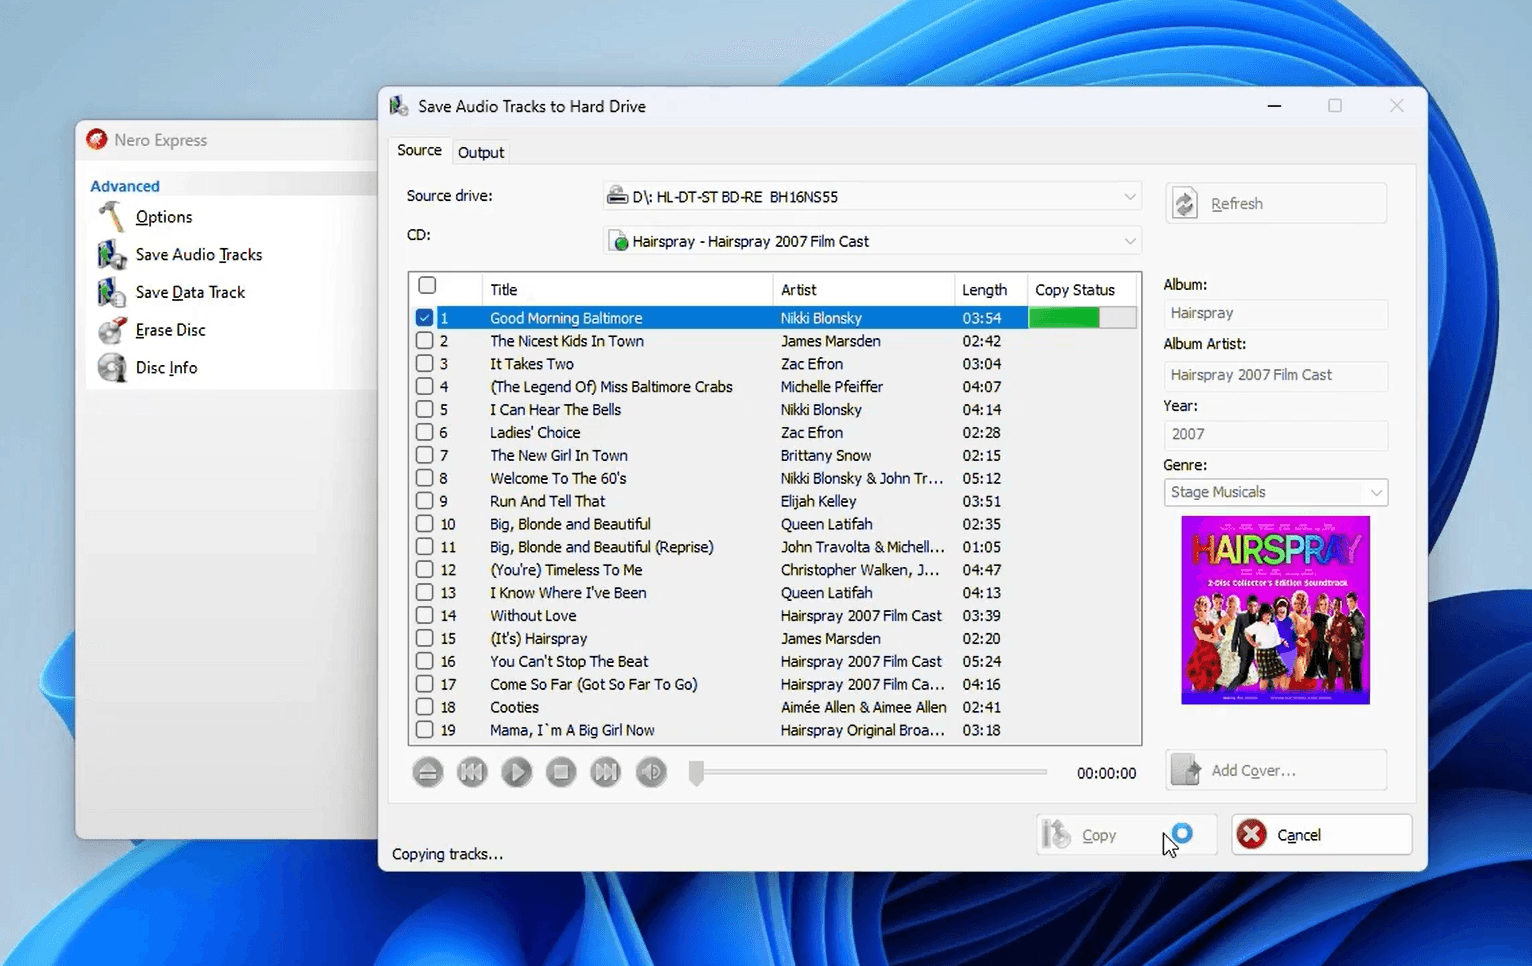
In the track list, you'll see every song on the CD along with its title, artist, and duration. Check the boxes next to the tracks you want to save. To rip the entire album, check the box at the top to select all tracks at once.
Step 5 — Set Output Format to FLAC
Click on the Output tab to configure where and how your files will be saved. Here you can:
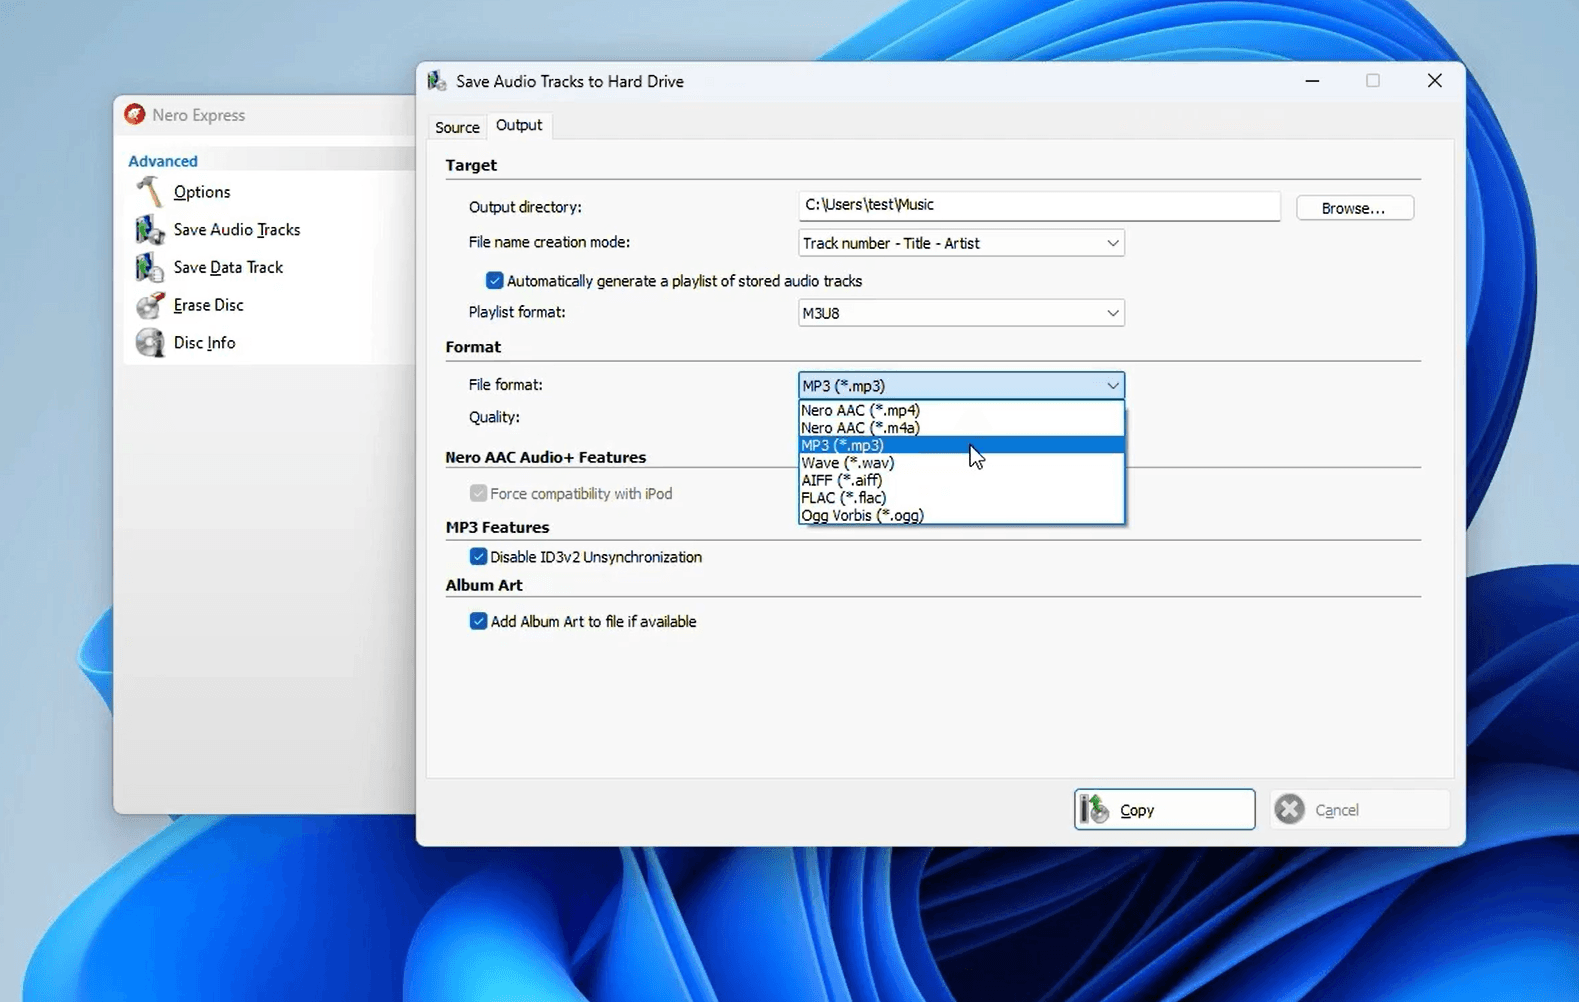
Output directory — Choose the folder where your FLAC files will be stored (e.g.,
C:\Users\YourName\Music).File name creation mode — Set the naming convention, such as Track number – Title – Artist.
File format — Open the dropdown and select FLAC (*.flac) from the list of available formats.
Album Art — Make sure "Add Album Art to file if available" is checked to embed the cover image into each FLAC file.
Step 6 — Click "Copy" to Start Ripping
Once everything is configured, click the Copy button. Nero Express will begin reading the audio data from your CD and encoding each track to FLAC. You can monitor the progress in real time via the copy status indicator. When complete, your FLAC files will be waiting in the output folder, perfectly tagged and ready to enjoy.
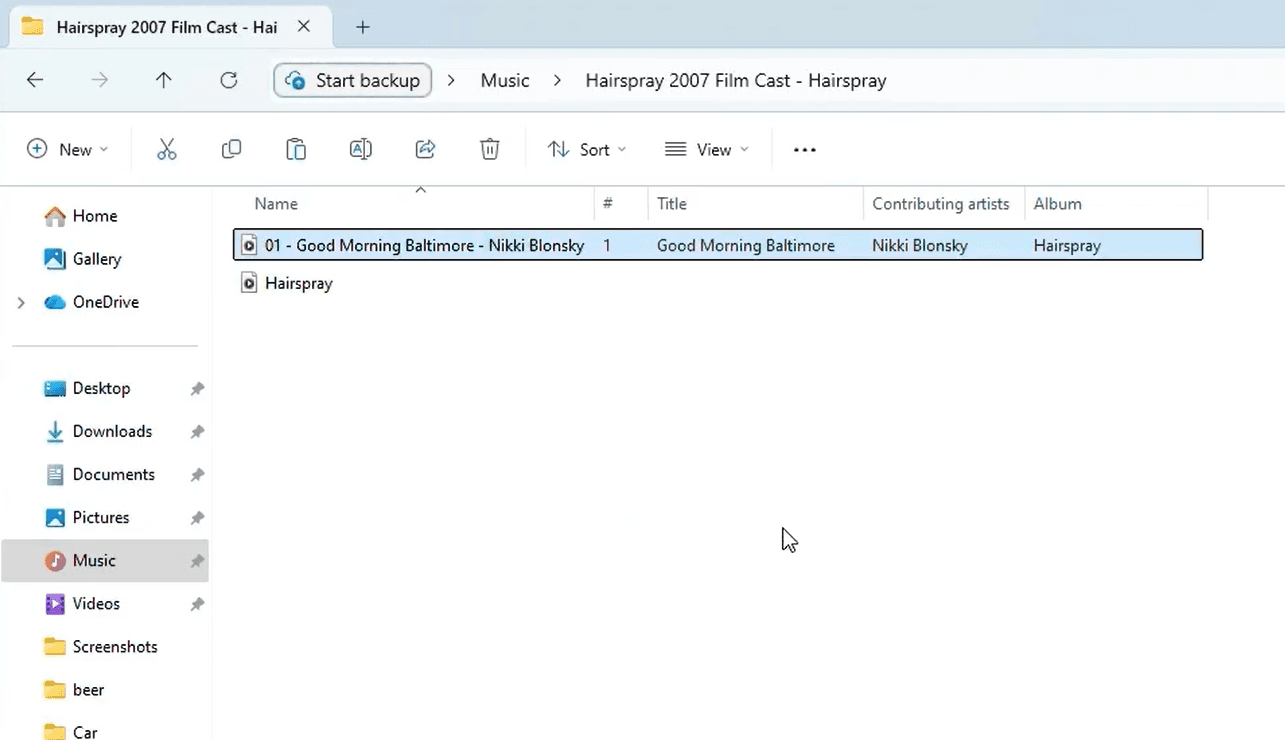
Step 7 — Verify Your Files
Navigate to your output folder in Windows Explorer. You'll find your tracks neatly organized with the naming convention you selected, complete with embedded metadata and album art. The files are now your permanent, lossless digital archive of the original CD.
Why Nero Express Is the Right Tool for the Job
Nero Express makes CD ripping genuinely effortless. It automatically fetches album metadata, supports all major audio formats including FLAC, embeds album art, and generates playlists — all in a clean, beginner-friendly interface. Whether you're archiving a single album or digitizing an entire shelf of CDs, Nero Express handles the job reliably and quickly.
FLAC is great for archiving, but is Nero the right ripper for your whole collection? See our complete comparison of the best CD rippers for Windows — we tested them all so you don't have to.
Ready to preserve your CD collection in perfect FLAC quality? Get started with Nero Express today — it's available on the Microsoft Store.
🎵 Free Download
👉 Download Nero Express — Microsoft Store
📖 Learn More


