Still have a stack of CDs collecting dust? You're not alone. While streaming dominates today's music landscape, many of us still own valuable CD collections filled with rare recordings, personal mixes, or albums that aren't available on streaming platforms. The good news? Converting your CDs to digital MP3 files is easier than ever, and you can preserve all the important metadata—artist names, album titles, track info, and even album art.
In this tutorial, I'll show you how to rip your music CDs using Nero CD Ripper, a powerful tool available on Windows. The entire process takes just a few minutes per CD, and you'll end up with high-quality digital files you can enjoy on any device.
What You'll Need
A Windows PC with a CD/DVD drive (or an external USB drive)
Nero CD Ripper (free download from Microsoft Store)
Your music CDs
Step 1: Download Nero CD Ripper from Microsoft Store
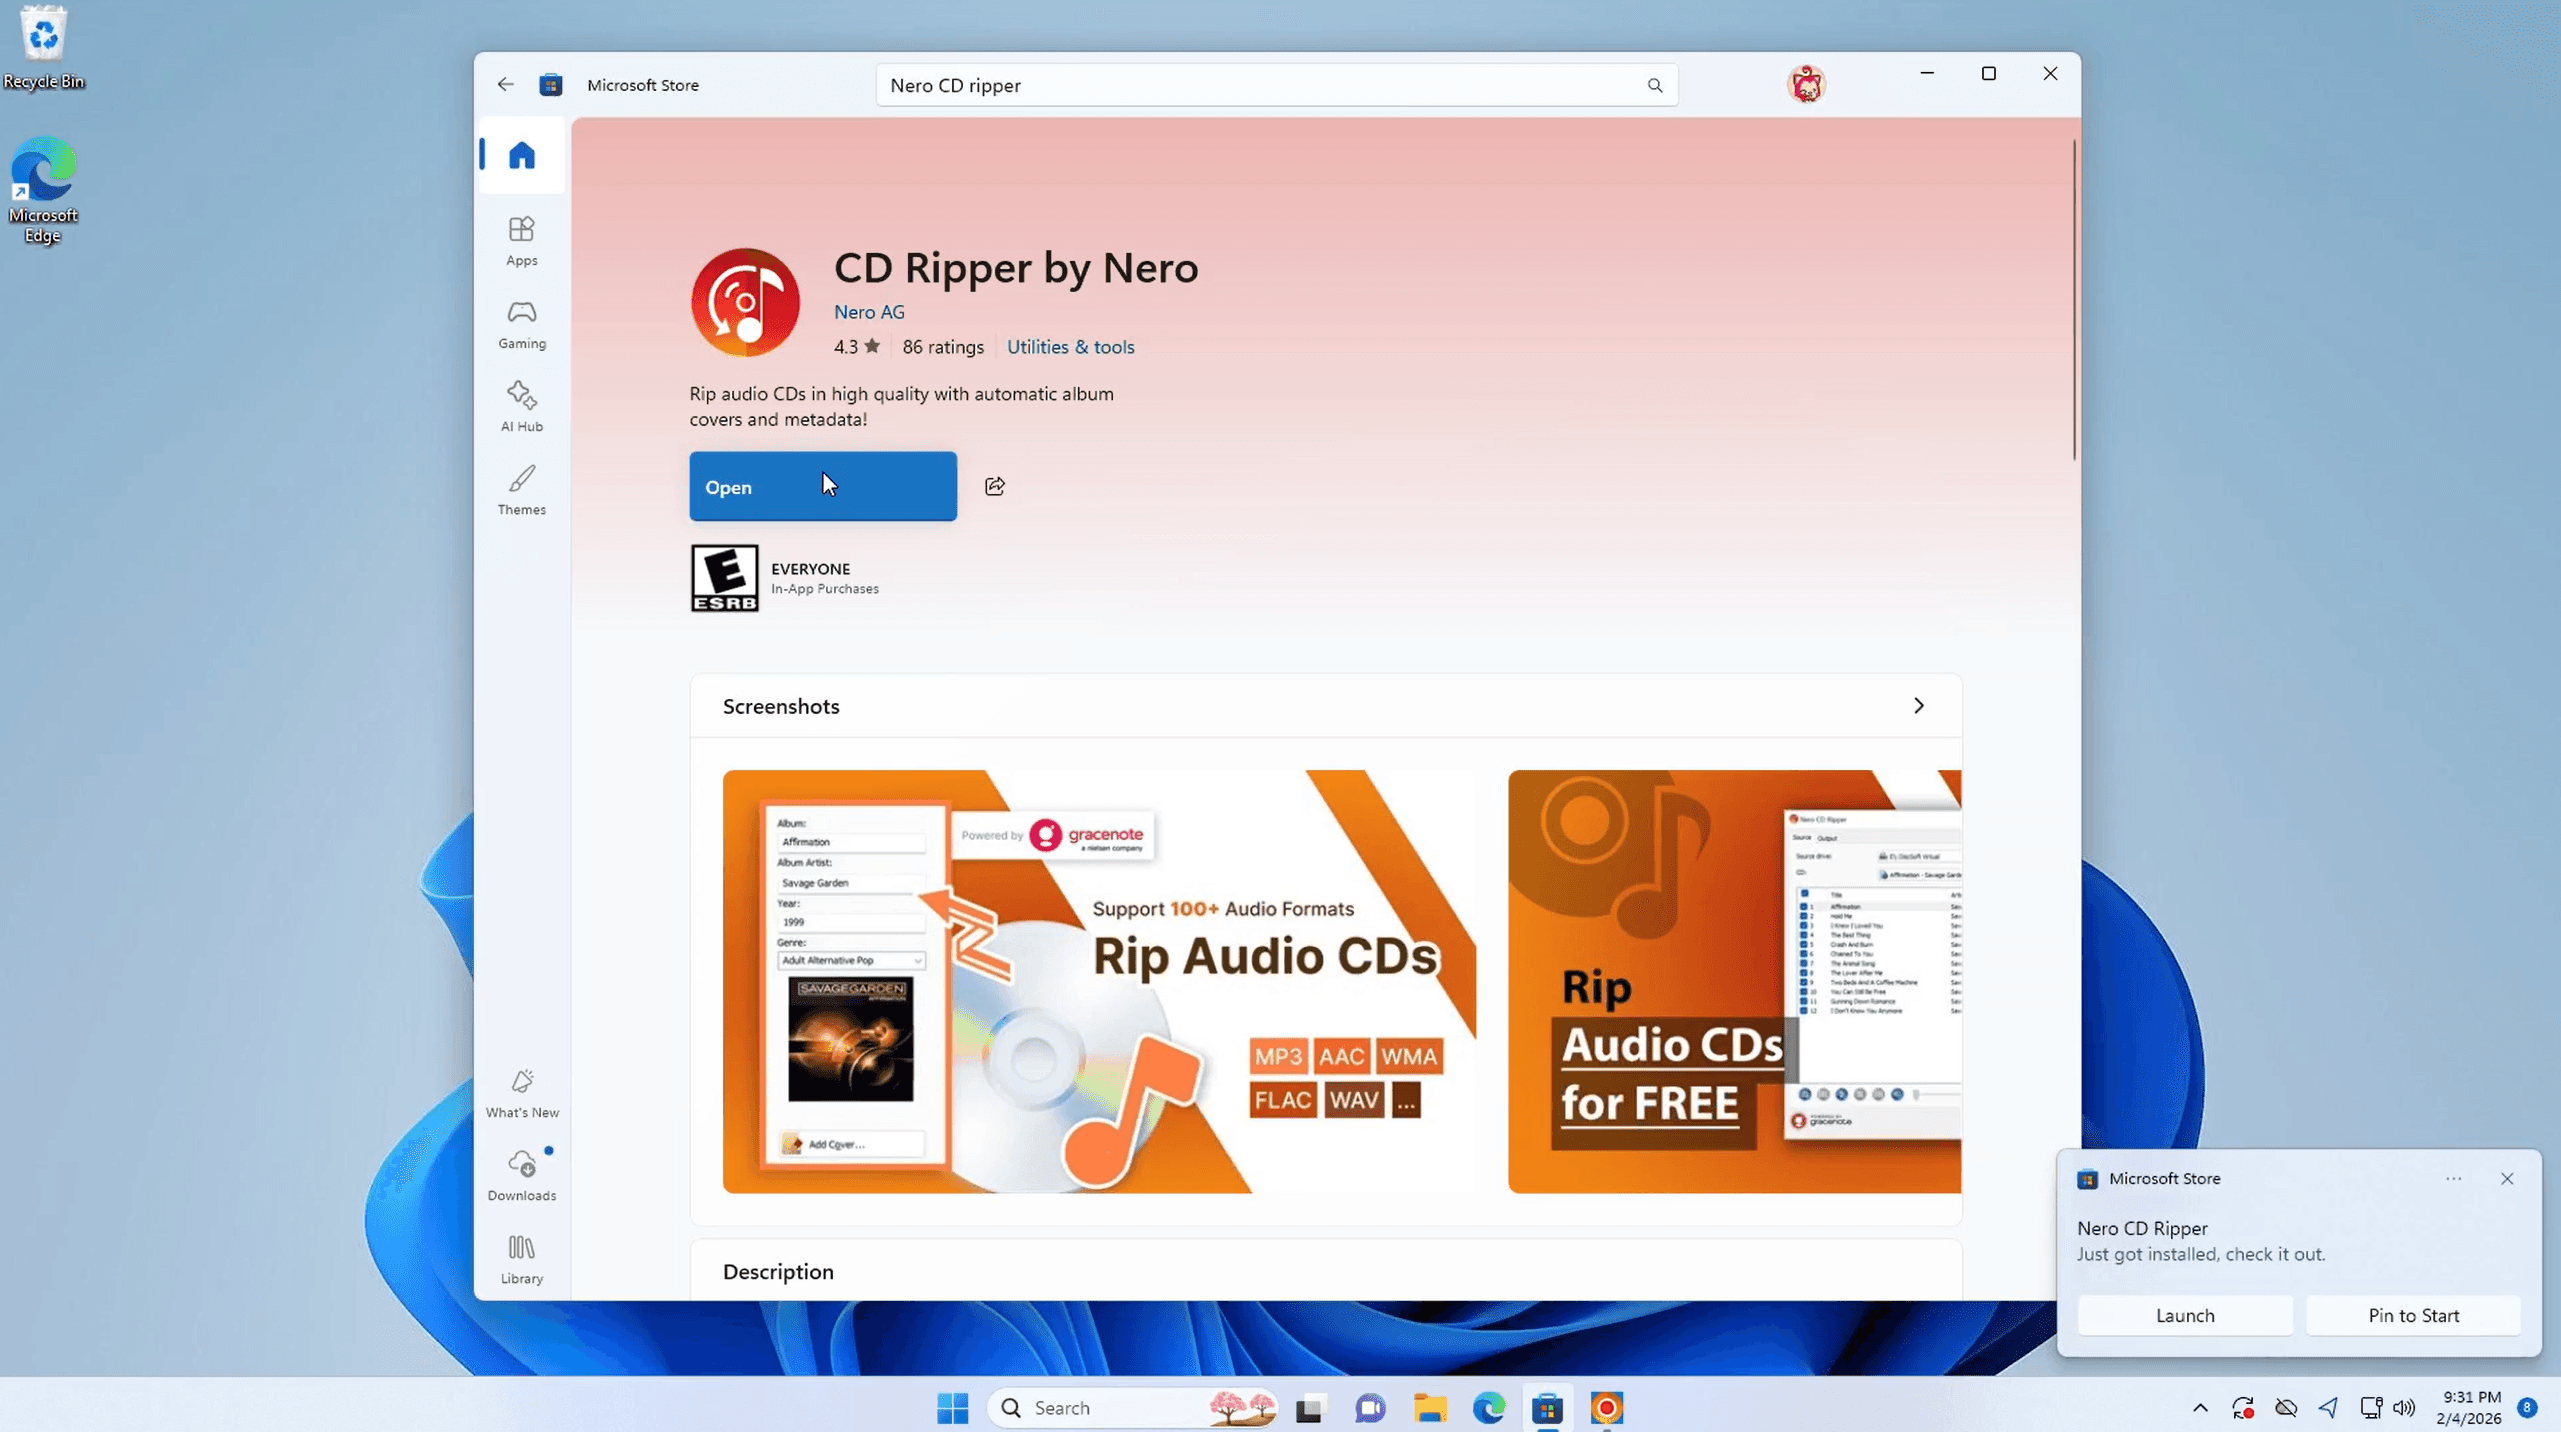
First, you'll need to get the software. Open the Microsoft Store on your Windows PC and search for "Nero CD Ripper" in the search bar. Click the download button to install the application.
Download Nero CD Ripper: Get from Microsoft Store
Step 2: Choose a CD
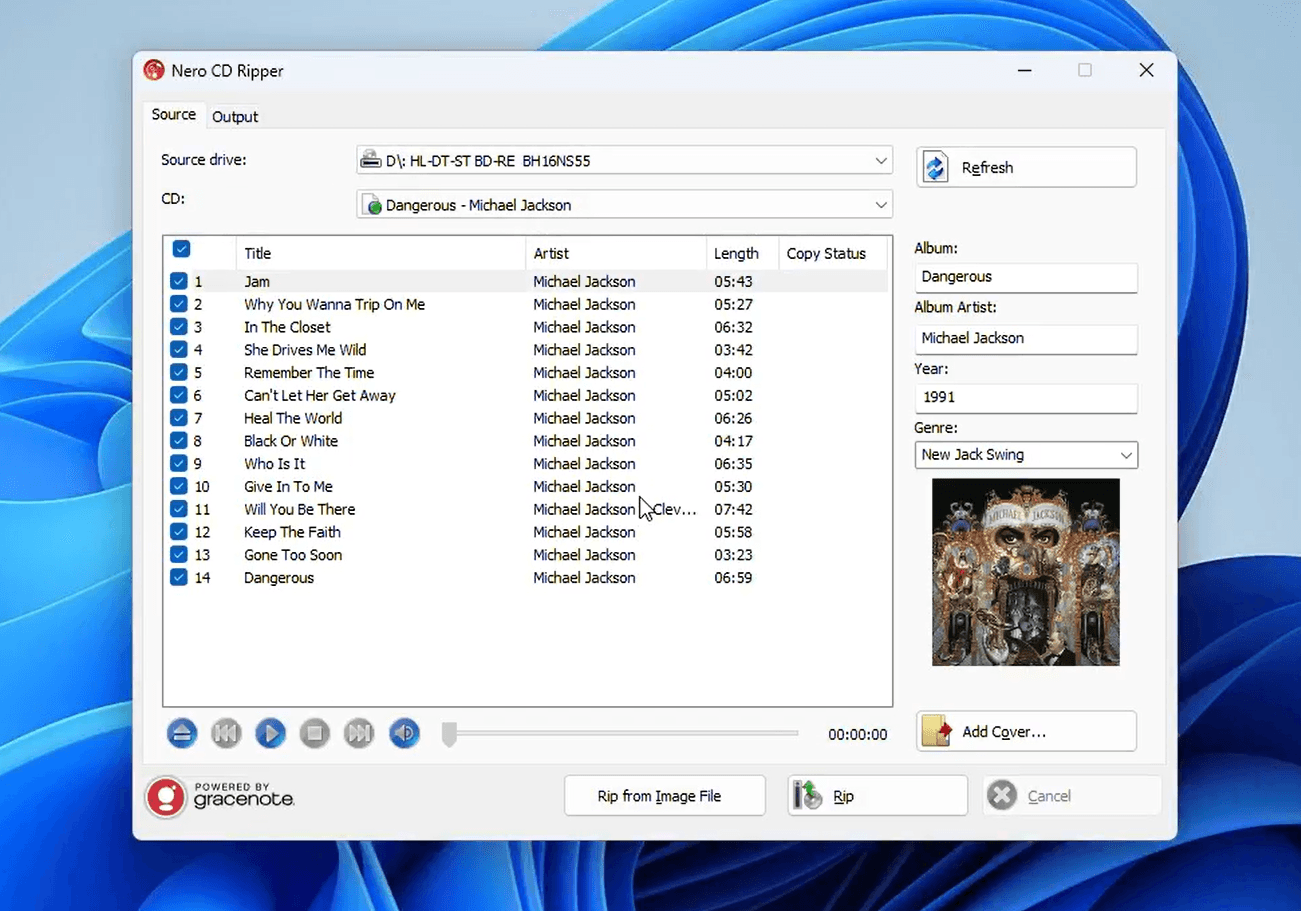
Insert your music CD into your computer's disc drive. Launch Nero CD Ripper, and the software will automatically detect your disc. Within seconds, you'll see the complete album information displayed on screen, including:
Artist name
Album title
Track list with song titles and durations
Genre and release year
Album artwork (if available)
The software pulls this metadata automatically from online databases, saving you the hassle of manually entering track information.
Step 3: Set Up Output Directory and Format
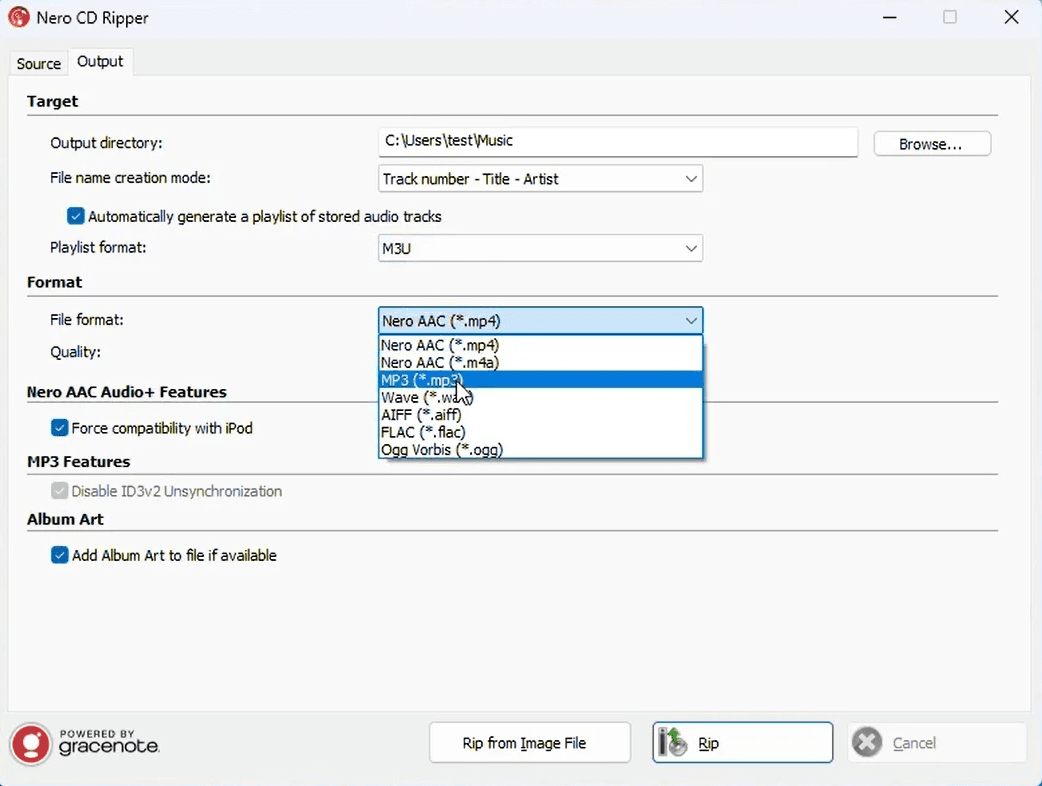
Before you start ripping, you need to configure where your files will be saved and what format you want. Click on the "Output" tab to access these settings:
Output Directory: Choose a location on your computer where you want to save the ripped files. Most people use the default Music folder, but you can select any location you prefer.
File Naming: Set your preferred naming convention. Options include combinations of track number, title, and artist name (e.g., "01 - Jam - Michael Jackson").
Audio Format: Select your desired format from the dropdown menu. MP3 is the most universal choice, but Nero AAC is also available if you want better quality at similar file sizes. You can adjust the quality/bitrate settings here as well—higher bitrates mean better sound quality but larger file sizes.
Album Art: Make sure to enable "Add Album Art to file if available" to keep your music library visually organized.
Step 4: Select Files and Click "Rip"
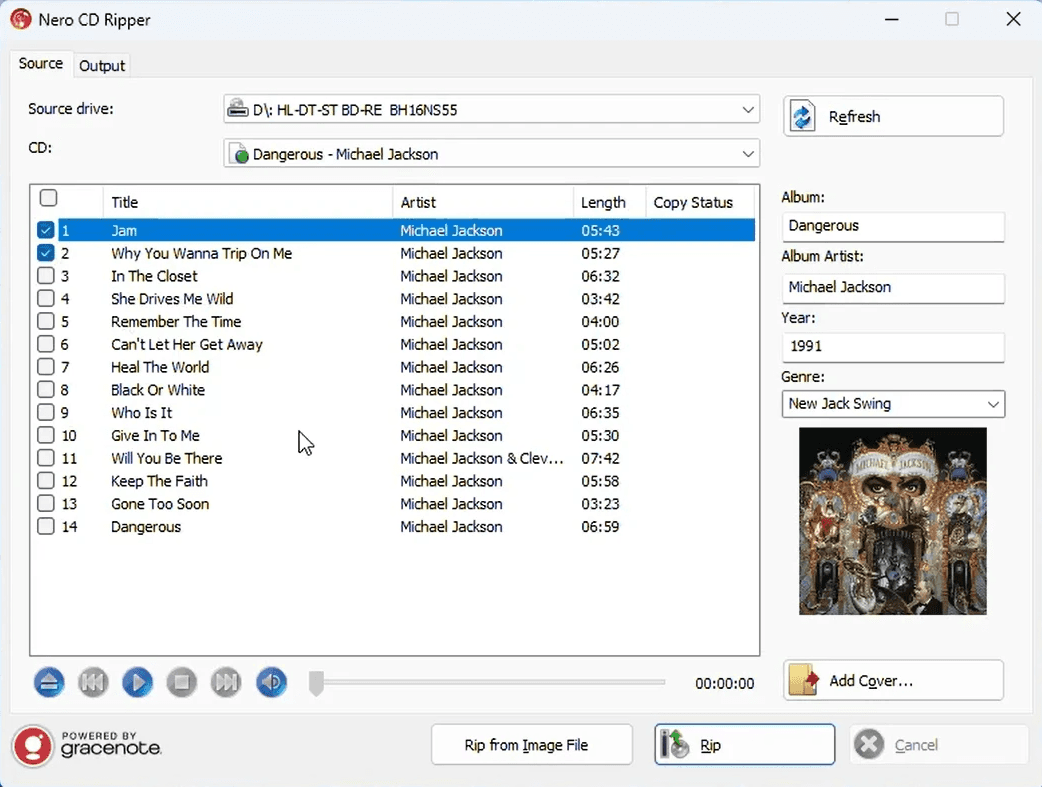
Return to the "Source" tab where you'll see the complete track listing. By default, all tracks are selected, but you can uncheck any songs you don't want to rip. This is useful if you only want specific tracks from an album.
Once you've made your selections, click the "Rip" button at the bottom right of the interface. The software will begin extracting the audio from your CD and converting it to your chosen format. You'll see a progress bar showing the status of each track.
The ripping process typically takes just a few minutes, depending on the number of tracks and your computer's speed.
Step 5: Find Your Files
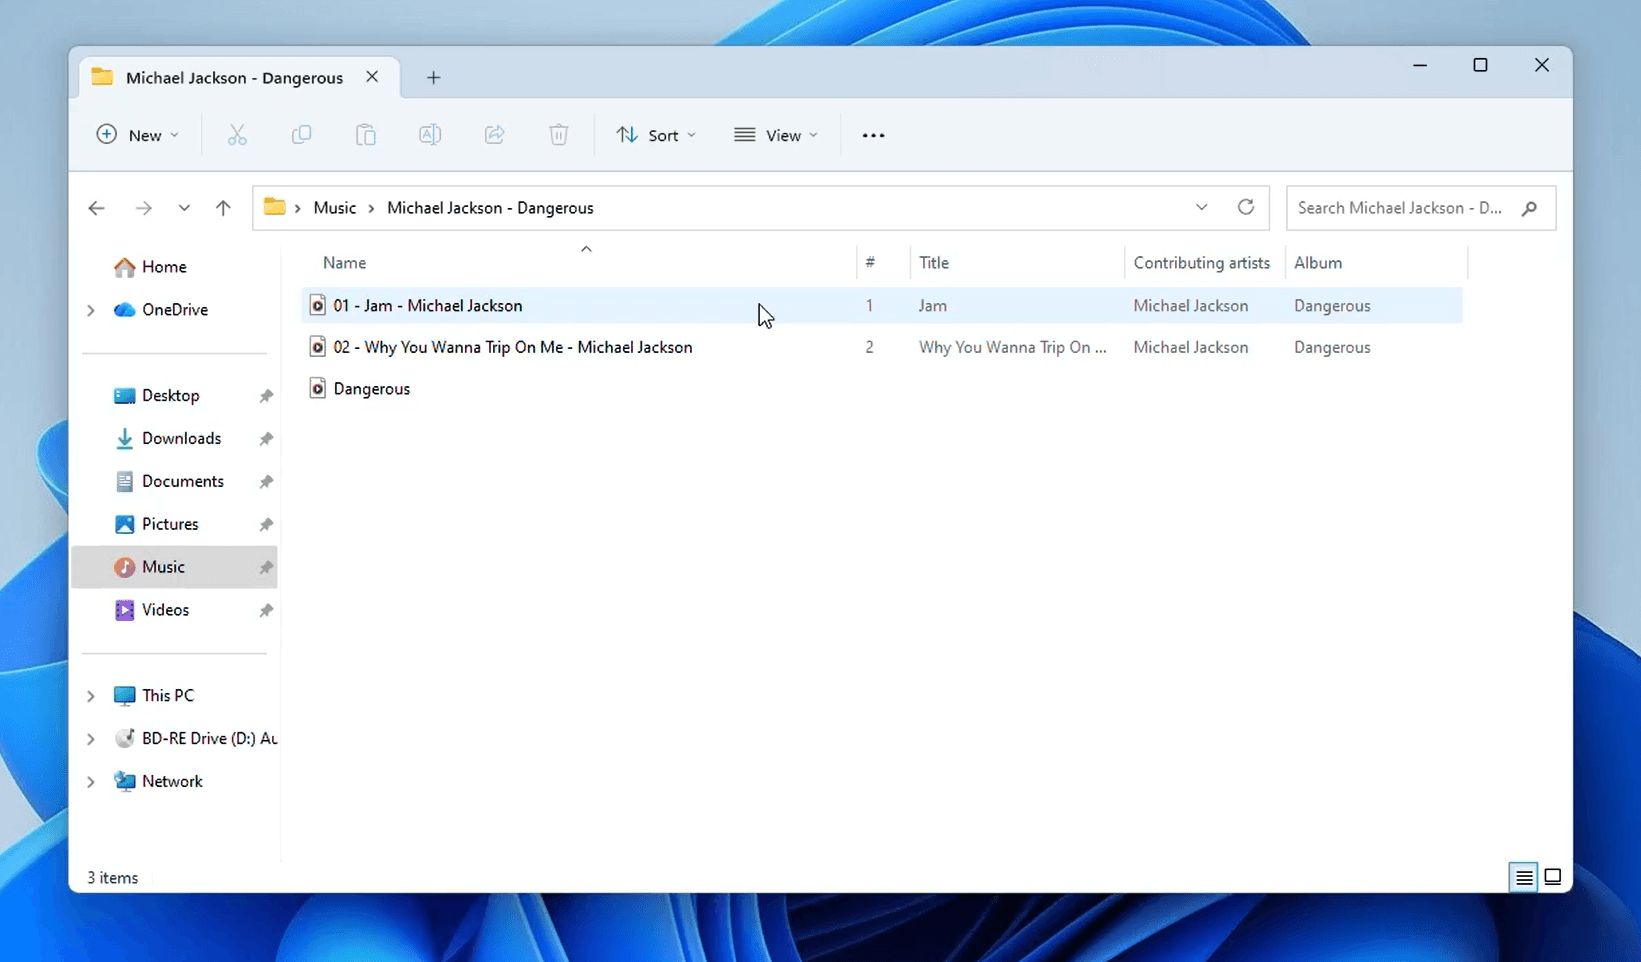
When the ripping process is complete, navigate to the output directory you specified in Step 3. Open File Explorer and go to your Music folder (or your custom location). You'll find a new folder named after your album—for example, "Michael Jackson - Dangerous"—containing all your freshly ripped audio files.
Each file will include the complete metadata you saw earlier: artist name, album title, track number, genre, year, and album artwork. This means when you play these files in any music player or transfer them to your phone, all the information displays correctly.
Why Rip Your CDs in 2026?
You might wonder if it's worth the effort to digitize your CD collection when streaming services offer millions of songs. Here are a few compelling reasons:
Ownership: You truly own the music on your CDs. Streaming services can remove albums at any time, but your ripped files are yours forever.
Rare recordings: Many CDs contain recordings, remixes, or editions that aren't available on streaming platforms.
Sound quality: Ripped CDs can offer better audio quality than compressed streaming files, especially if you choose lossless formats.
No internet required: Once ripped, you can enjoy your music anywhere, even without an internet connection.
Preservation: CDs degrade over time. Creating digital backups ensures your music collection survives for decades.
Final Thoughts
Ripping your CD collection might seem like a throwback to the early 2000s, but it's actually a smart way to preserve and modernize your music library. With Nero CD Ripper, the process is straightforward, and preserves all the important metadata that makes organizing your digital music collection a breeze.
Now that your music is digitized, you can sync it to your smartphone, create custom playlists, back it up to cloud storage, or simply enjoy it on your computer without fumbling through stacks of discs. Your music, your way—that's the beauty of going digital.
And if you're wondering how the tool you just used stacks up against the competition — see how Nero compares to other CD rippers in our full roundup. It's our #1 pick for a reason.


