Quick answer: If your photo is slightly soft but still retains visible detail, AI sharpening can make existing edges and texture clearer. In Nero AI Image Upscaler, use Enhance Sharpness, choose the most natural-looking result, and check it at 100% for halos or noise. For obvious motion blur or missed focus, use a different restoration workflow instead.
A photo can look soft even when its important detail is still there: a face is recognizable, lettering is readable, and edges have shape, but the whole image lacks crispness.
For a visual walkthrough, watch the How to Sharpen a Photo with Nero tutorial.
First, Check Whether Your Photo Is Soft or Actually Blurry
Before you sharpen, check that the photo is soft rather than affected by strong camera shake, subject movement, missed focus, or serious damage.
If the photo looks like this | Best next step |
The subject outline is clear and small details are present, but the image looks generally soft | Try AI sharpening |
You can see a directional trail or double edge from camera shake or subject movement | Use an Unblur workflow instead |
Focus is clearly behind or in front of the important subject, with little usable texture left | Do not expect sharpening to recreate the detail; consider an Unblur workflow or another source image |
The image has blocky compression, heavy pixelation, or broad damaged areas | Assess it carefully first; sharpening may make the defects more obvious |
A useful rule is simple: sharpening can make existing edges and texture easier to see, but it does not restore detail that was never captured. A slightly soft portrait, product shot, or landscape may respond well because the underlying forms are intact. A photo with a strong motion trail or a completely missed focal plane needs a different kind of repair.
Sharpen the Photo with Nero AI Image Upscaler
Keep the original image unchanged before you begin, then decide how you will use the finished file. A photo for a website or social post does not need the same level of close inspection as a large print. Choose one area to check throughout the process: eyes and hair in a portrait, fine texture in a landscape, or text and hard edges on an object. Comparing the same area each time is more reliable than judging only by a thumbnail.
Import the photo and select Enhance Sharpness.
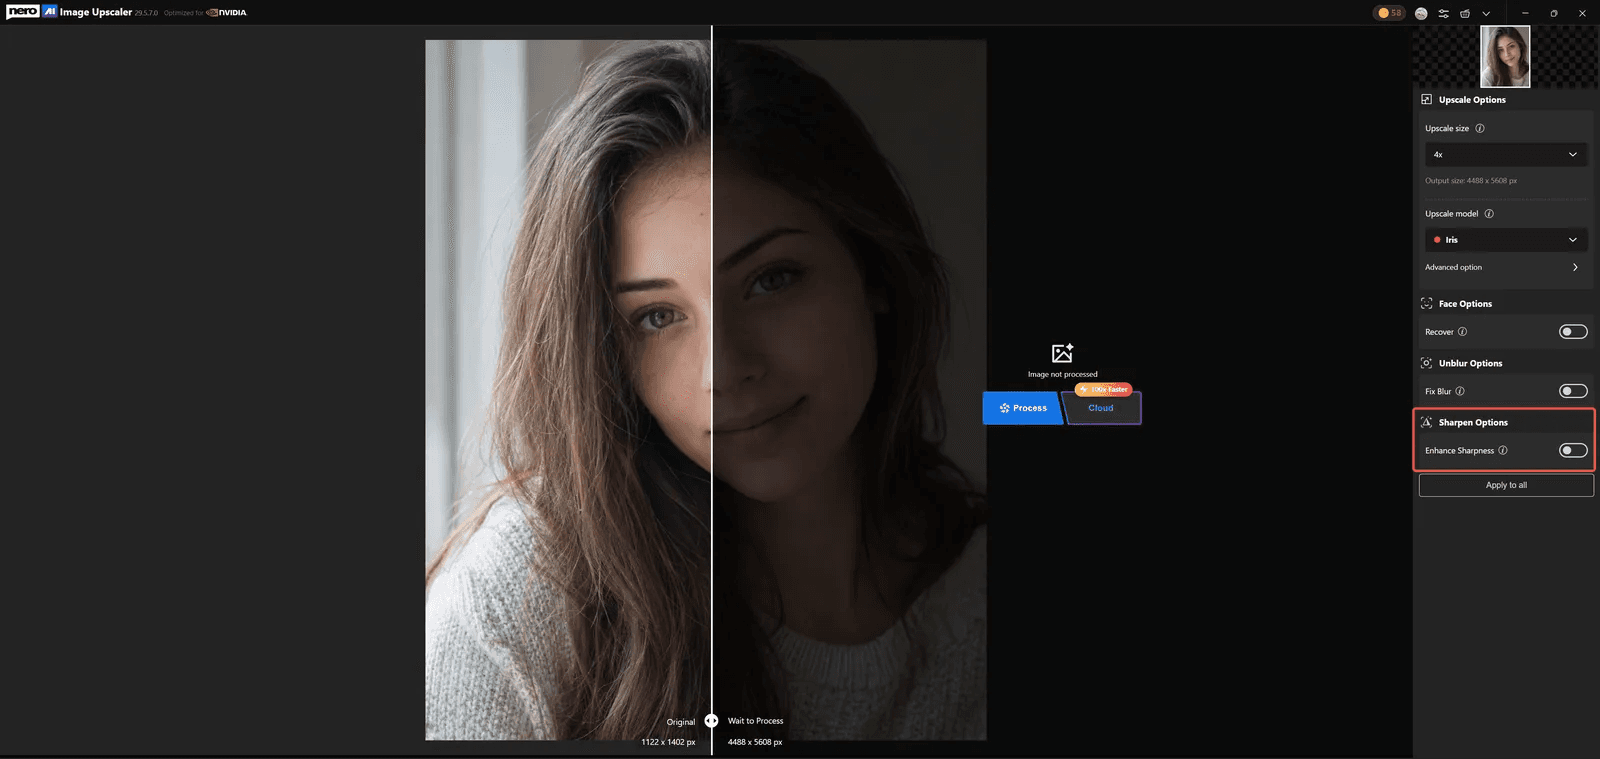
Open the image in Nero AI Image Upscaler and select Enhance Sharpness. Work on one photo first: it is easier to see what a natural result looks like, and easier to notice the point where processing begins to look excessive. This is a single-photo workflow, not a batch-processing method.
Start with the most natural-looking result.
Choose the result that makes the subject easier to read without making every edge look etched. The most dramatic version at a small size is not always the best one. Compare a gentler result with a stronger one instead of assuming that more sharpening is better.
Preview the result at 100%.
Normal viewing size matters, but it can hide sharpening artifacts. Zoom in to 100% and check:
High-contrast edges, such as a dark object against a bright background;
Portrait detail, especially eyes, hair, and smooth skin; and
Fine lines and text, including labels, signs, thin branches, rails, or fabric patterns.
Compare the original and processed image at the same zoom level. The question is not only “Does this look sharper?” but also “Does it still look like a believable version of the same photo?”
Compare alternatives and stop before artifacts appear.
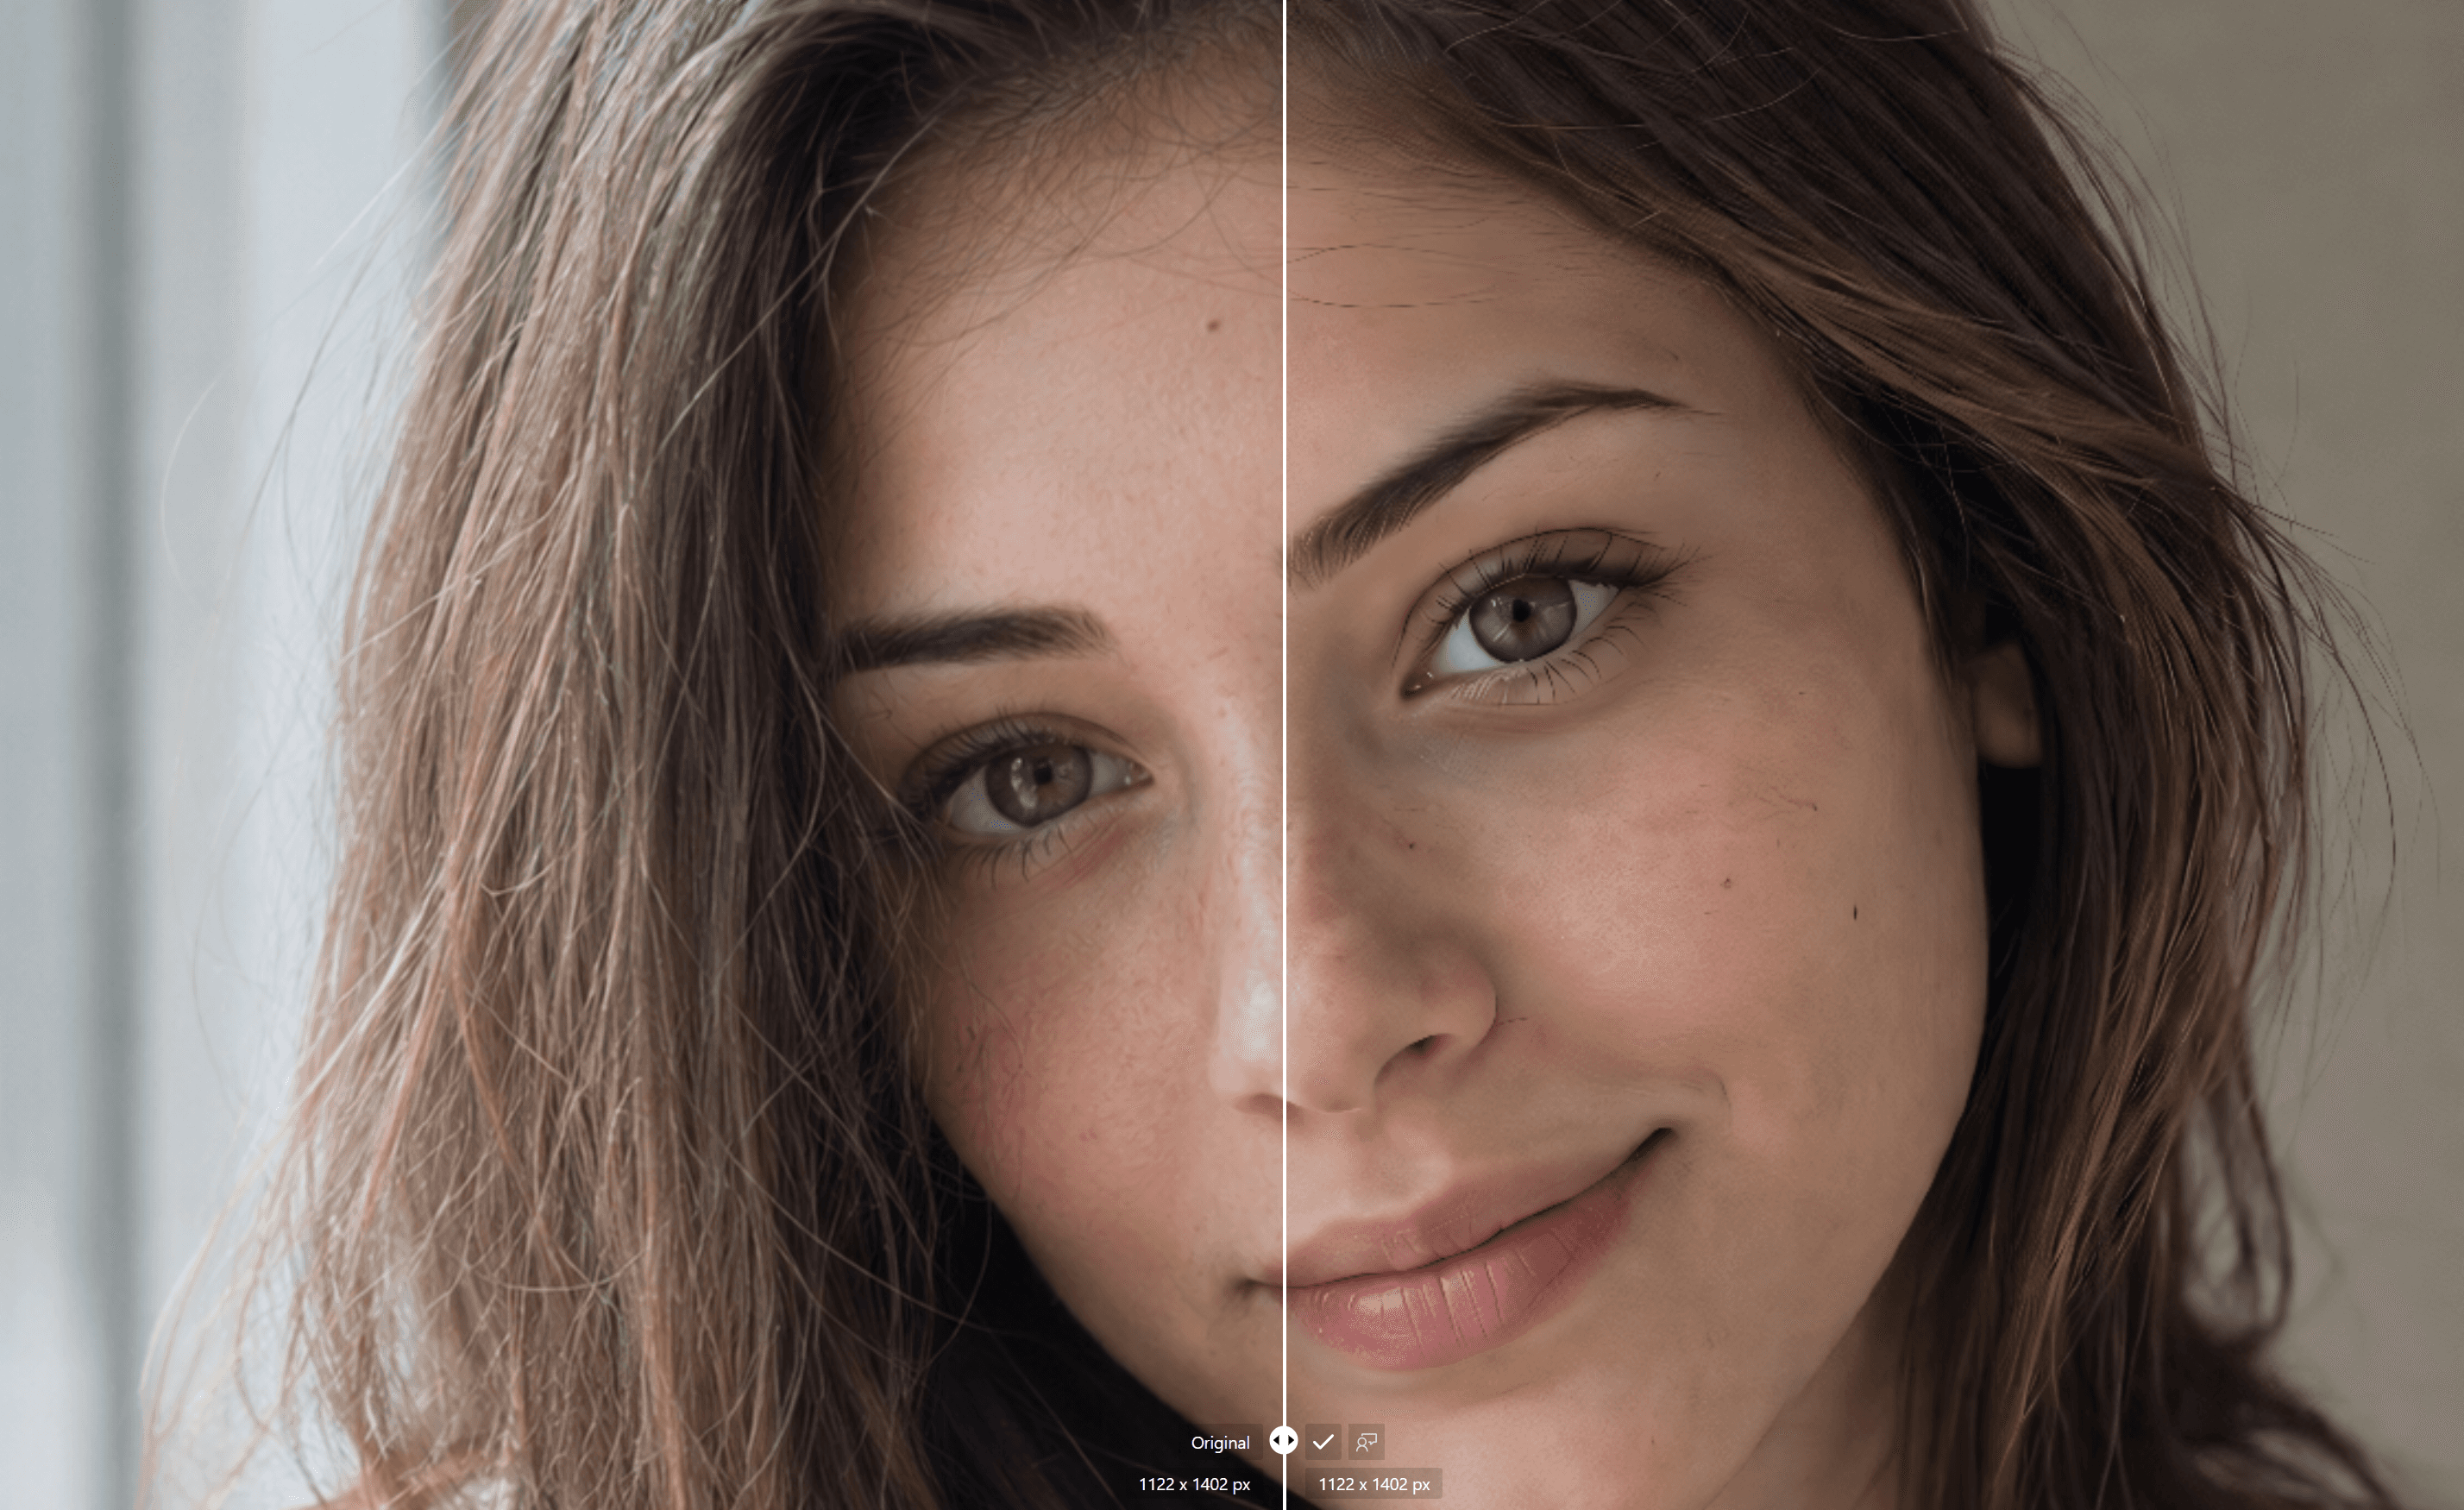
Return to the same crop and zoom level when comparing results. Stop when the subject is easier to recognize, the important edges are clearer, and the image still looks natural at its intended viewing size.
If a stronger result introduces visible side effects, keep the milder one. A modest improvement that preserves the photo is more useful than an aggressively sharpened file that calls attention to its processing. If the real problem is motion blur, missed focus, or serious damage, switch to a more appropriate repair workflow instead of adding more sharpening.
Check for Halos, Noise, and Unnatural Texture
The most important part of sharpening is knowing when to stop. If the sharpened edges become more noticeable than the subject itself, the processing has usually gone too far. Check the result at 100%, then look again at the size where the image will actually be used.
Halos around edges. Look along the border between light and dark areas: a face against a bright wall, a dark building against the sky, or lettering on a pale surface. A bright or dark outline that was not present in the original is a halo. Go back to a gentler result rather than trying to hide it later.
Noise in smooth areas. Examine skies, painted walls, shadows, and smooth skin. Sharpening can make faint grain, blotches, or compression remnants look more pronounced. If these areas become distracting, the processing has not produced a genuinely cleaner image, even if some edges appear stronger.
Overly hard skin or hair. Portraits can fail in a subtler way. Skin may take on a gritty, plastic, or sandpaper-like look, while hair can turn into hard, separated strands. Compare the processed version with the original at the same zoom. A good result should preserve a person’s natural texture rather than replace it with an exaggerated pattern.
Artifacts around text and fine lines. Check signs, logos, product labels, branches, railings, and detailed fabrics. Watch for broken strokes, doubled lines, false texture, or uneven outlines. These are easy to miss in a full-frame view and easy to notice once the photo is shared or printed.
When you see any of these problems, choose a more conservative result first. If the issue remains, consider whether a smaller final output is enough for the photo’s purpose. Do not add a separate repair process simply to force a weak image into a use case it cannot support.
Export for the Way You Will Actually Use the Photo
Export decisions should follow the final use, not a desire for the biggest possible file. For online sharing and ordinary screen viewing, a restrained output is often enough. Enlarging more than the destination requires can make artifacts easier to notice without adding practical value.
If you need a larger file for a bigger display or print, start with a conservative 2X or 4X output, then inspect the result again. Treat 8X as a higher-output option for cases that genuinely need it, not as a default. It deserves closer checking because any edge artifact or artificial texture can become more visible at a larger size.
Use a file name or destination folder that does not overwrite the original. Finally, view the exported file on the device—or at the physical size—you actually care about. An image that looks good inside an editor may look different in the place where it will be used.

When Sharpening Is Not the Right Fix
If the image shows directional motion blur, obvious missed focus, or serious damage, sharpening is unlikely to be the right workflow. For camera shake, movement, or a more severely blurred image, direct readers to the F1 Unblur tutorial instead.
For a different image-enlargement task, see Best AI Image Upscaler.