Got a pile of video clips and no time to edit? Nero Video has a feature built exactly for that: Express Editing mode. In just a few clicks, it automatically assembles your footage into a themed movie — complete with transitions, background music, and title cards.
This guide walks you through the full Express workflow, from installing Nero Video to exporting your finished MP4.
What Is Nero Video?
Nero Video is a Windows video editing application by Nero AG, available on the Microsoft Store. It supports up to 4K resolution, comes with 1,000+ templates, and exports without a watermark. While it includes a full Advanced Editing timeline for experienced editors, its standout feature for beginners is the Express Editing mode.
What Is Express Editing Mode — and Why Use It?
Express Editing is a guided, semi-automatic editing mode inside Nero Video. Instead of manually trimming clips, placing transitions, and syncing music, you simply drop in your footage and let Nero do the heavy lifting.
What Express Mode does automatically:
Arranges your clips in sequence on the timeline
Applies a matching theme with transitions and color style
Adds background music synced to your video length
Generates an opening title card and closing credits
Applies Pan & Zoom effects to still images for a "Ken Burns" look
Who is Express Editing best for?
✅ Beginners who have never edited video before and want a polished result fast.
✅ Casual users making birthday recap videos, travel slideshows, or family memories.
✅ Content creators who need a quick draft video before refining it in Advanced Editing.
✅ Anyone short on time — the whole process from import to export can take under 5 minutes.
Not ideal for: Professional editors needing frame-accurate cuts, color grading, or multi-track audio. For those use cases, switch to Advanced Editing mode.
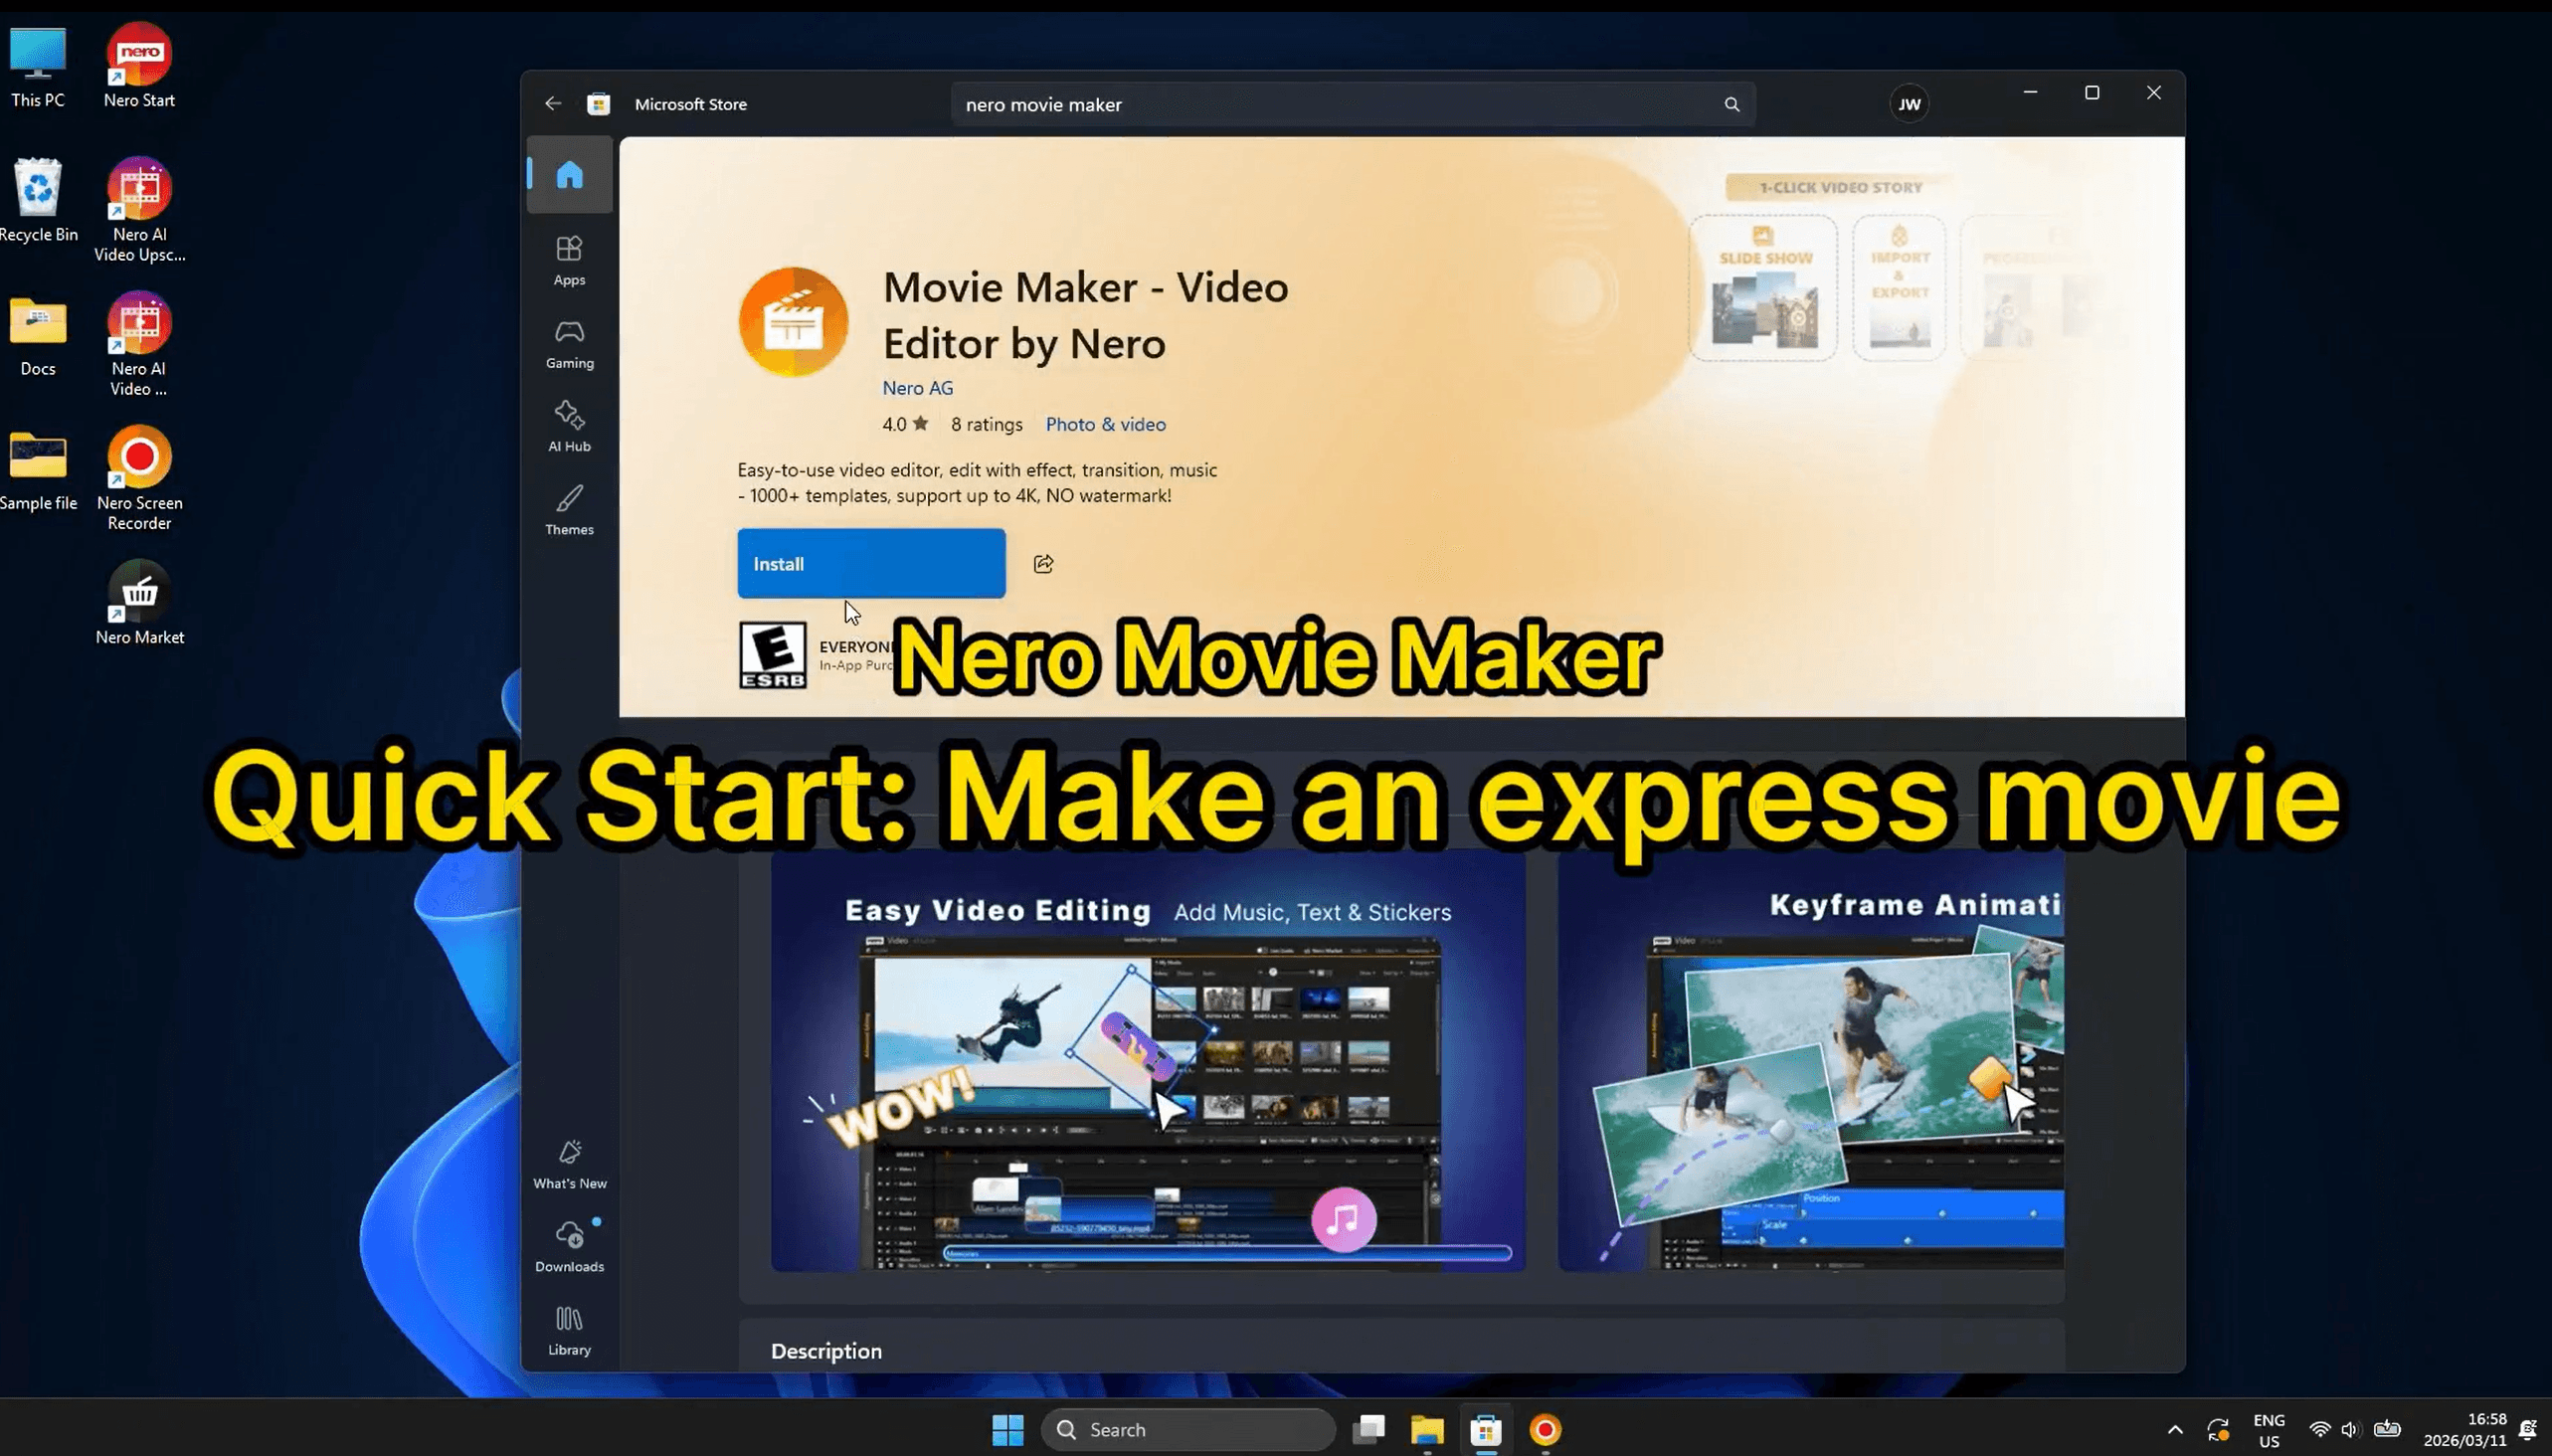
Step 1: Install Nero Video from the Microsoft Store
Open the Microsoft Store on your Windows PC and search for "nero movie maker" or "Nero Video". Click Install on the Movie Maker – Video Editor by Nero listing (rated 4.0★, published by Nero AG).
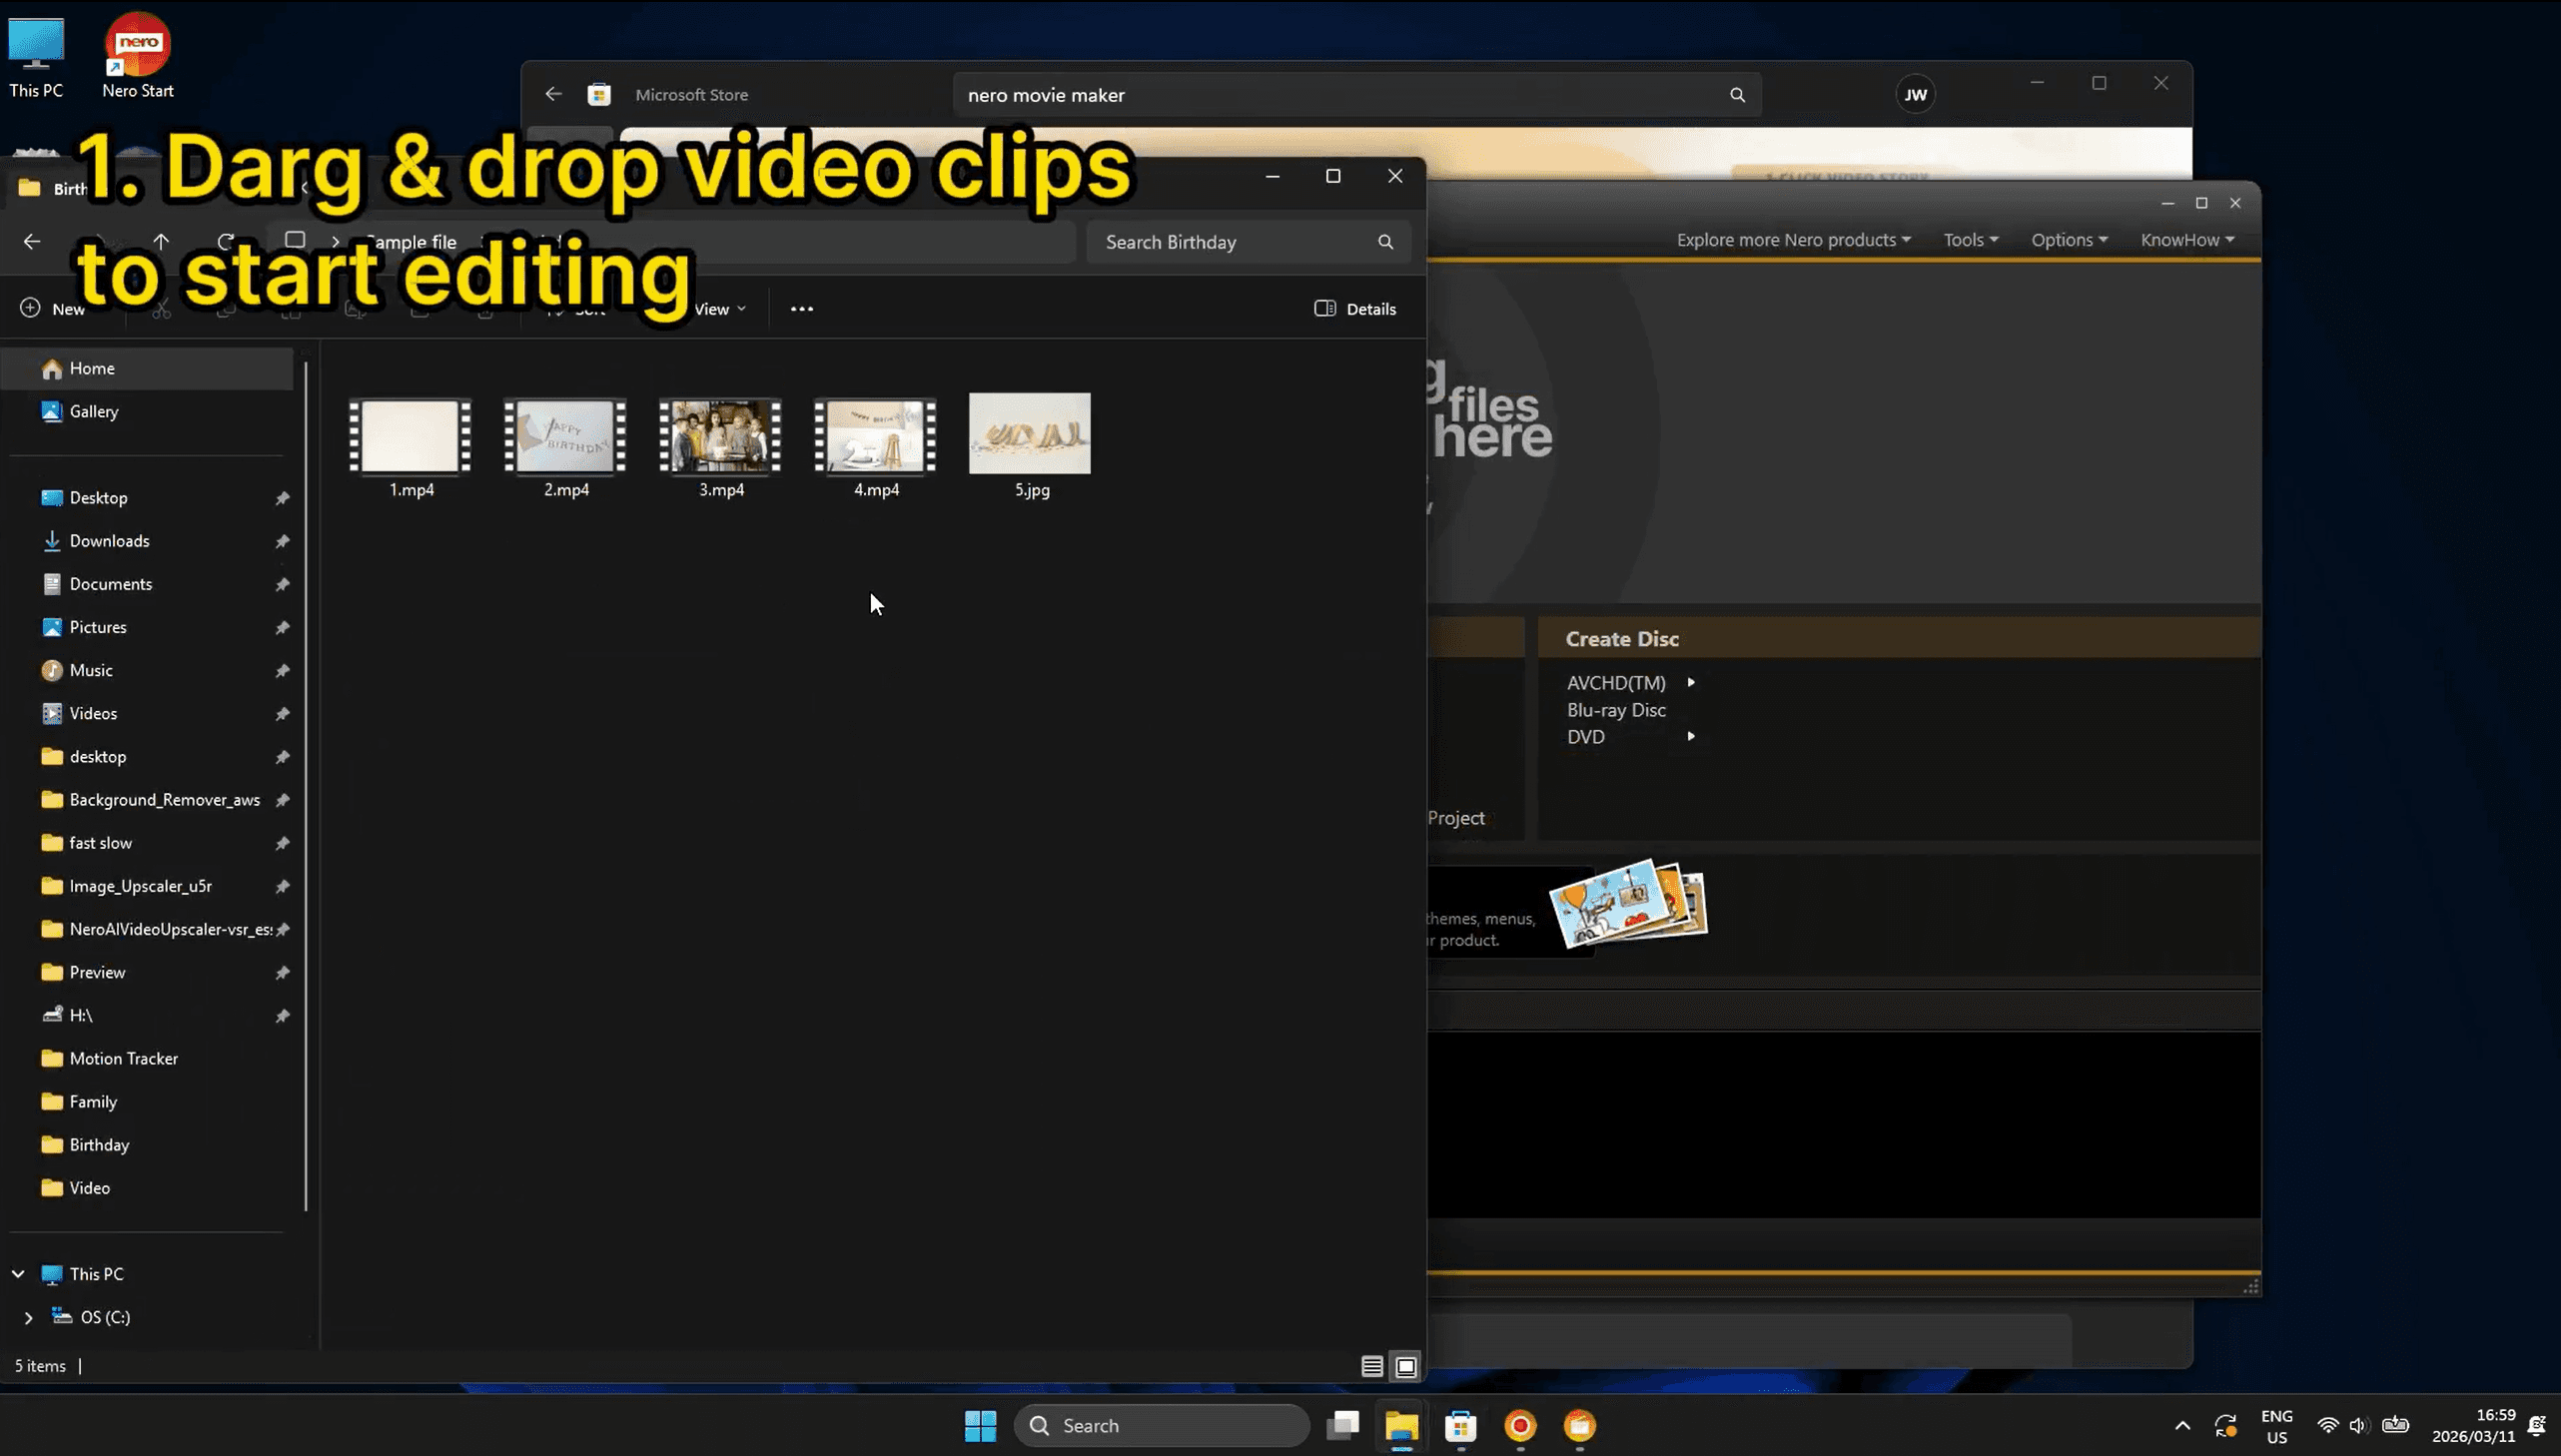
Step 2: Drag & Drop Your Clips to Start Editing
Open Nero Video and you'll see the main project hub. Open File Explorer alongside it, navigate to your clips folder, then drag and drop your video files (e.g. 1.mp4, 2.mp4, 3.mp4, 4.mp4) and any photos (e.g. 5.jpg) directly into the Nero window.
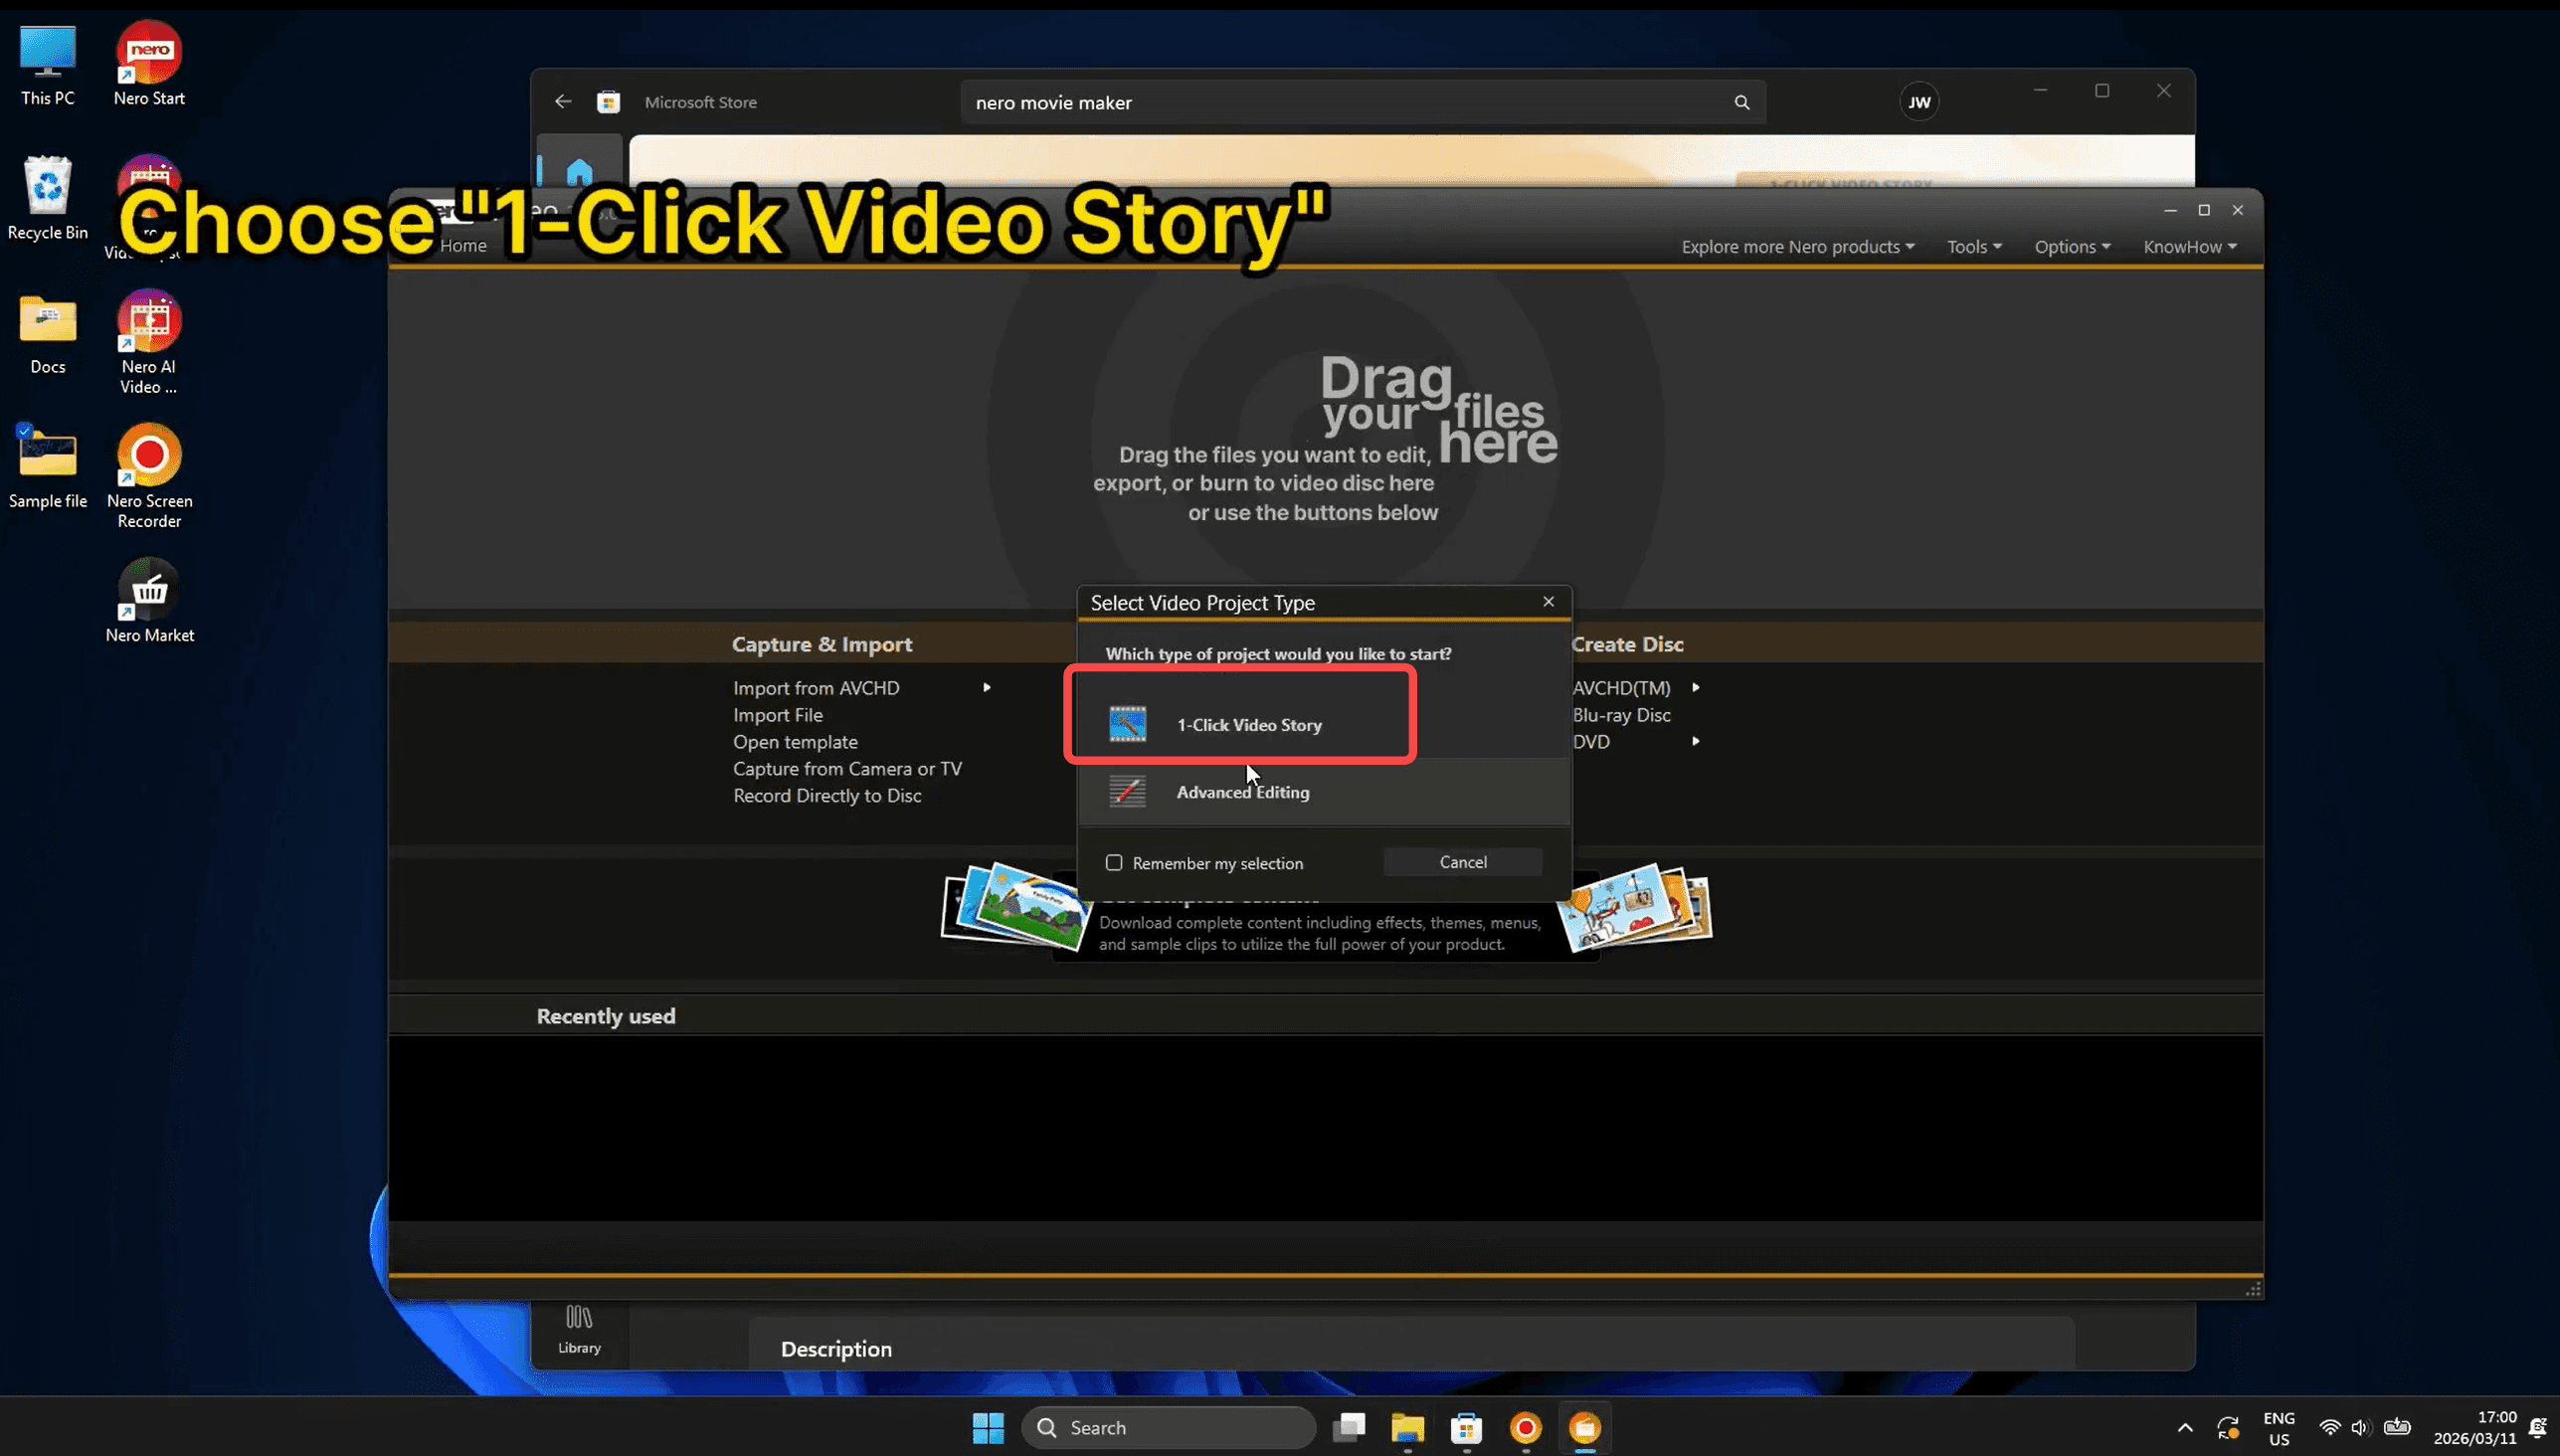
A dialog will appear: "Select Video Project Type". Choose 1-Click Video Story to enter Express Editing mode. Nero will instantly build a rough cut with your clips, applying the default theme and music.
Supports MP4, AVI, MOV, and common image formats
Mix videos and photos freely in the same project
Clip order follows the order you dropped them in
💡 Tip: Select all your files at once in Explorer (Ctrl+A or Ctrl+click) before dragging to import everything in one go.
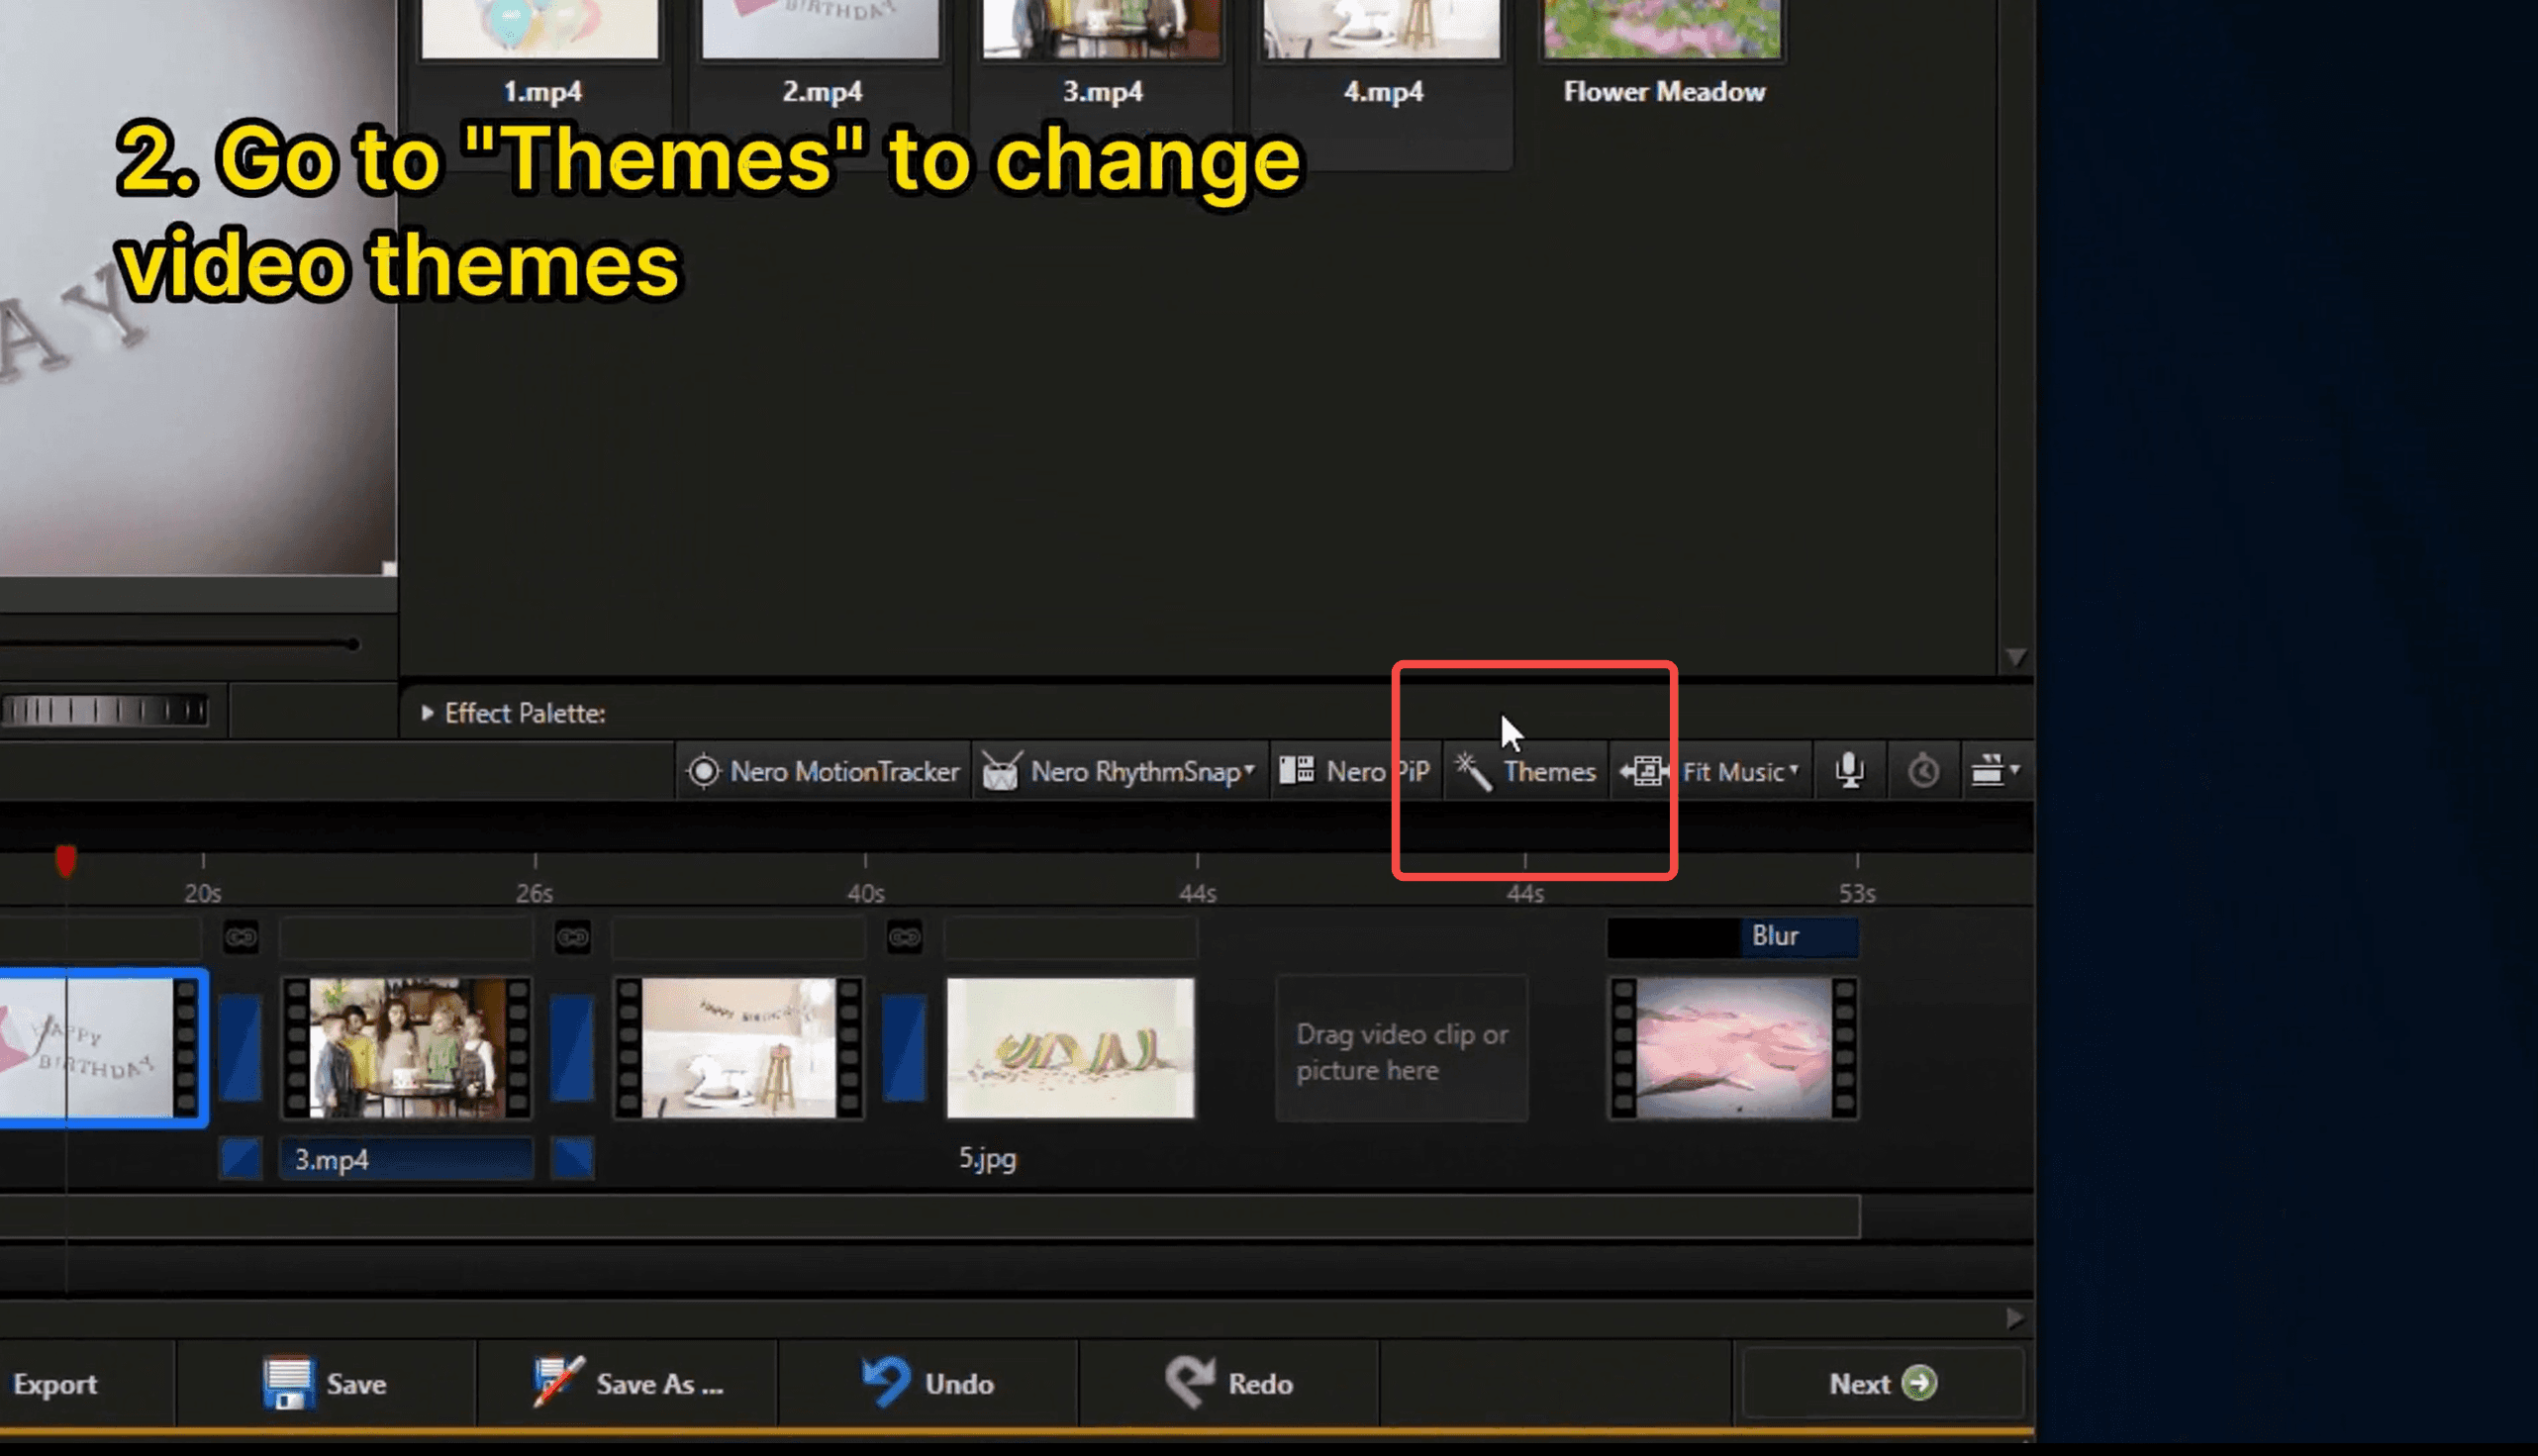
Step 3: Change the Video Theme
Once inside Express Editing, Nero applies a default theme (e.g. "Universal"). To change it, click the Themes button in the toolbar above the timeline.

The Themes panel opens with two categories — Basic and Abstract. Click any thumbnail to preview it. You can also configure:
Opening Title — the text shown at the start of your movie
Closing Title — shown at the end (default: "The End")
Apply Pan & Zoom to still pictures — gives photos a cinematic movement effect
Music balance — blend theme music with original audio from your clips
Apply theme music — toggle whether background music plays at all
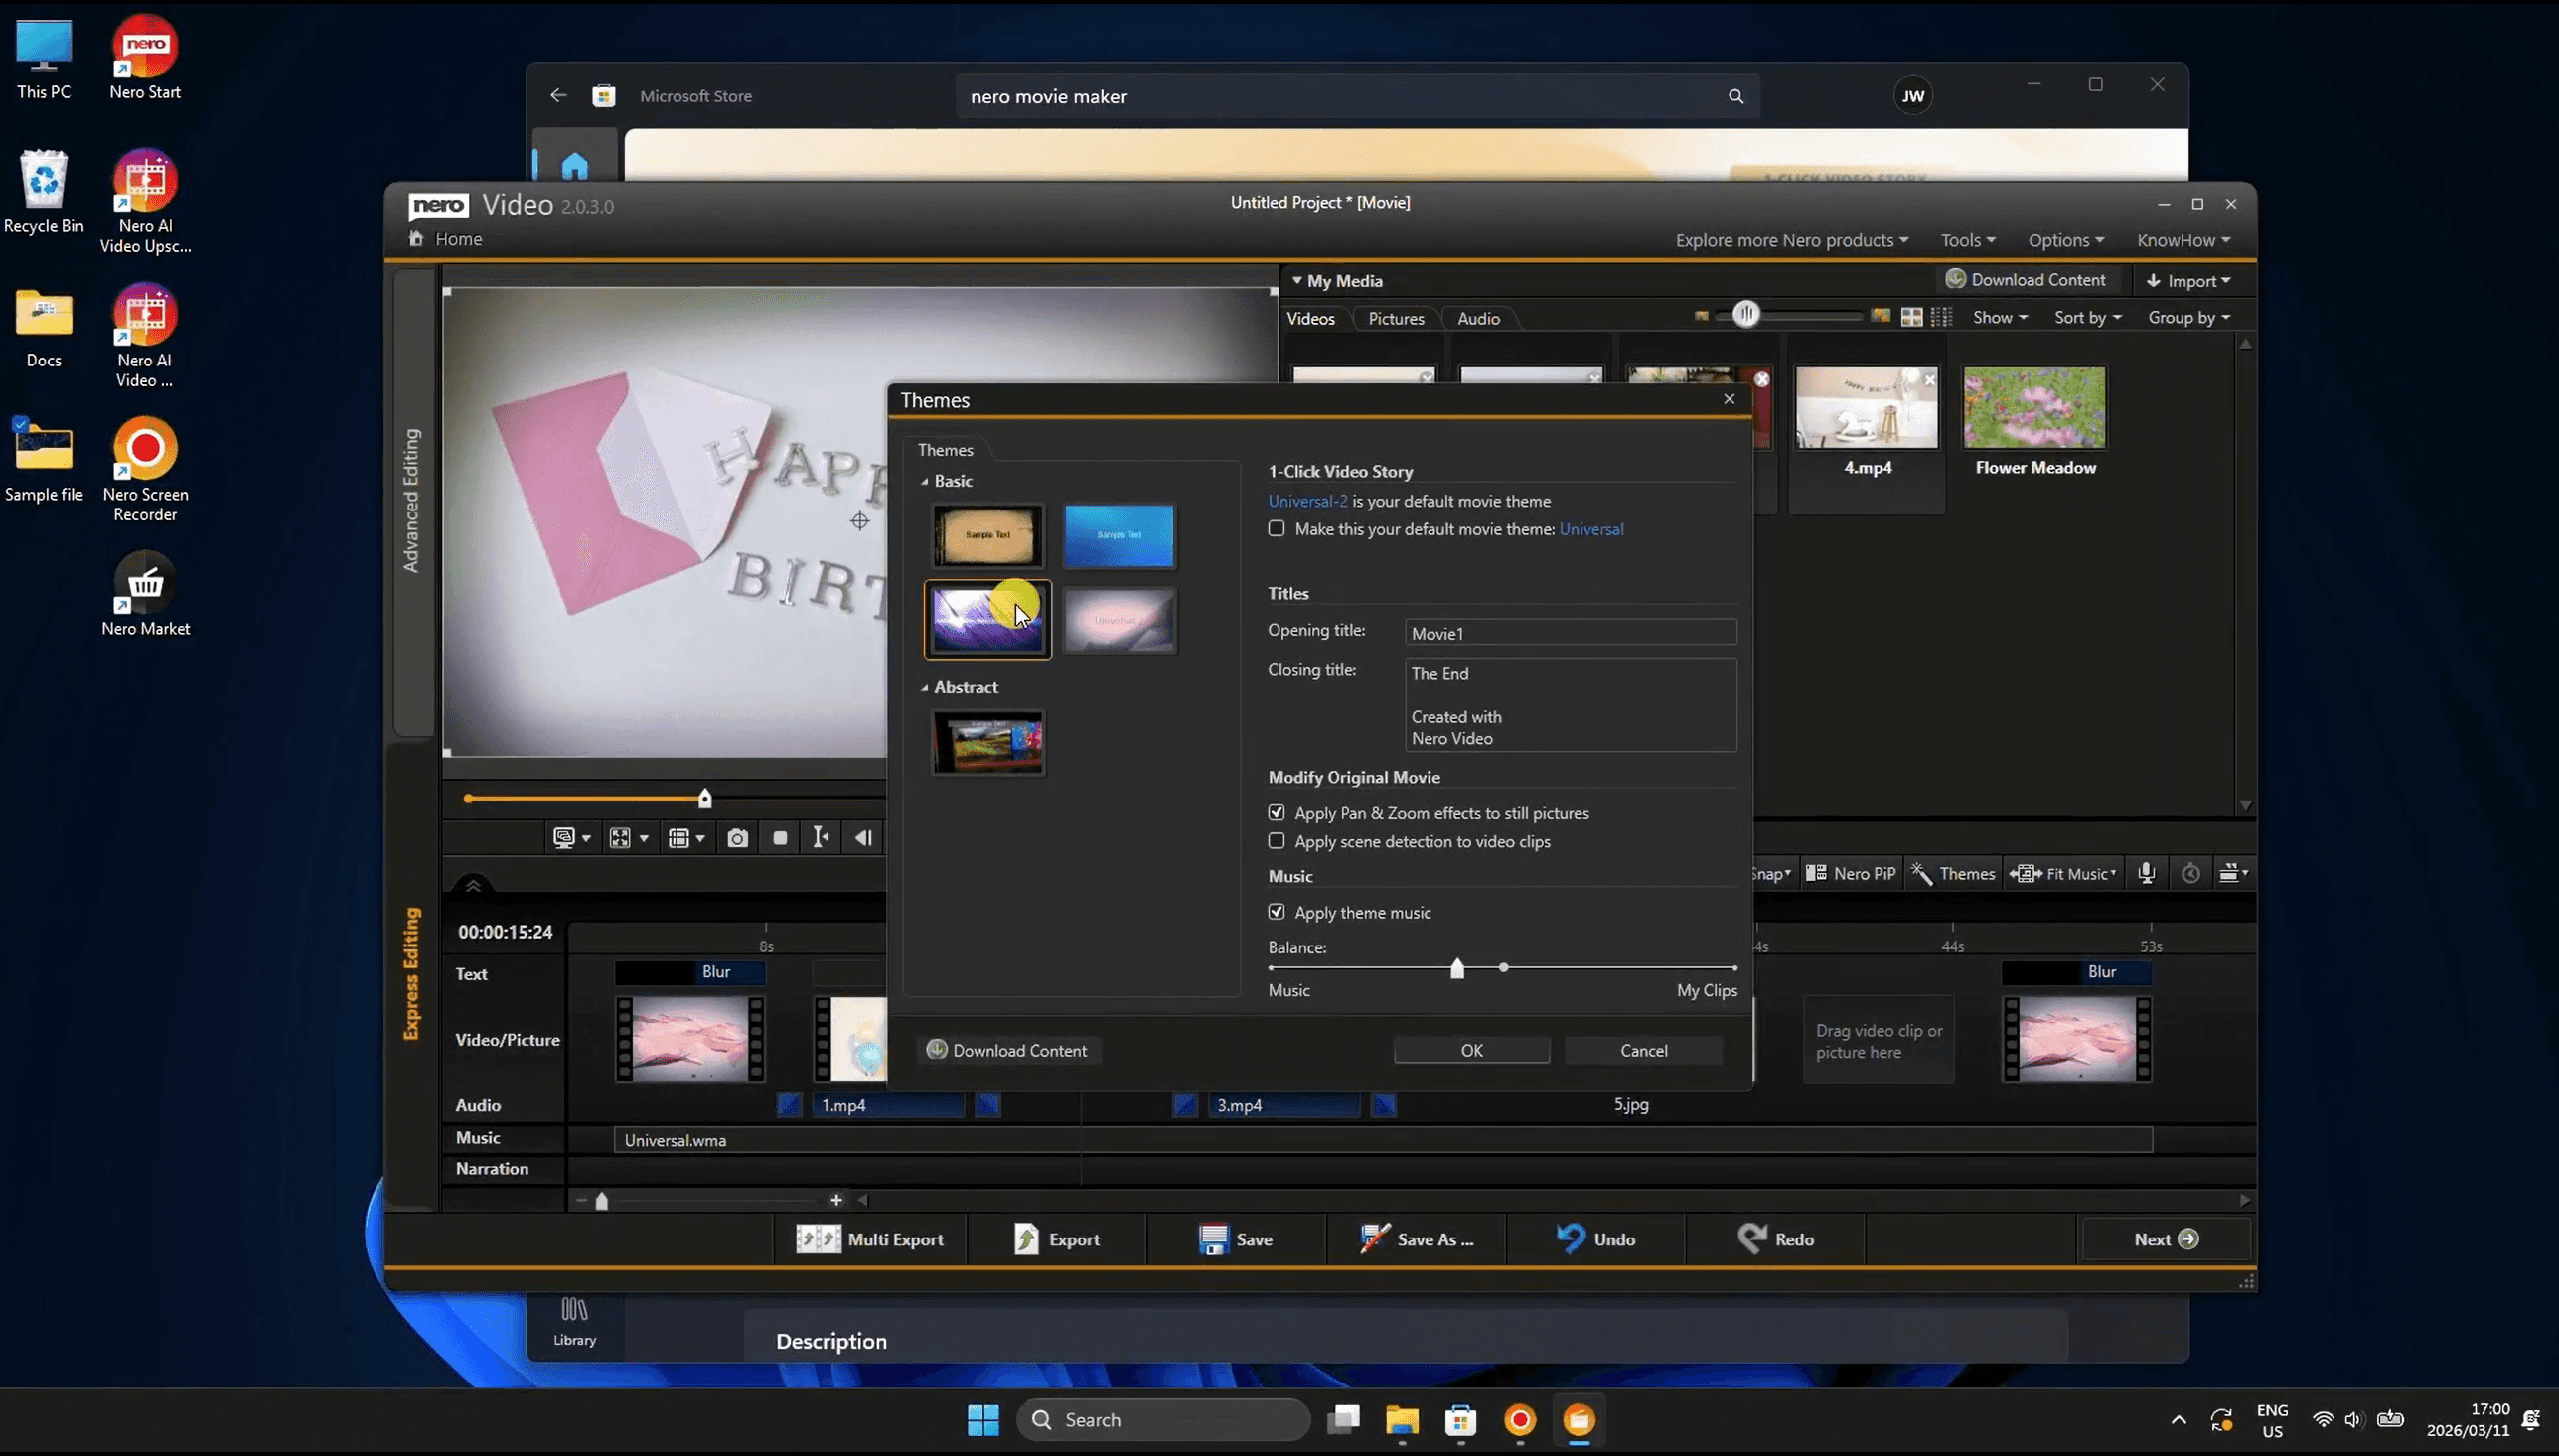
Click OK and Nero re-renders the timeline with the new theme applied.
💡 Tip: Use "Download Content" in the Themes panel to get additional free themes and music packs from Nero's servers.
Step 4: Edit the Opening Title Text
In the timeline, you'll see a "Static Text" clip at the very beginning — this is your opening title card. Click it to select it. The preview panel will switch to show the title card with Done and Fonts buttons.
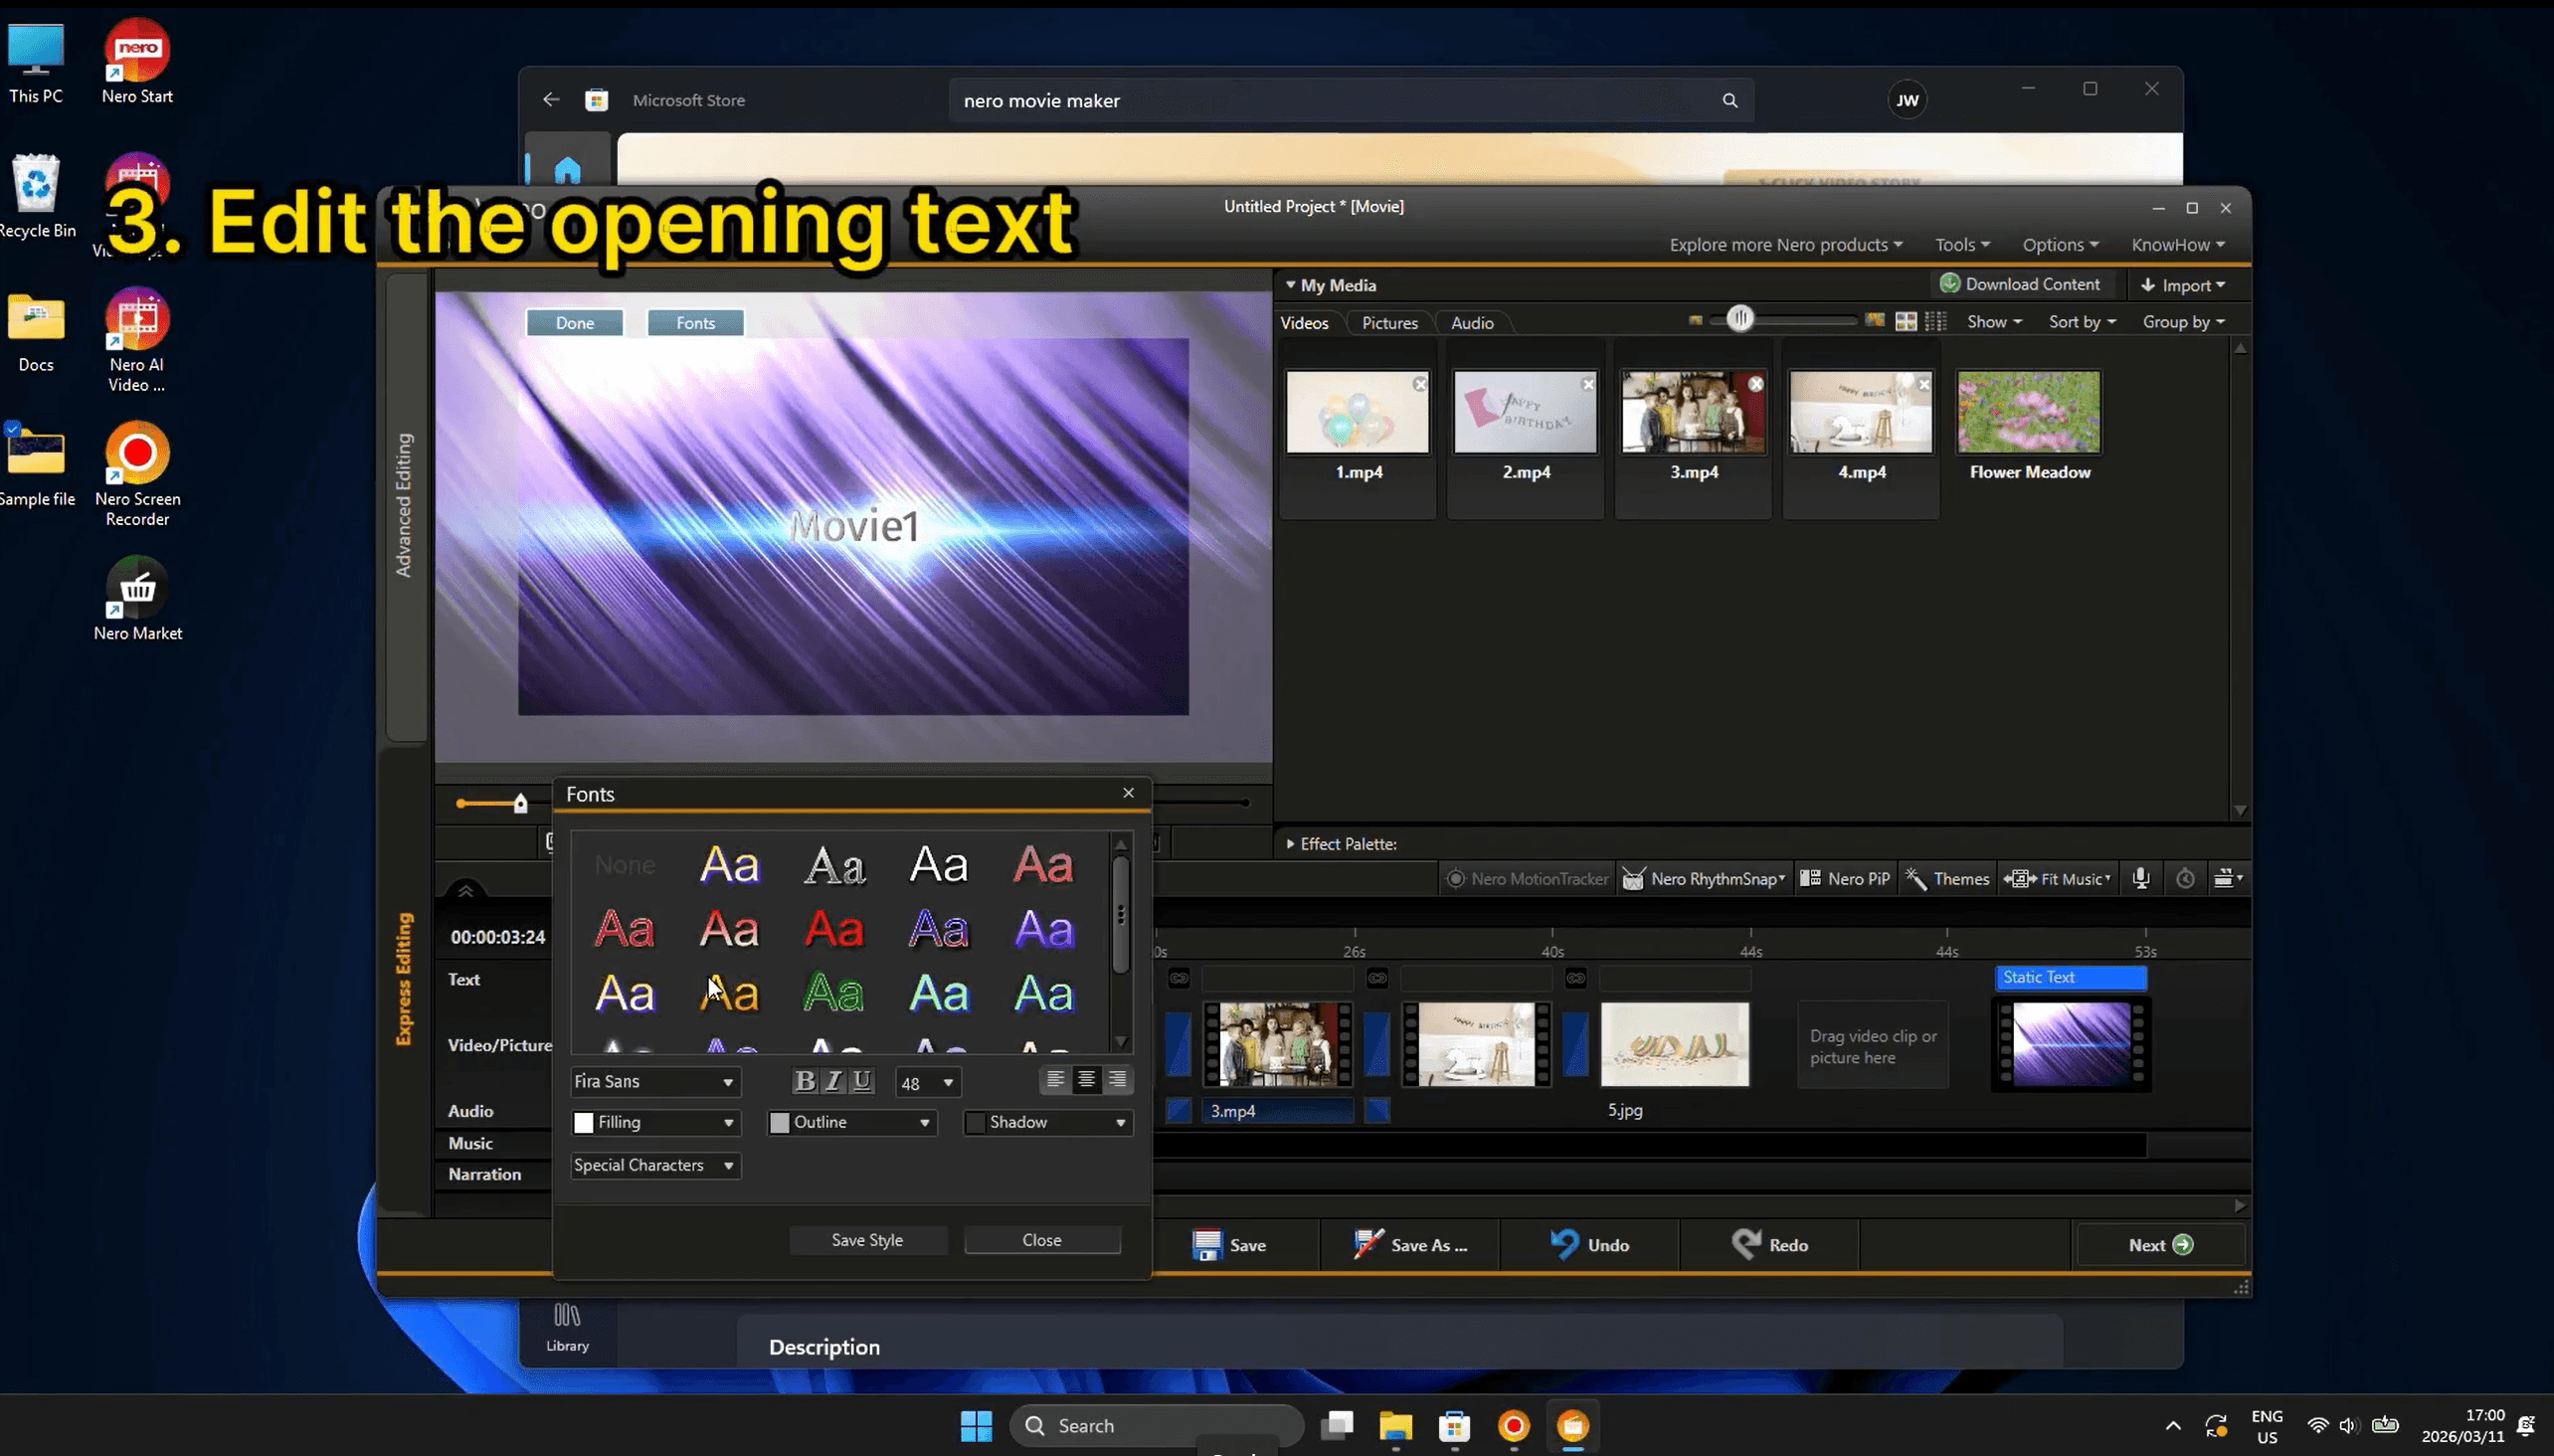
Click Fonts to open the font picker, where you can:
Choose from dozens of pre-styled animated and static font designs
Adjust font size, bold, italic, and underline
Add Outline and Shadow effects
Insert special characters for creative titles
Click directly on the title text in the preview to rename it inline. When done, click Done to return to the timeline.
💡 Tip: The same editing workflow applies to the closing title clip at the end of the timeline.
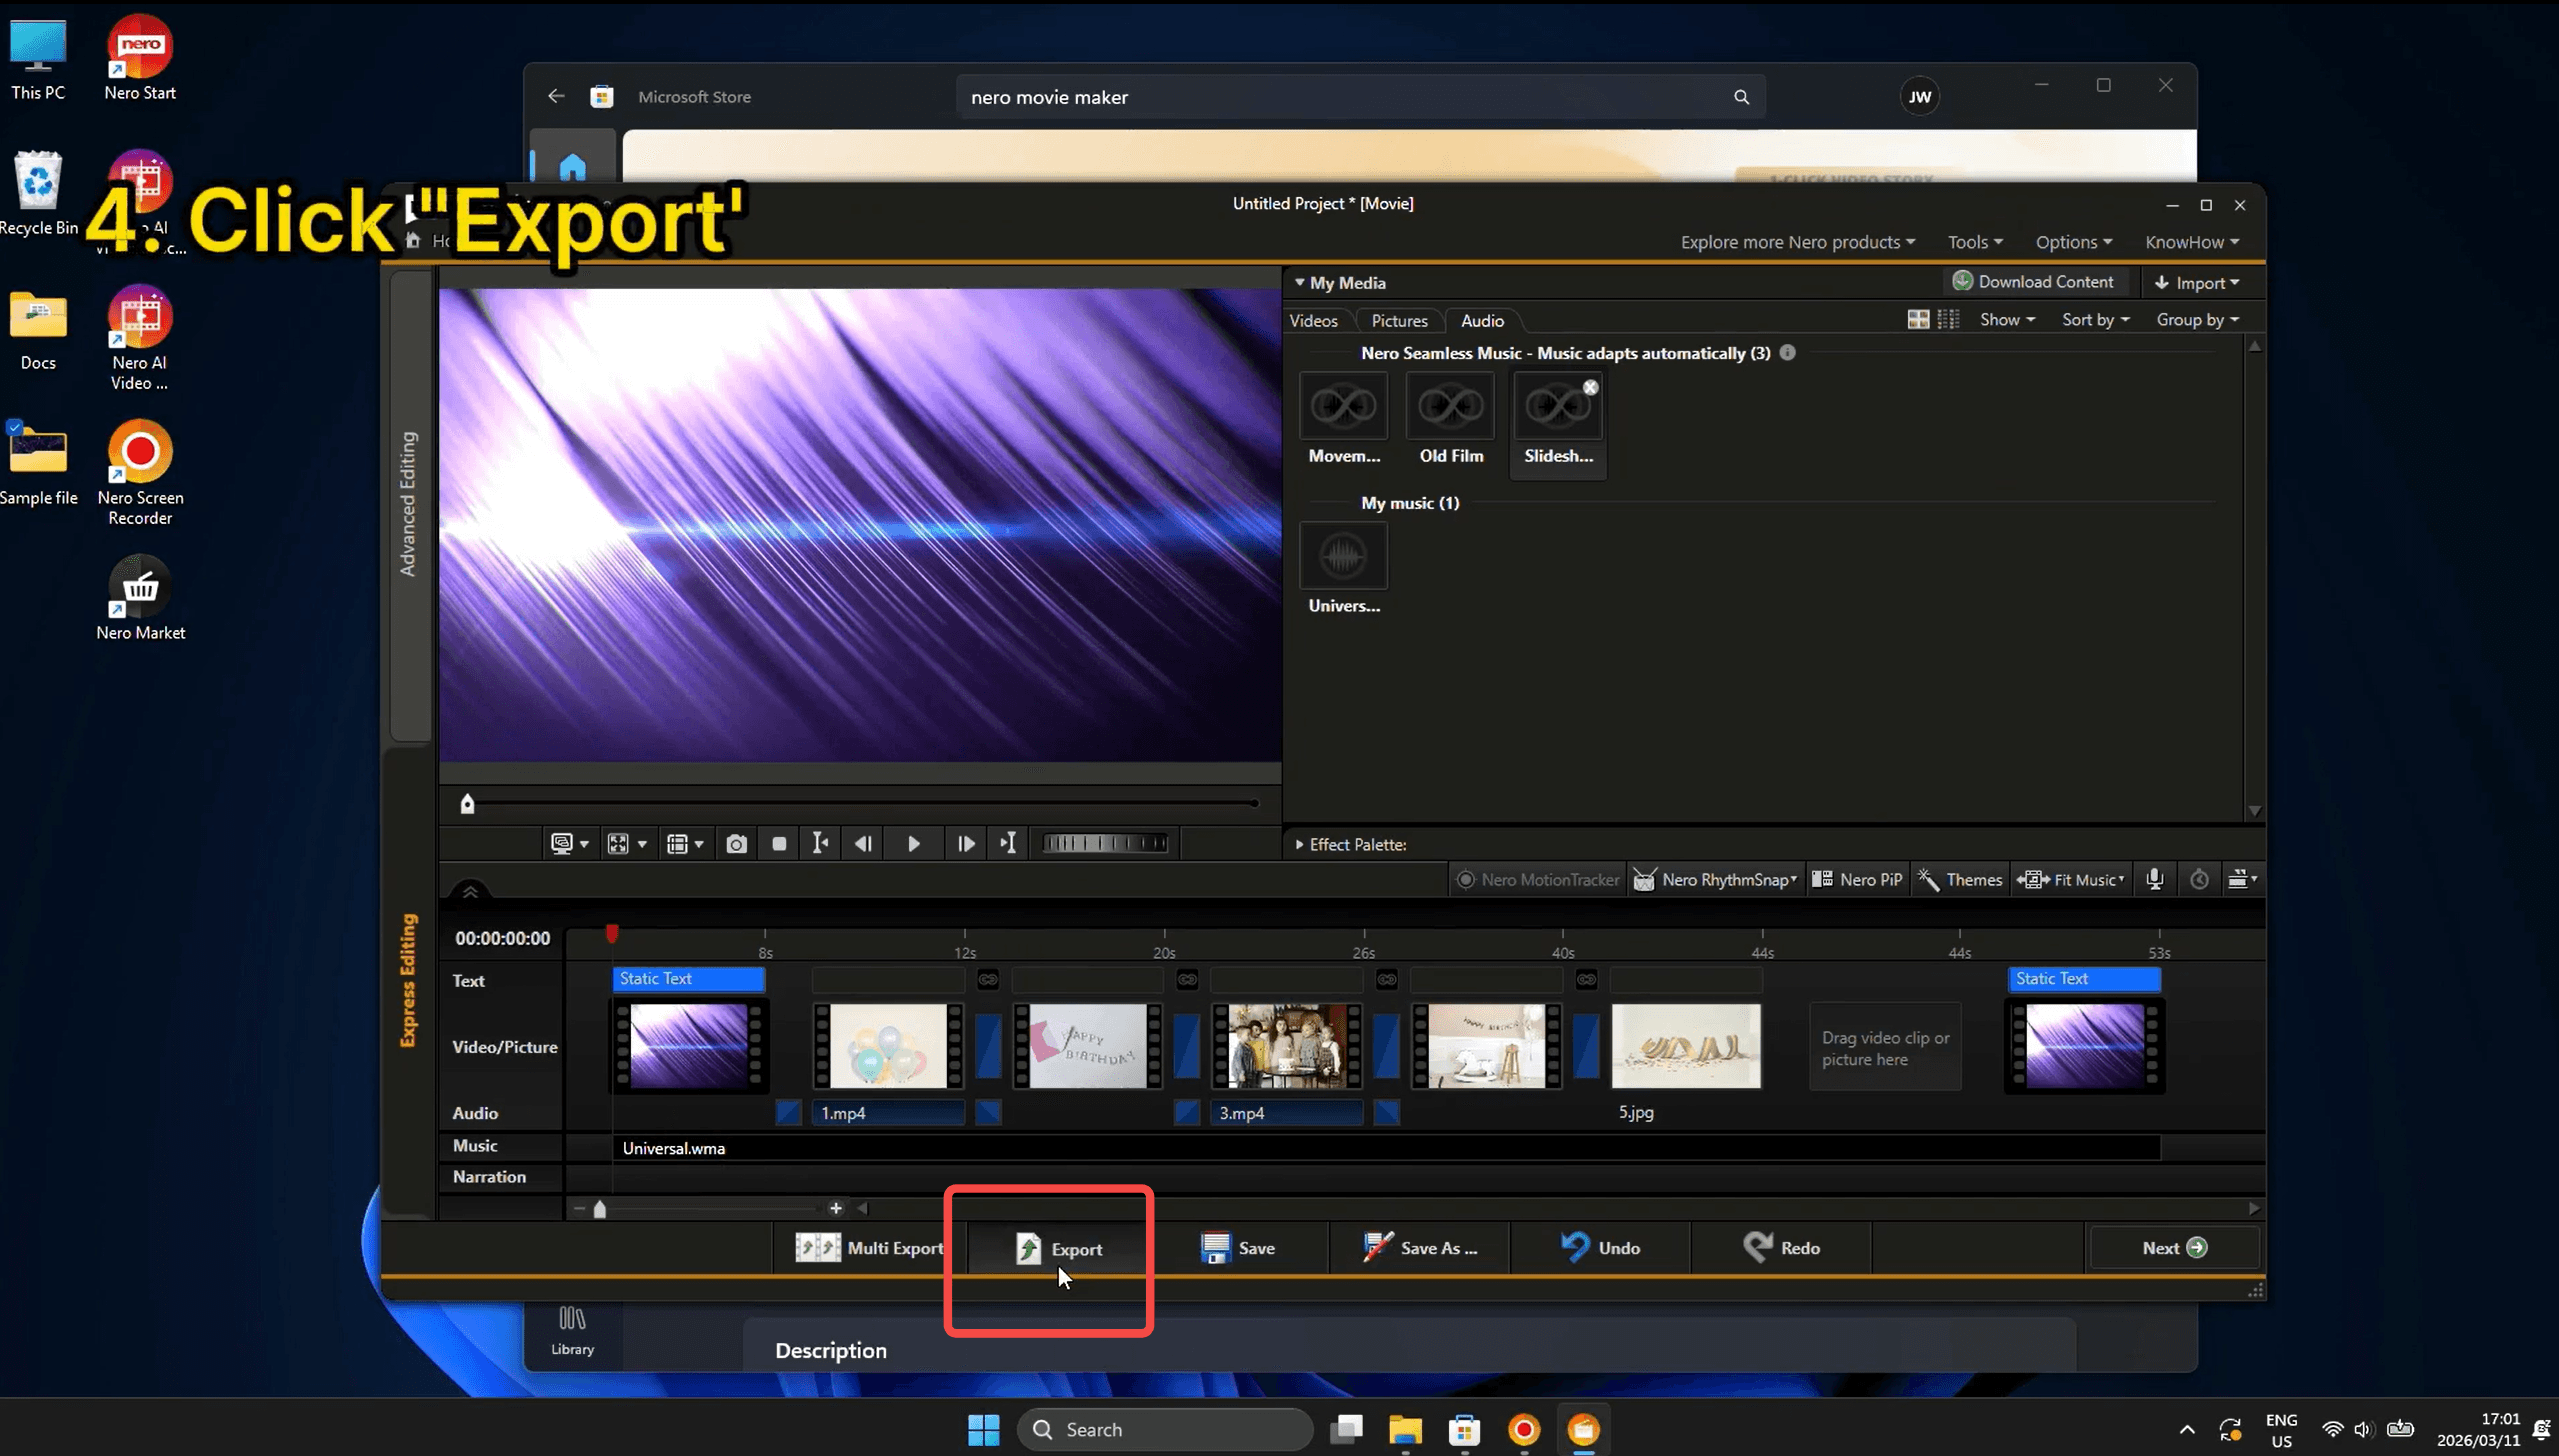
Step 5: Export Your Finished Movie
When your movie looks good, click the Export button at the bottom of the screen. Nero renders the full video and saves it automatically to:
Documents > NeroVideo > ExportedVideo > NVExport.mp4
A File Explorer window opens automatically once rendering is complete. The default output is MP4 — ready to upload to YouTube, share on social media, or send directly.
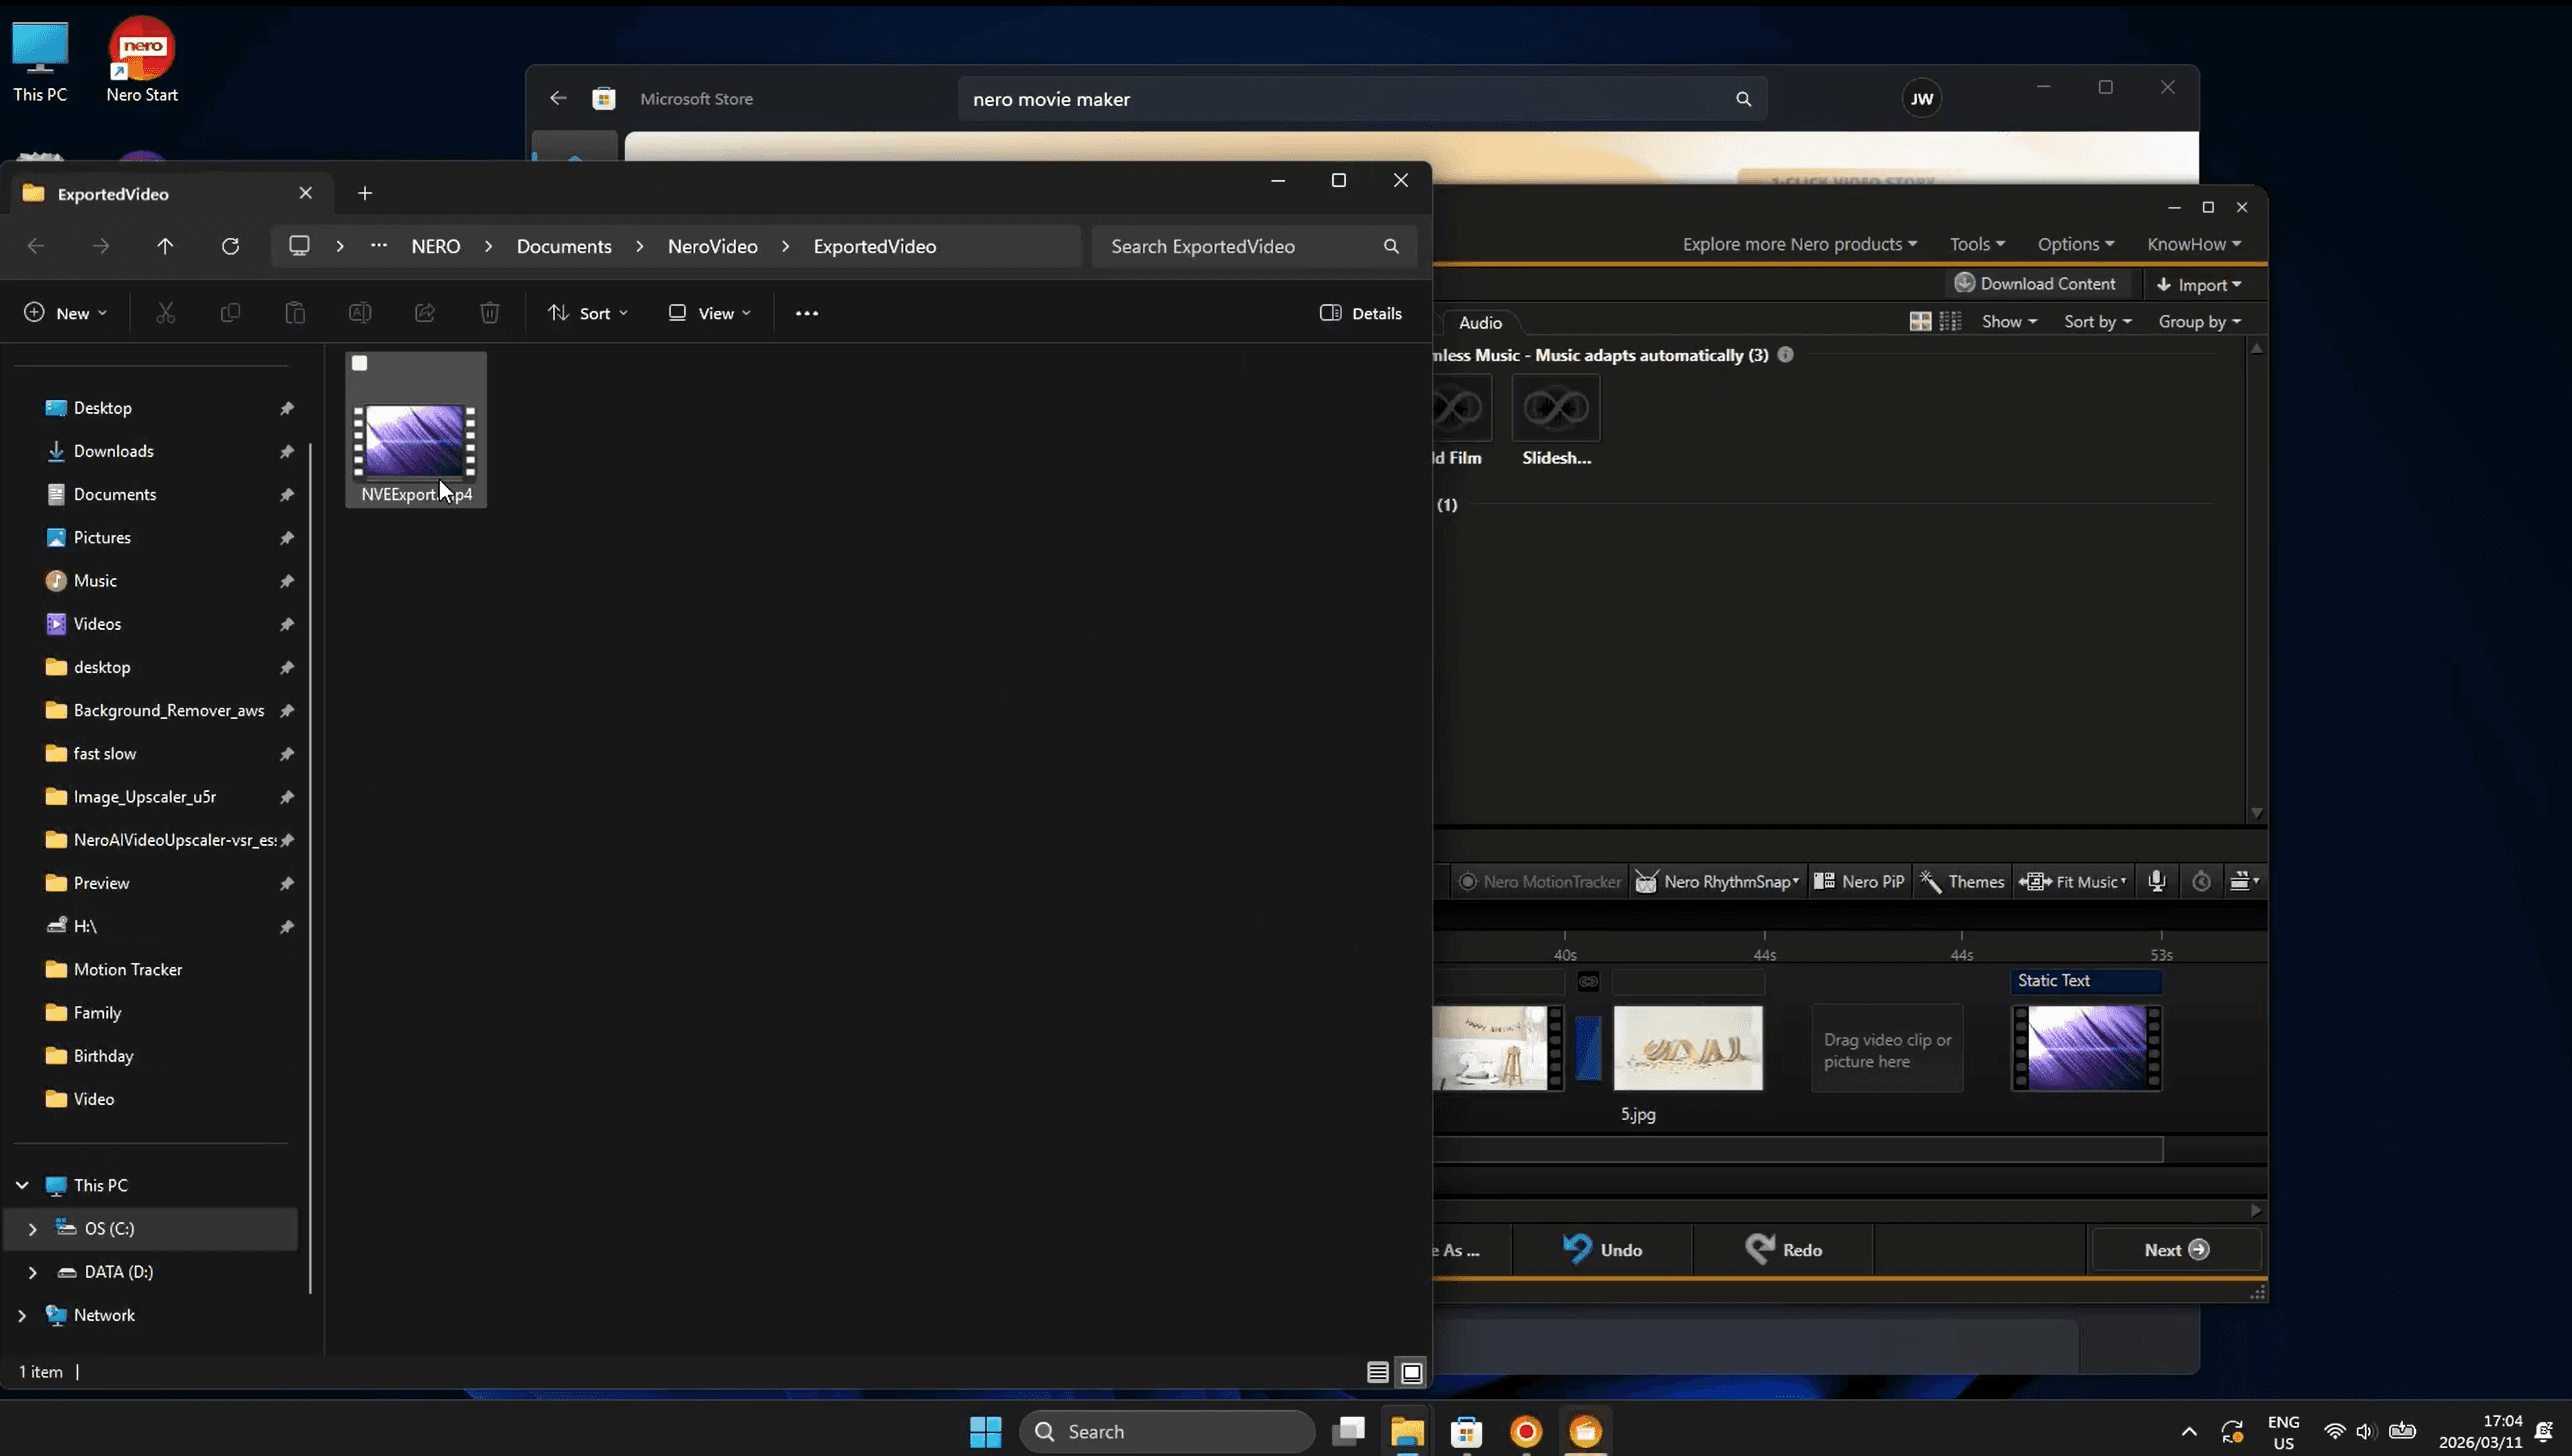
Need more control? Use Multi Export to render multiple formats at once, or Save As to keep the project file for future editing.
Ready to Try It?
Nero Video's Express Editing mode is one of the fastest ways to go from raw footage to a shareable movie. Whether you're making a birthday recap, travel montage, or family slideshow, the 1-Click Video Story feature handles the heavy lifting — no editing skills required.


