An AI image can look sharp on a screen and still print poorly. Screens need fewer pixels than prints viewed up close.
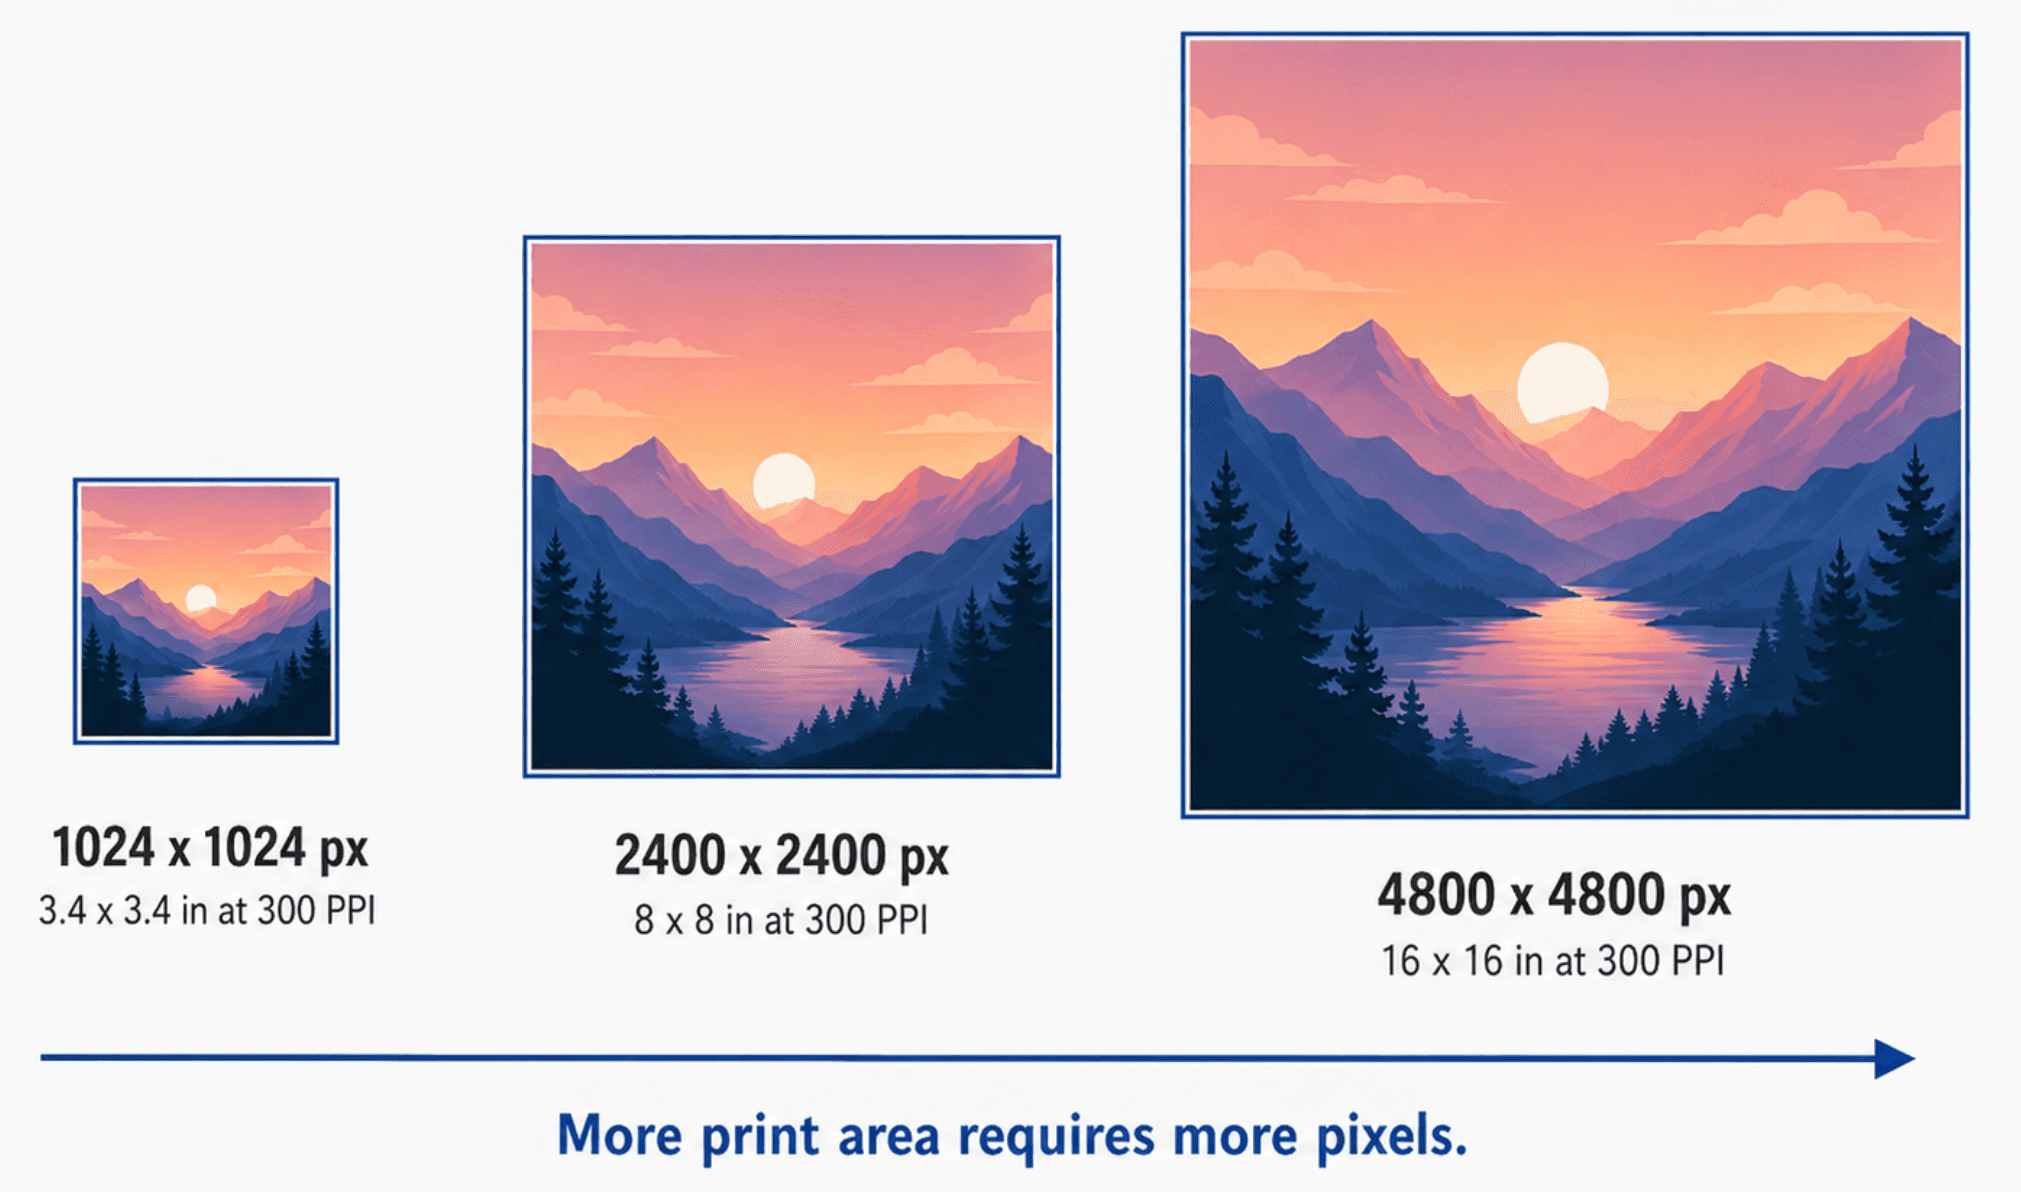
A 1024 × 1024 image prints at only 3.4 × 3.4 inches at 300 PPI. Changing its DPI setting will not add detail. The file needs more actual pixels.
This guide explains how to calculate the right resolution and choose between 4K and 8K. It also shows how to prepare the image with Nero AI Image Upscaler.
Why do AI-generated images need upscaling for print?
Most AI outputs are too small for large prints
Popular image generators often create files near 1024 pixels on one or both sides. The exact dimensions vary by model, aspect ratio, and export setting.
AI image generator | Common square output |
Midjourney | 1024 × 1024 px in SD mode or 2048 × 2048 px in HD mode |
GPT Image | Commonly 1024 × 1024 px, with portrait and landscape options |
Stable Diffusion XL | 1024 × 1024 px by default |
FLUX.1 Kontext | 1024 × 1024 px by default |
Output size depends on the model, interface, quality setting, and aspect ratio. Check the downloaded file before calculating its print size.
Check the dimensions of the downloaded file before planning a print. Generator settings change, so an old specification may no longer match your image.
AI artwork has its own upscaling problems
Generated images contain synthesized textures. Those textures can behave differently from detail captured by a camera.
Hair may become wiry after enlargement. Skin can look plastic, while fabric and foliage may break into random patterns.
Weak areas also become easier to see. Hands, faces, text, jewelry, and repeating architecture need close inspection.
An upscaler can add plausible detail. It cannot confirm that the new detail is correct.
Important text should usually be rebuilt in a design application. Obvious errors in hands or faces are also easier to fix before enlargement.
What resolution do you need to print AI-generated images?
Calculate the required pixel dimensions
Print resolution depends on the number of pixels and the physical print size.
PPI means pixels per inch. DPI describes the dots produced by the printer. People often mix up the two terms, but image preparation is based mainly on pixels and PPI.
Adobe notes that changing print resolution without resampling keeps the same amount of image data. The physical print size changes, but the file does not gain pixels. See Adobe's guide to printed image resolution.
Use this formula:
Required width in pixels = print width in inches × target PPI Required height in pixels = print height in inches × target PPI
An 8 × 10-inch print at 300 PPI needs 2400 × 3000 pixels.
A 16 × 20-inch print needs 4800 × 6000 pixels at the same density.
Print size | Pixels at 300 PPI | Pixels at 200 PPI |
5 × 7 in | 1500 × 2100 | 1000 × 1400 |
8 × 10 in | 2400 × 3000 | 1600 × 2000 |
11 × 14 in | 3300 × 4200 | 2200 × 2800 |
16 × 20 in | 4800 × 6000 | 3200 × 4000 |
24 × 36 in | 7200 × 10800 | 4800 × 7200 |
Use 300 PPI for prints viewed at close range. Large posters may work at 150 to 200 PPI because viewers stand farther away.
Ask the printer for its recommended pixel dimensions. Paper, canvas, viewing distance, and printing method can affect the requirement.
Find the upscale factor
Divide the required output dimension by the matching source dimension:
Upscale factor = required output dimension ÷ original dimension
Suppose your source is 1200 × 1500 pixels. A 16 × 20-inch print at 300 PPI needs 4800 × 6000 pixels.
Both sides need a 4× enlargement. A 4× setting is therefore a sensible starting point.
Use Custom Resolution when the printer gives you exact dimensions. It is often more accurate than choosing 4K or 8K by name.
Is 4K or 8K better for printing?
What 4K and 8K mean
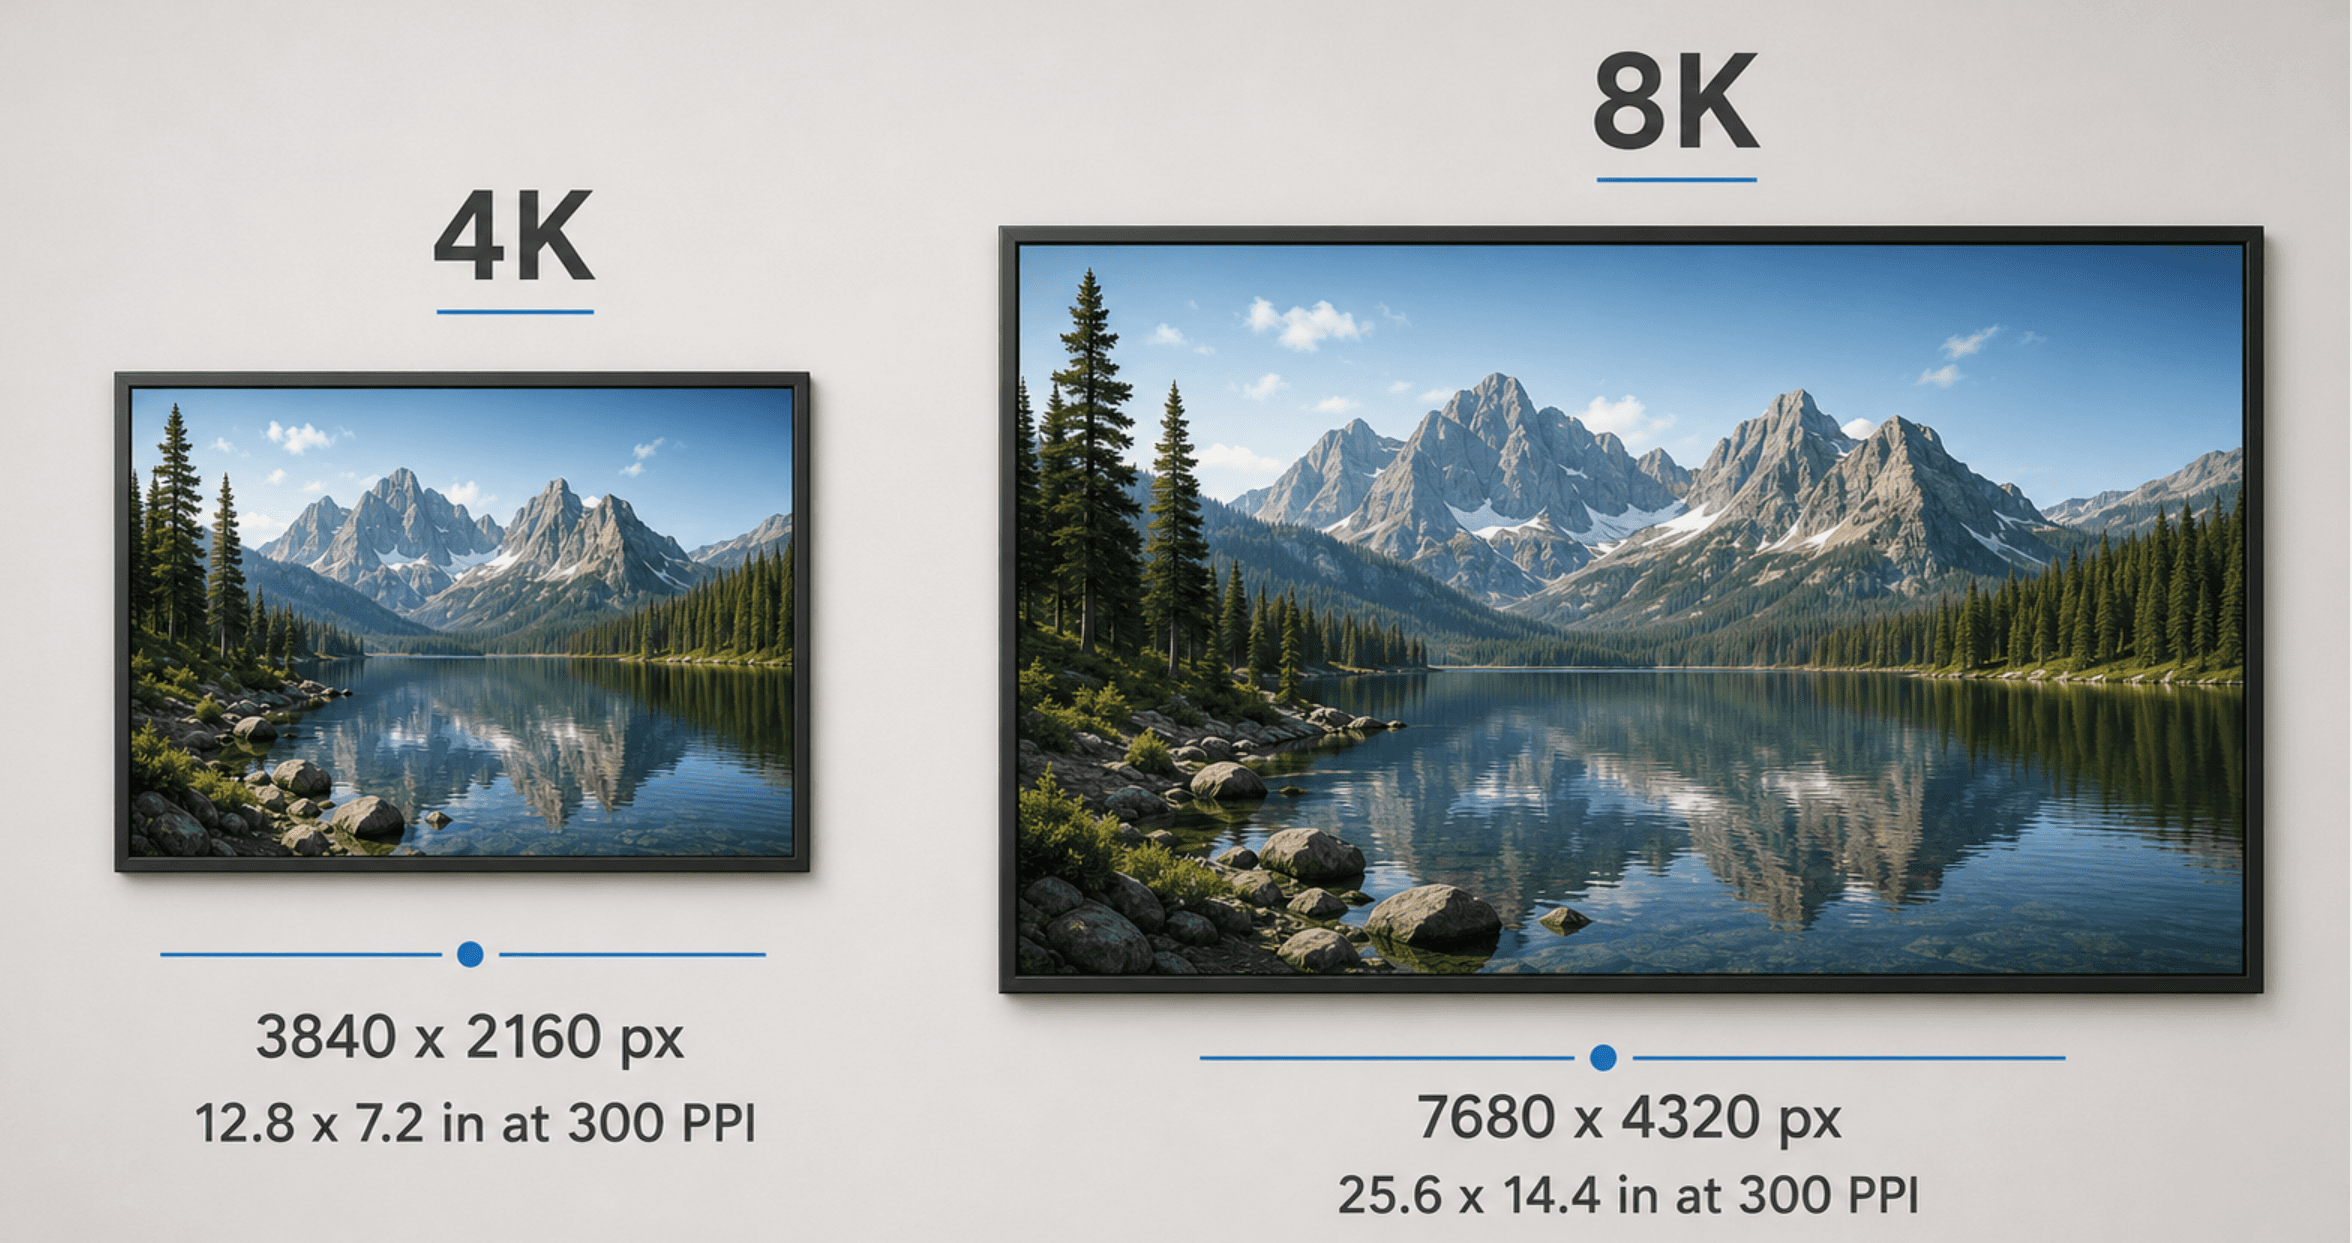
Standard 4K UHD is 3840 × 2160 pixels. Standard 8K UHD is 7680 × 4320 pixels.
Both use a 16:9 aspect ratio. Square and portrait AI images will have different dimensions, even if their longest edge reaches 4K or 8K.
Resolution | Pixel dimensions | Print size at 300 PPI | Print size at 150 PPI |
4K UHD | 3840 × 2160 | 12.8 × 7.2 in | 25.6 × 14.4 in |
8K UHD | 7680 × 4320 | 25.6 × 14.4 in | 51.2 × 28.8 in |
Cropping reduces the available print area. Always check the final width and height rather than relying on the 4K or 8K label.
When to choose 4K or 8K
Choose 4K for small and medium prints. It often works for A4 artwork, book covers, photo prints, and modest wall pieces.
A 4K target can also be safer for a weak source. Extreme enlargement may expose malformed details or create artificial textures.
Choose 8K for larger posters, canvas prints, or artwork that needs extra cropping room. It can also provide a flexible master file for several print sizes.
Still unsure which software or output limit fits your work? This comparison of the best AI image upscalers in 2026 covers enlargement limits, models, and processing options.
Eight-kilopixel output is not automatically better. Pick the smallest resolution that meets the print requirement and still looks natural.
How to upscale an AI image with Nero AI Image Upscaler
Step 1: prepare and import the source
Download the largest original file from the image generator. Avoid screenshots and compressed social media copies.
Fix obvious problems before upscaling. Check hands, facial features, text, and repeated patterns.
Open Nero AI Image Upscaler and import the image. Supported formats include JPG, PNG, BMP, WebP, and TIFF.
Step 2: choose the output size
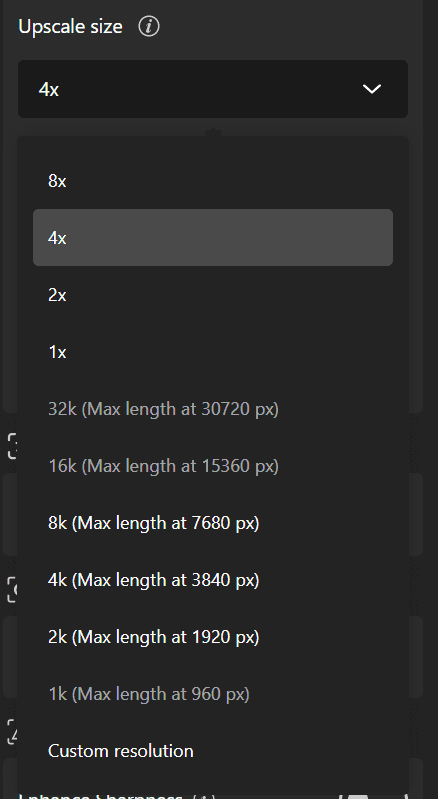
Select 4×, 8×, 16K, 32K, Custom Resolution or more.
A 2× setting suits images that are already close to the target. Choose 4× when both dimensions need roughly four times as many pixels.
The 4K and 8K presets use the longest edge as the target. Custom Resolution is better for an exact print size.
For example, a square 16-inch print at 300 PPI needs 4800 × 4800 pixels. Entering that target is more precise than forcing the image into a standard 16:9 resolution.
Nero also supports up to 8× enlargement and 32K output for more demanding print projects.
Step 3: match the AI model to the artwork
Different images need different treatment.
Nero model | Best suited to |
Photograph | Photorealistic portraits and natural scenes |
Standard | Landscapes, products, architecture, and city scenes |
Anime | AI art, illustrations, cartoons, and digital paintings |
Iris | Hair, fur, fabric, jewelry, feathers, and other fine textures |
Anime is a good starting point for illustrated AI art. Photo often works better for realistic Midjourney or FLUX portraits.
Try Standard for architecture and scenery. Use Iris when fine texture matters most.
Model Strength controls how much the output can depart from the source. Reduce it if skin looks plastic or edges become harsh.
Face Recovery can help with blurry portraits. Compare the result carefully because reconstructed features may differ from the original character.

Step 4: process the image
Choose Local Process or Cloud Process, then start the upscale.
Local mode uses your computer's CPU or supported GPU. Cloud mode is useful for large images or slower computers.

Step 5: compare the upscaled image with the original
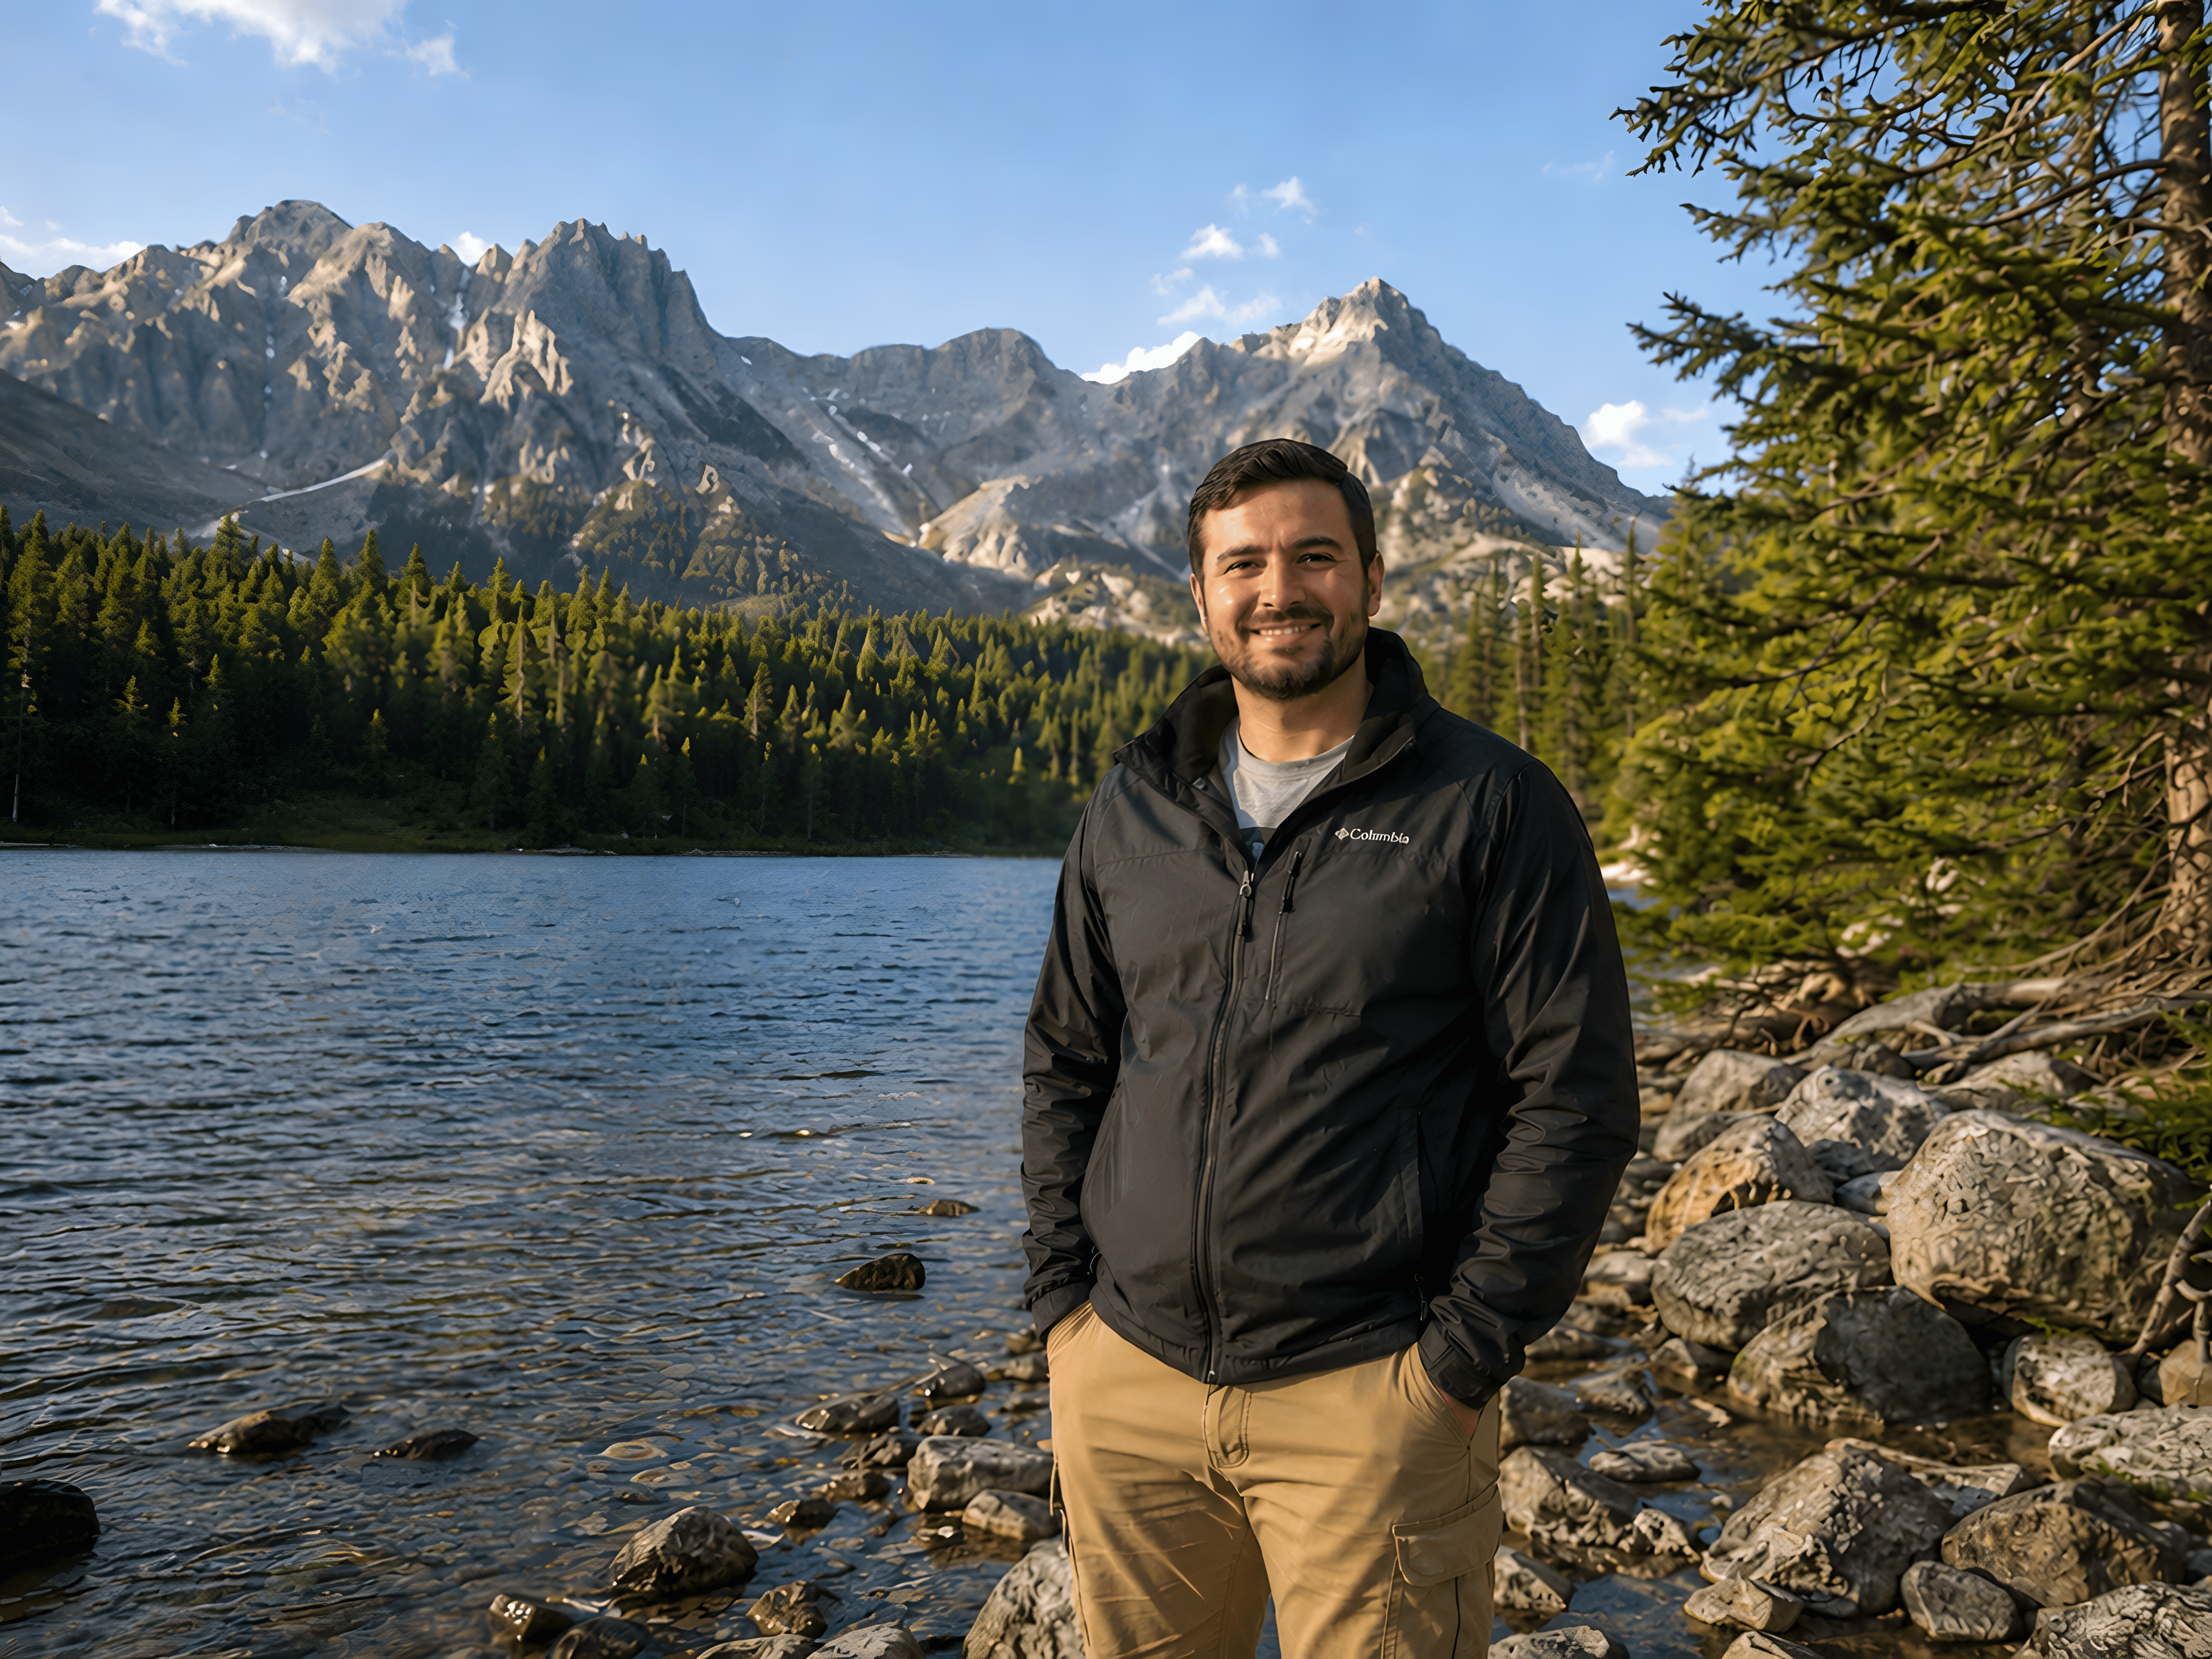
Use Nero's Slider or Split view to compare both versions. Zoom to 100 percent before judging the result.
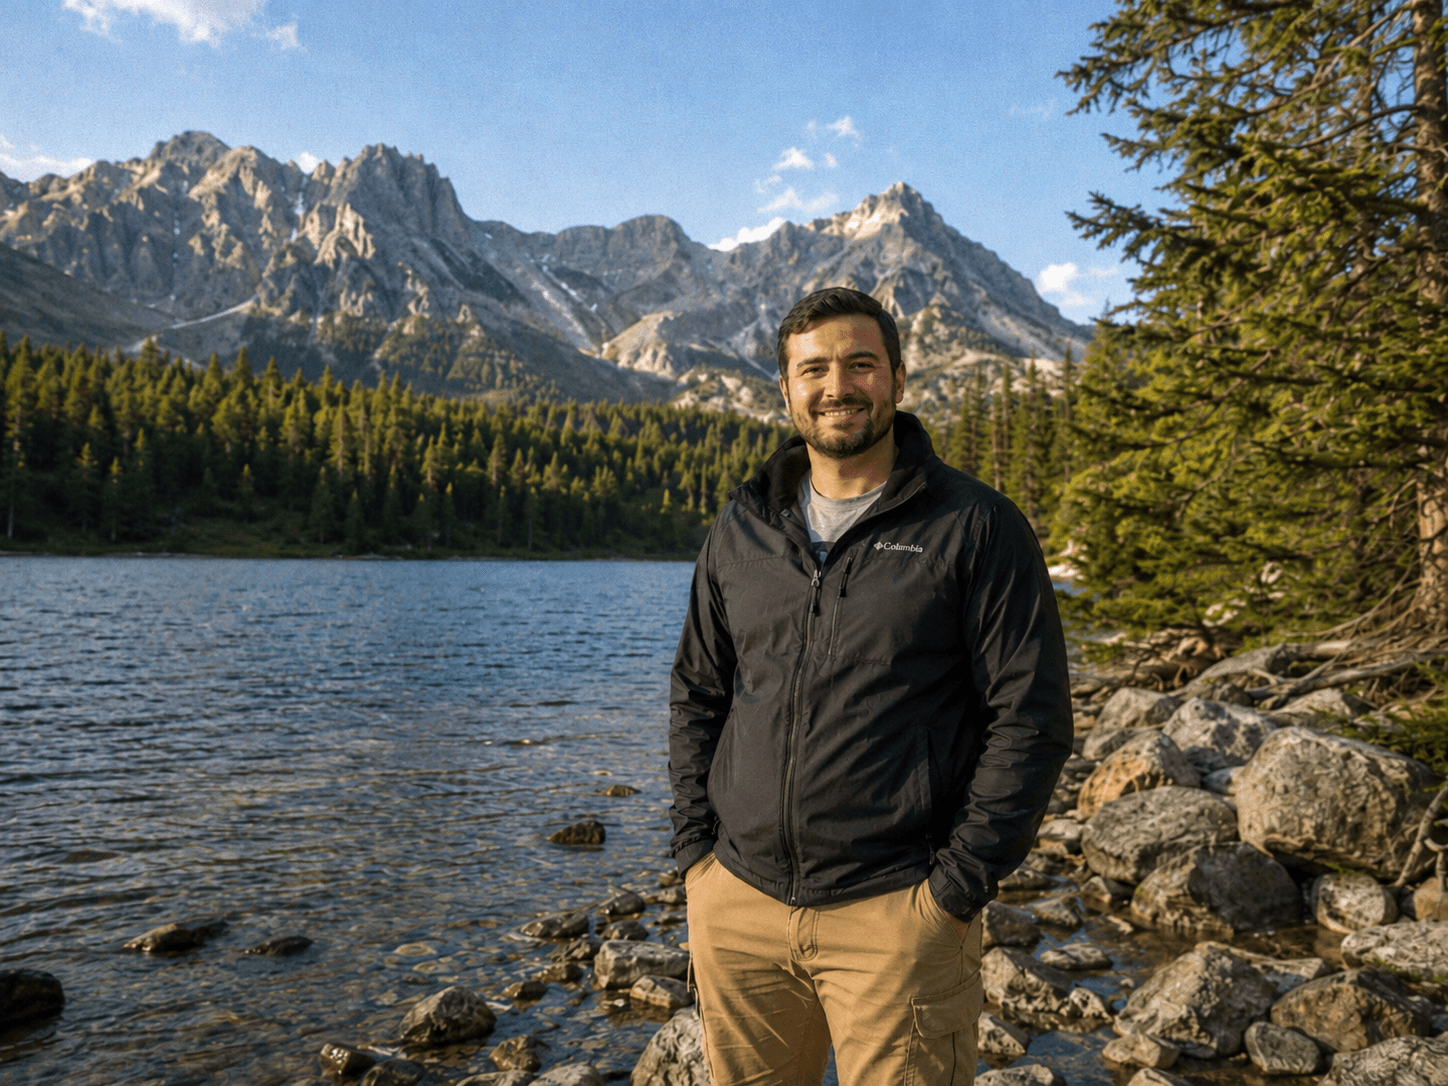
The upscaled example has cleaner edges around the face, hair, and jacket. Seams and folds in the clothing are easier to see.
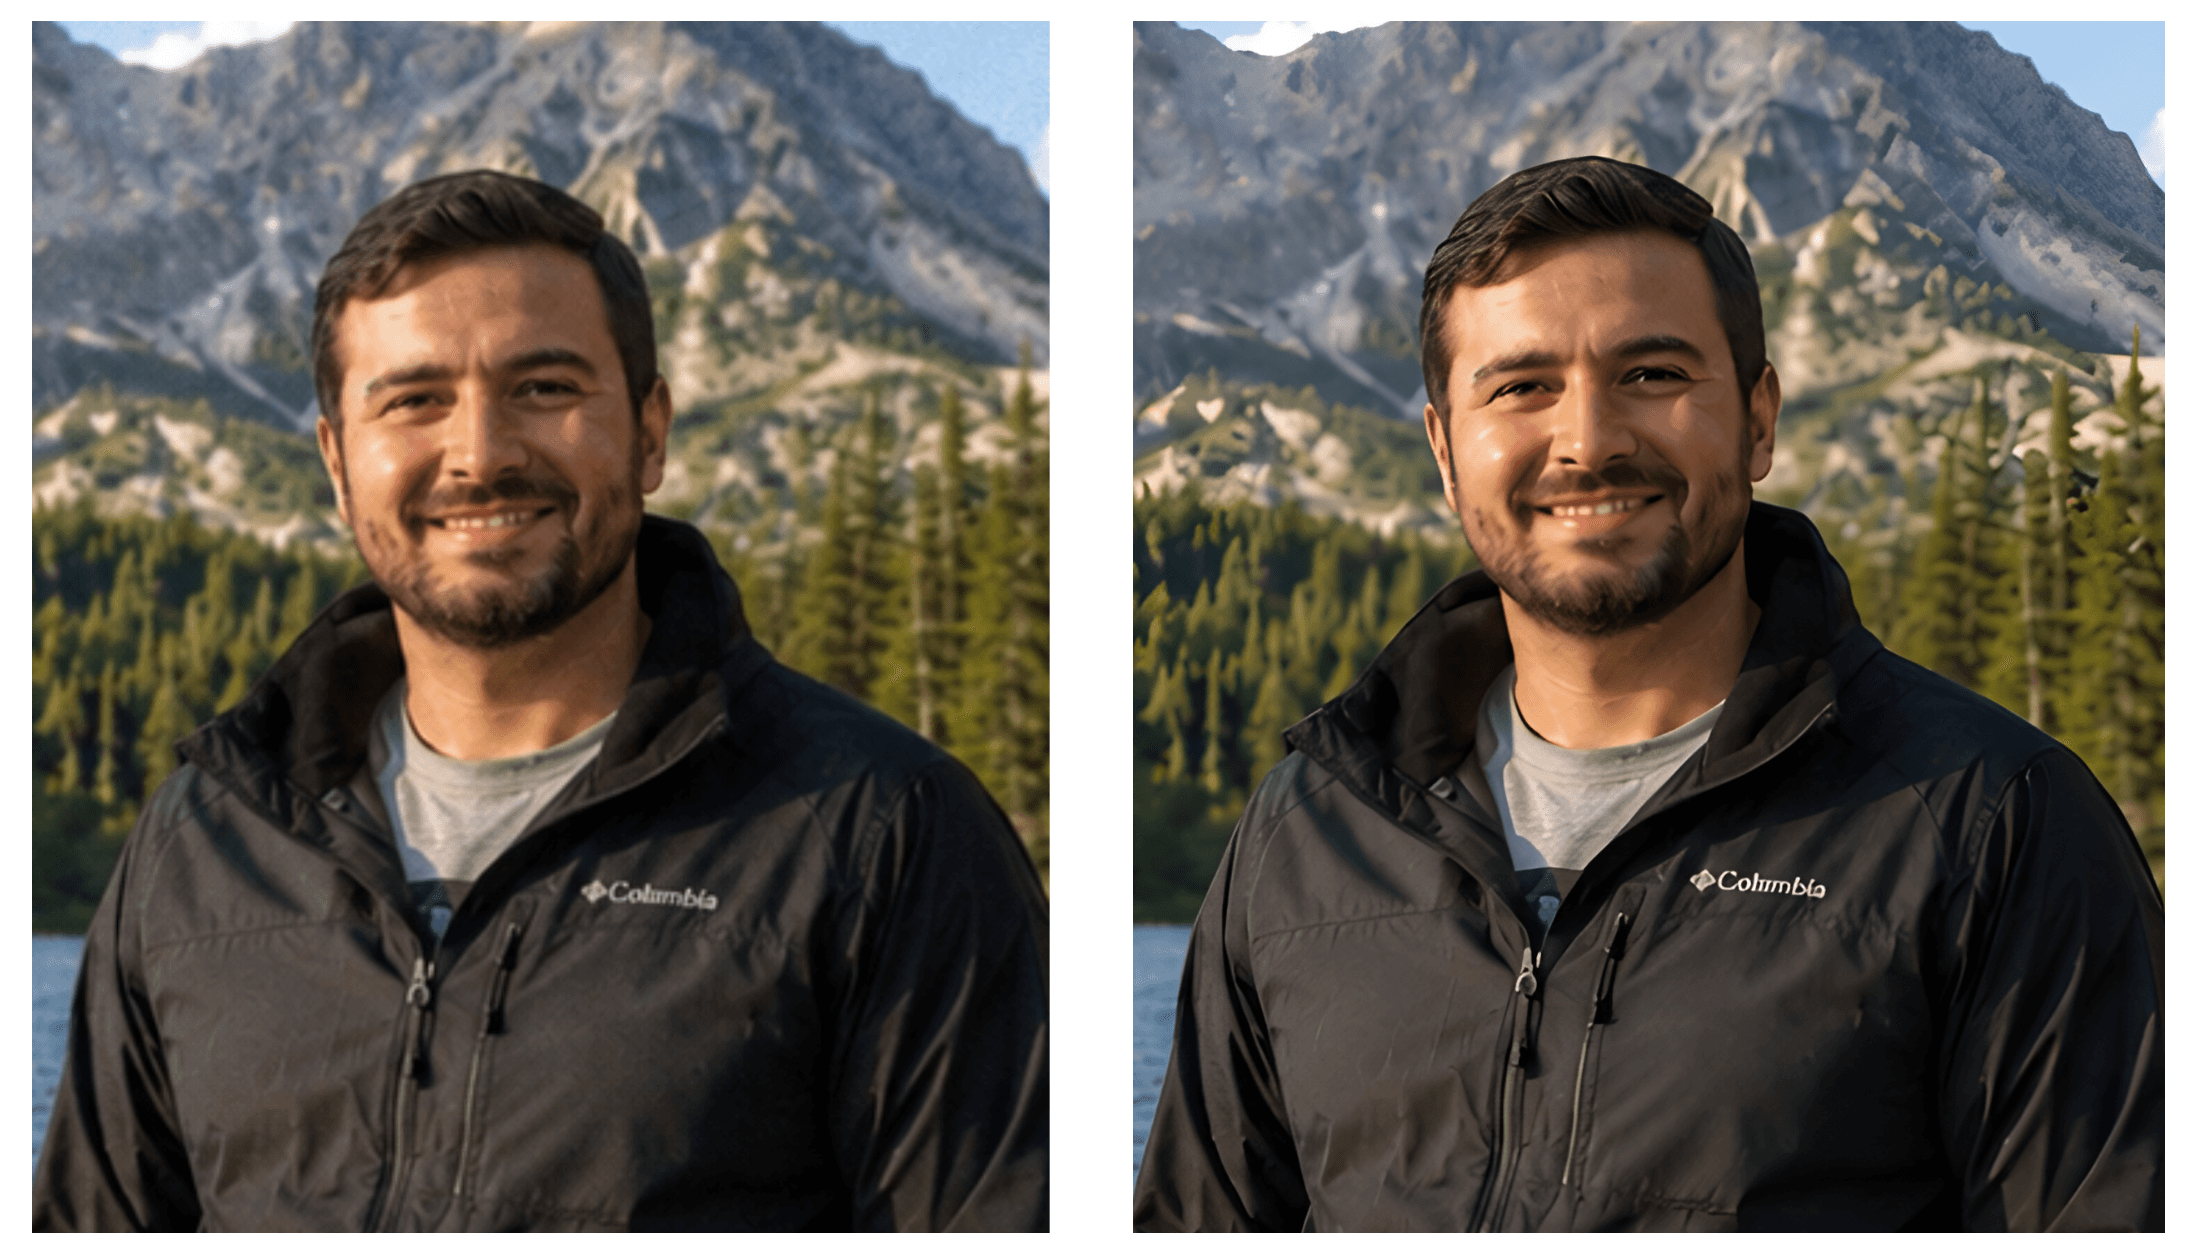
The mountain ridges, tree branches, rocks, and water ripples also have stronger definition.
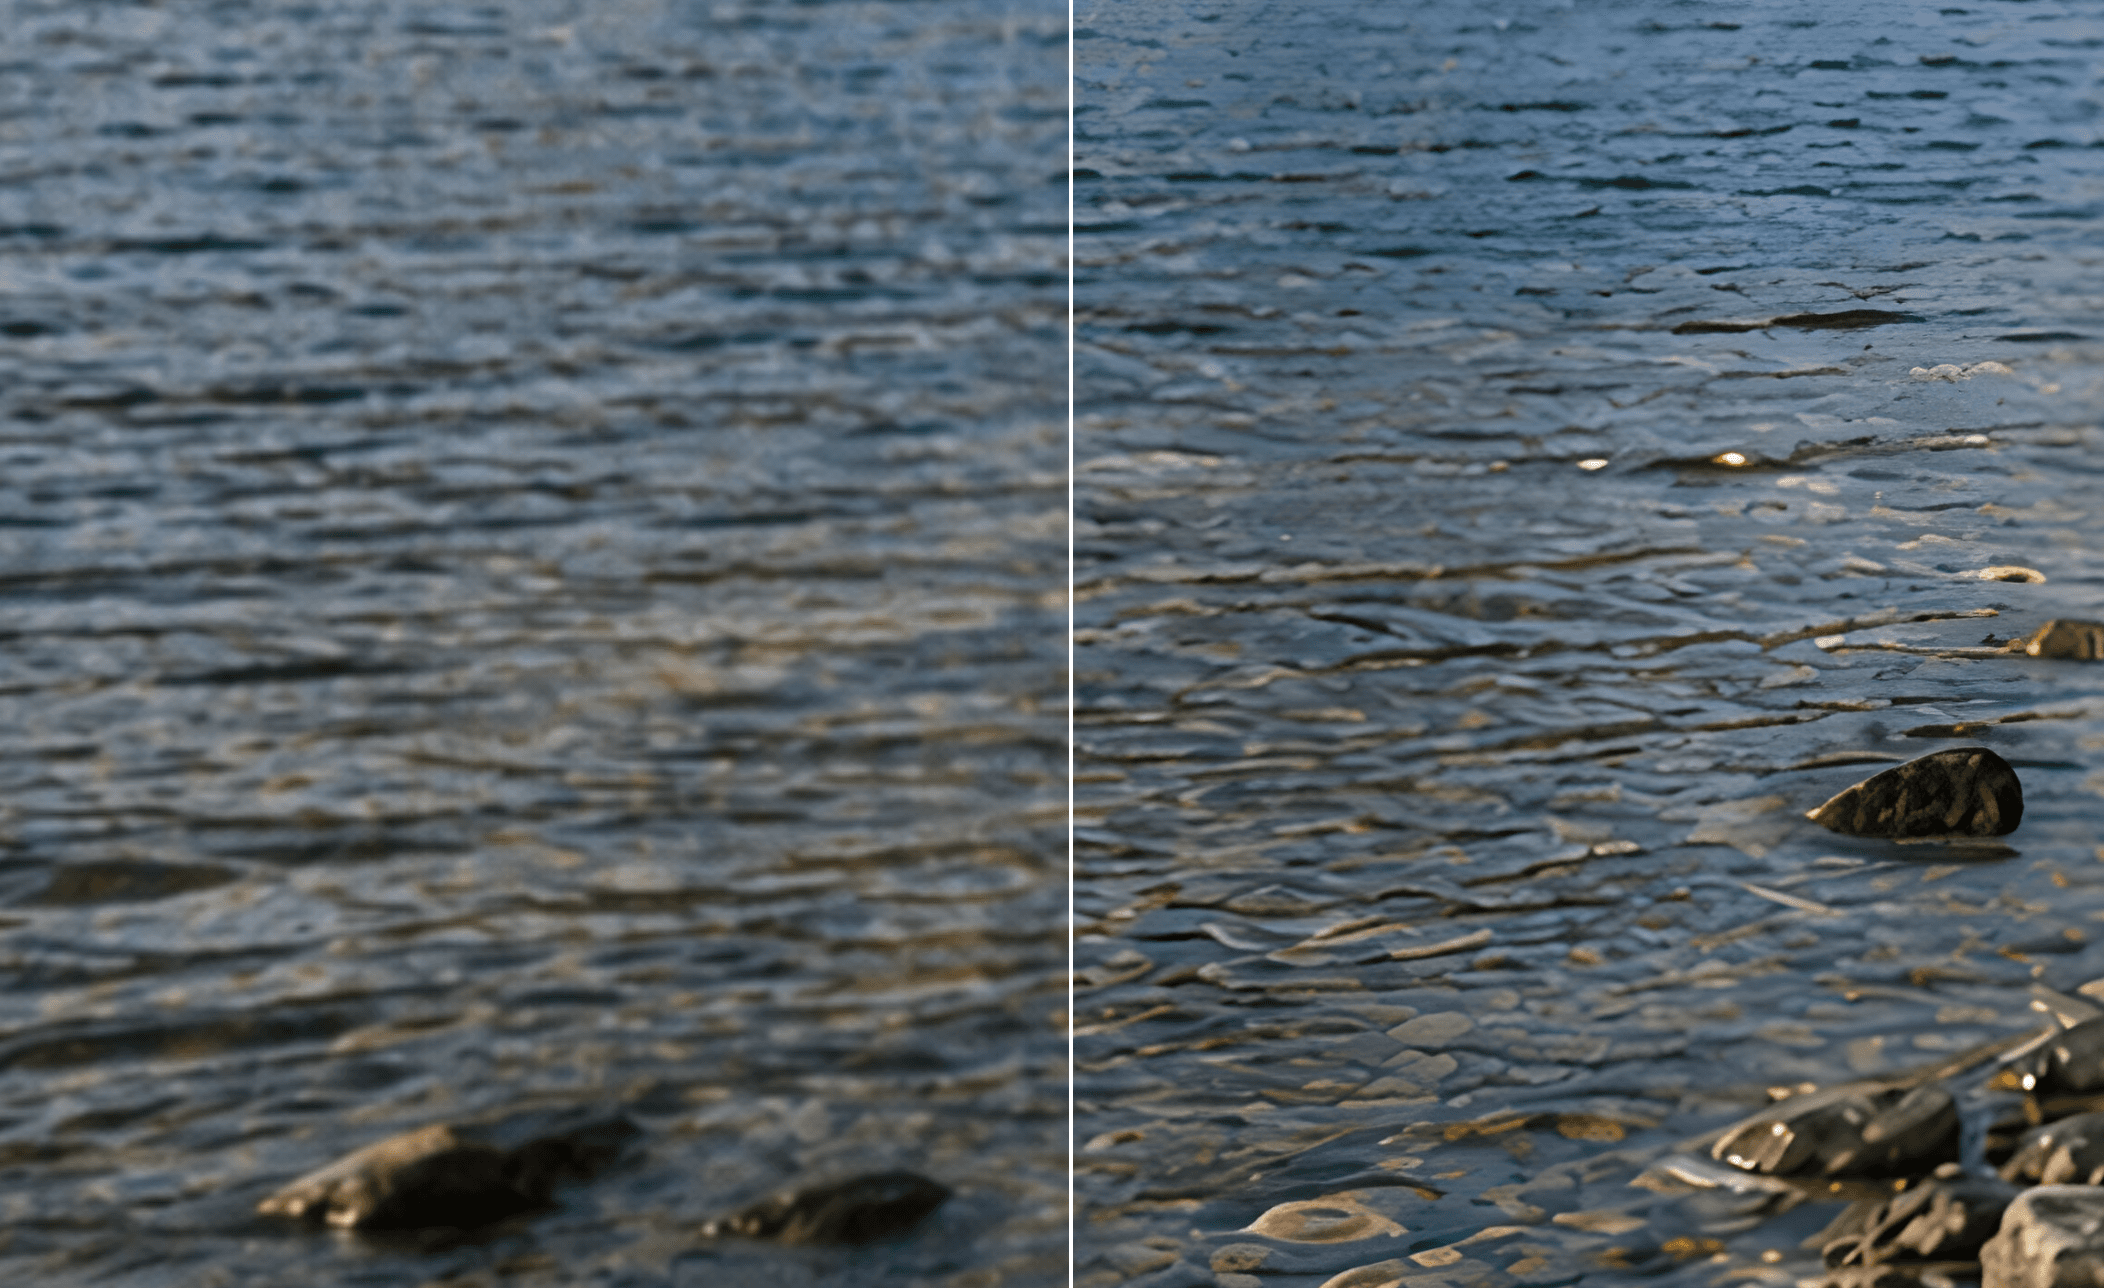
Noise in the sky and distant scenery is less distracting. The output looks cleaner overall, while the direction of the original light remains similar.
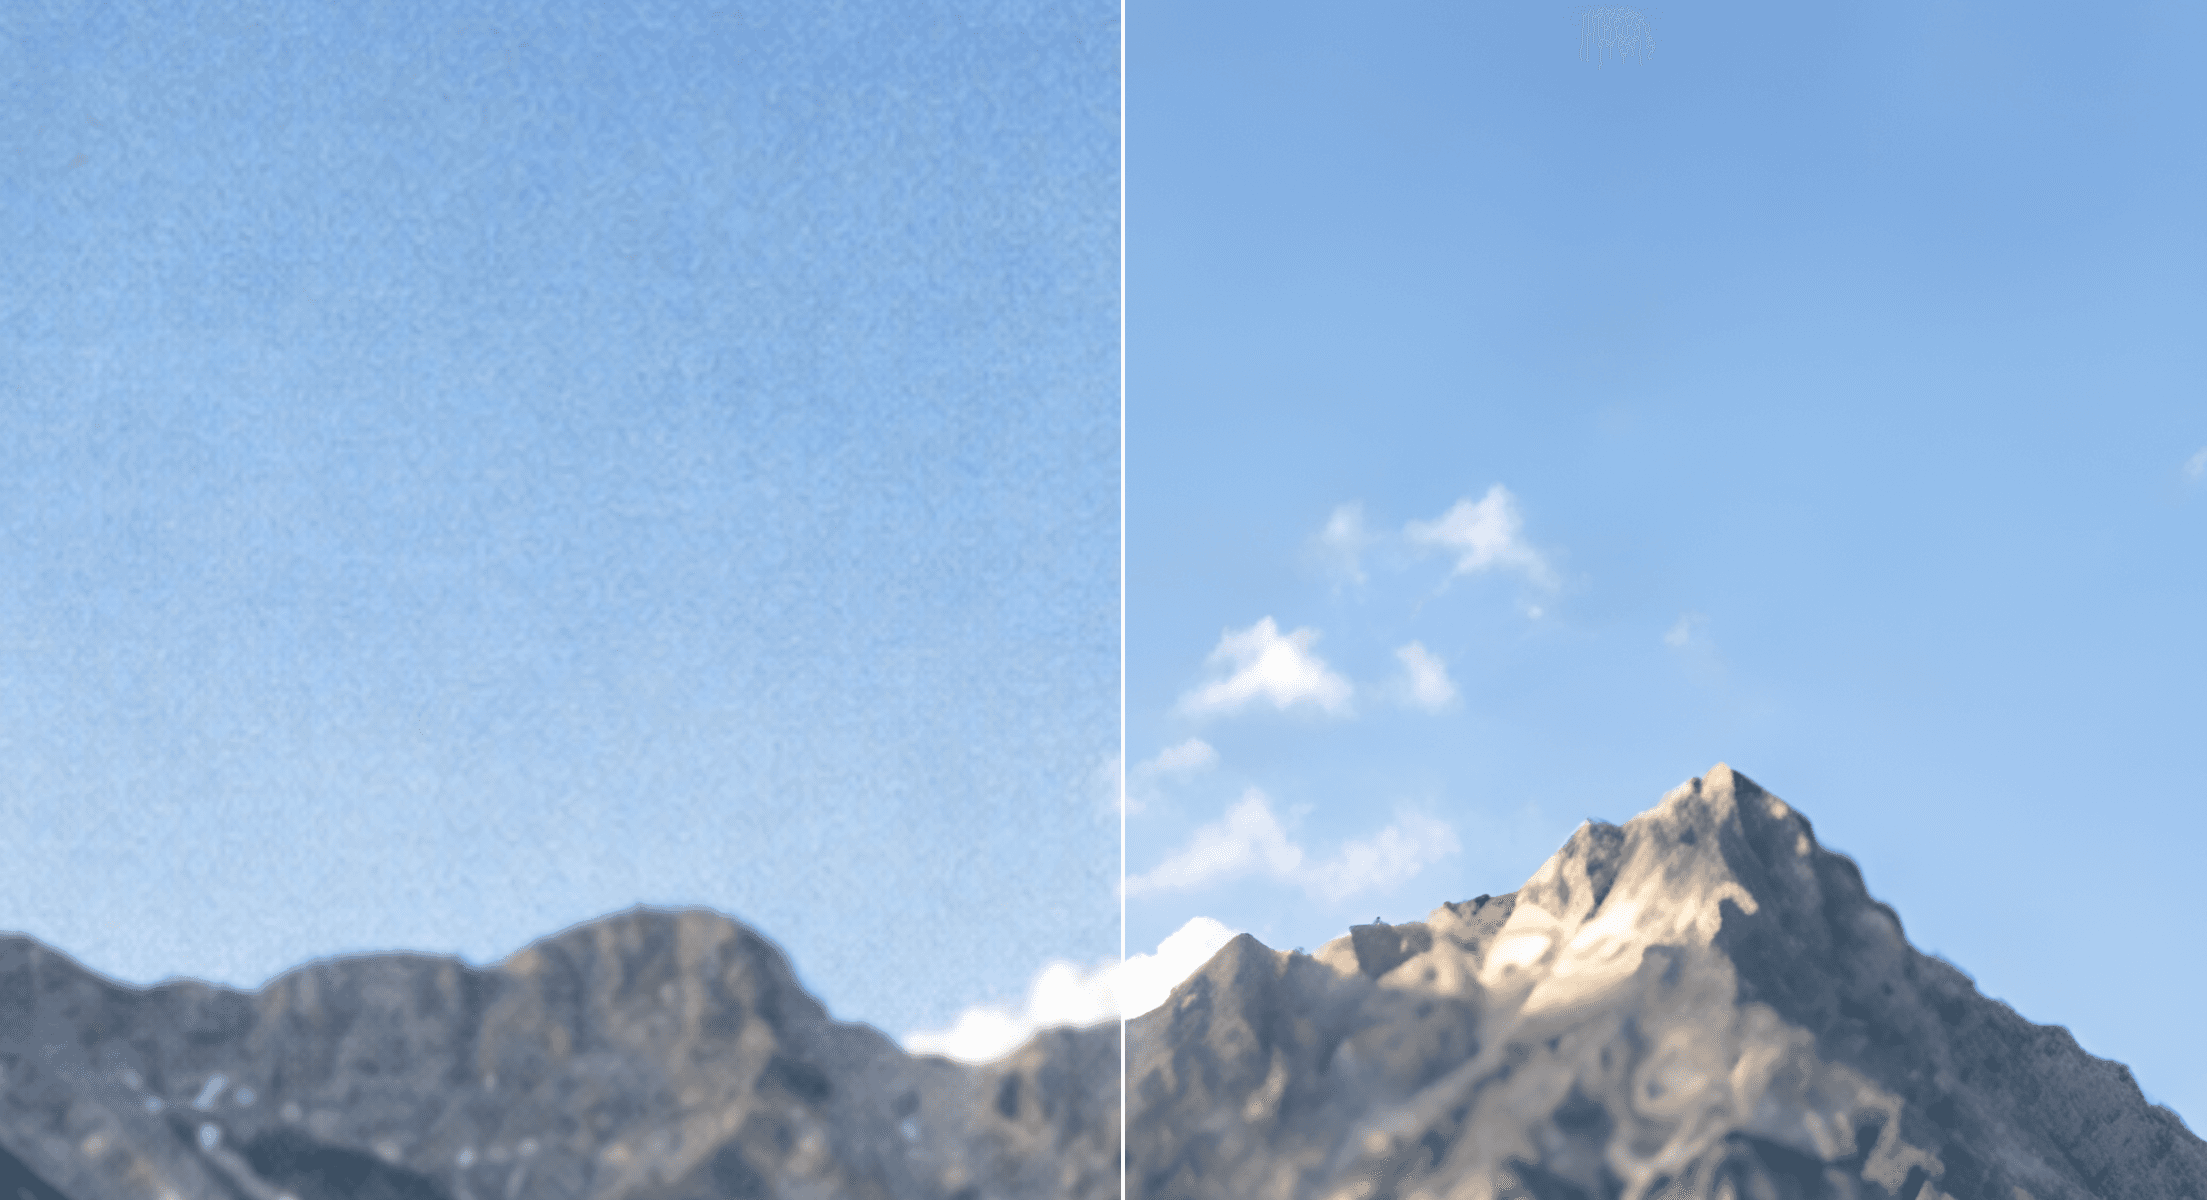
The larger 5792 × 4344 output also supports a much bigger print. At 300 PPI, it can print at about 19.3 × 14.5 inches. The original reaches only about 4.8 × 3.6 inches at the same density.
Check reconstructed areas carefully. Facial features and fine textures may change slightly when the model creates new detail. If the result looks too smooth or sharp, reduce Model Strength or try another model.
Step 6: save the print-ready image
Click Save Image when the result looks right.
Choose PNG or a lossless TIFF when you want to avoid JPEG-style compression. A high-quality JPEG can still work if the print provider accepts it.
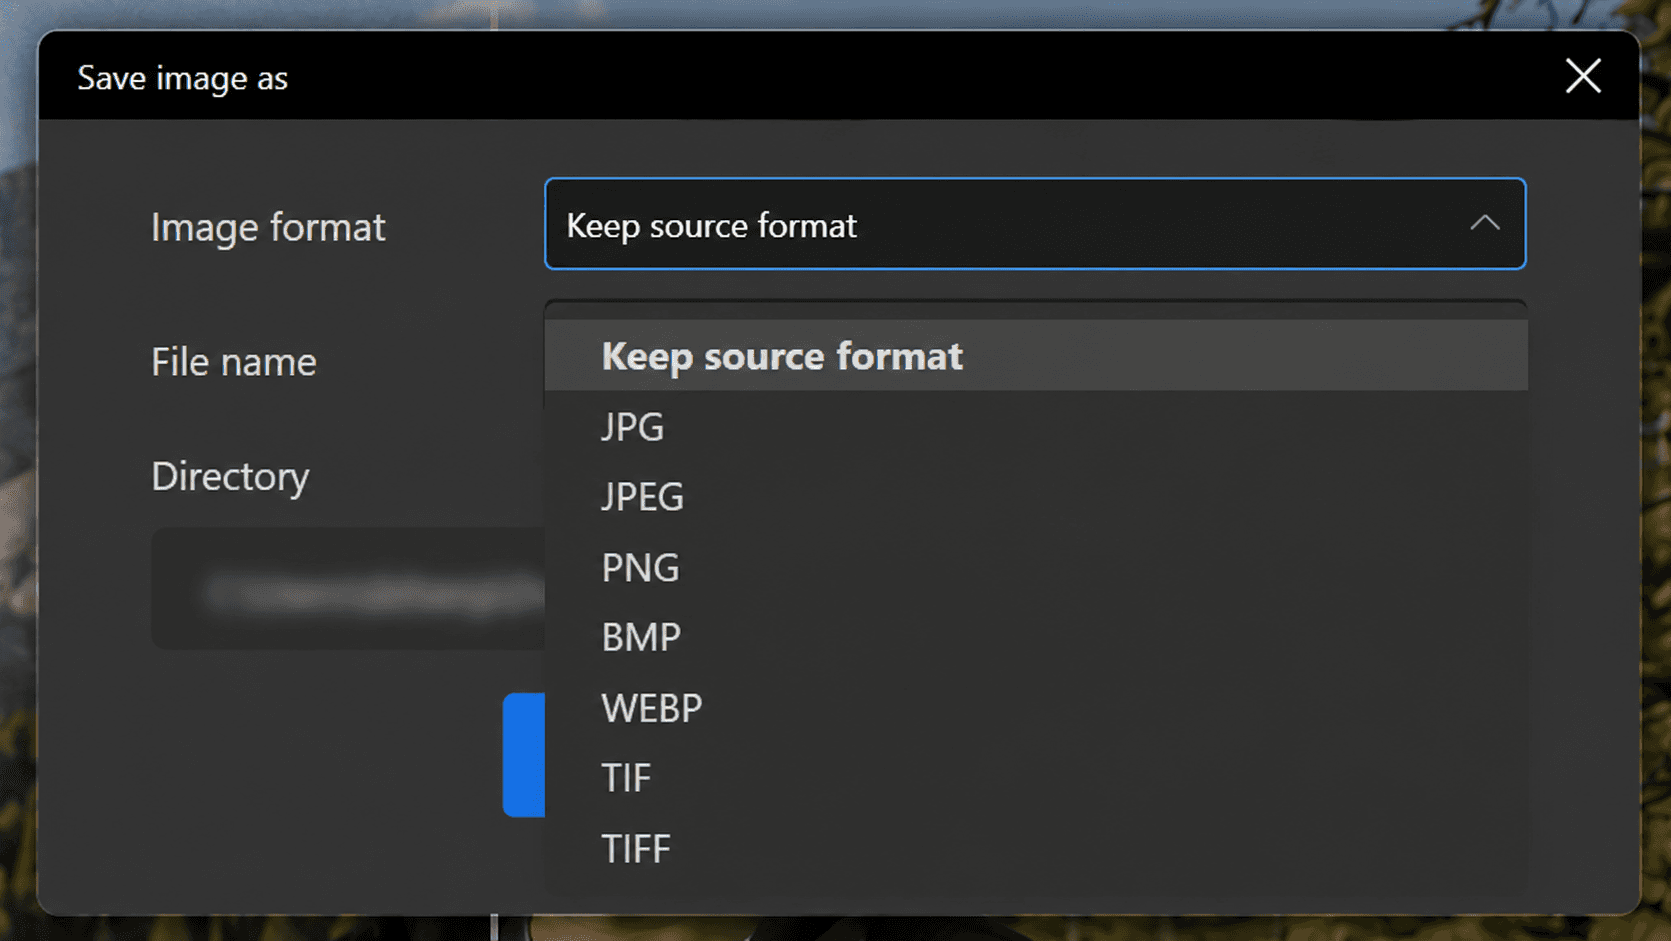
Keep the full-resolution file as your master copy. Add bleed, crop marks, and color settings later, based on the printer's specifications.
How to get better print results
Match the settings to the image
Use Photo for realistic scenes and Anime for illustrations. Standard suits general artwork, while Iris focuses on high-contrast texture.
Do not expect the upscaler to repair important text. Rebuild titles, labels, and logos separately.
Keep enhancement strength moderate. A print needs coherent detail, not the largest possible amount of generated texture.
Avoid common mistakes
Do not change only the DPI field. That does not add pixels.
Avoid starting with a screenshot. Use the original download whenever possible.
Do not select 16K or 32k before calculating the print requirement. More pixels can mean a larger file without a visible improvement.
Inspect the result at full size. A fit-to-screen preview can hide distorted faces, halos, or broken patterns.
Confirm the printer's file format and color requirements. Order a proof before producing a large or expensive print.
Print-ready checklist
Use the largest original image.
Confirm the final aspect ratio.
Calculate the required pixel dimensions.
Repair obvious AI errors.
Select the smallest suitable upscale target.
Match the Nero model to the image style.
Inspect the result at 100 percent.
Check faces, hands, text, and patterns.
Follow the printer's format and color requirements.
Test-print valuable work.
Frequently asked questions
Can AI-generated images be printed in high quality?
Yes. The file needs enough pixels for the intended size. Artifacts, color, cropping, and output format also affect the result.
Is 4K enough for a poster?
It depends on the poster size and viewing distance. A 3840 × 2160 image prints at 12.8 × 7.2 inches at 300 PPI or 25.6 × 14.4 inches at 150 PPI.
Does changing an image to 300 DPI improve it?
No. The setting changes how large the existing pixels print. Resampling or AI upscaling is needed to increase the actual pixel count.
Can upscaling fix AI faces, hands, or text?
It can improve blurry facial detail, but reconstructed features may change. Hands and text remain less predictable and may need manual correction.
Which file format is best for printing AI art?
TIFF and PNG preserve image quality well. A high-quality JPEG may also work if the printer accepts it.
Match the resolution to the print
Start with the final print size, not the largest available upscale option.
Calculate the pixels you need. Choose a suitable model, then inspect the result at full size.
Try Nero AI Image Upscaler to enlarge AI artwork to 4K, 8K, 16K, 32K, or a custom resolution for printing.