Did you know that duplicate files can consume gigabytes of valuable storage space on your Windows PC? Whether you've downloaded the same photo multiple times, backed up files to different folders, or accidentally copied videos, these duplicates silently eat away at your disk space and slow down your computer.
Studies show that the average Windows user has 15-30% of their storage occupied by duplicate files. That means if you have a 500GB hard drive, you could be wasting 75-150GB on redundant copies! Removing these duplicates not only frees up space but also makes your file organization cleaner and your PC faster.
In this comprehensive guide, we'll show you how to find and delete duplicate photos, videos, audio files, and documents on Windows 10 and Windows 11 using a powerful duplicate file cleaner. Let's get started!
What You'll Need
Before we begin, you'll need:
A Windows 10 or Windows 11 PC
A duplicate file finder tool (we'll show you where to download it)
5-10 minutes of your time
Download the Duplicate File Cleaner:
Get it from Microsoft Store
Step-by-Step Guide: How to Clean Duplicate Files on Windows
Step 1: Download and Install the Duplicate Cleaner
First, head to the Microsoft Store and download the duplicate file cleaner. The installation process is straightforward and takes just a few minutes. The software is available for free with basic features, and you can upgrade to the PRO version for advanced capabilities like AI-powered similar image detection and bulk operations.
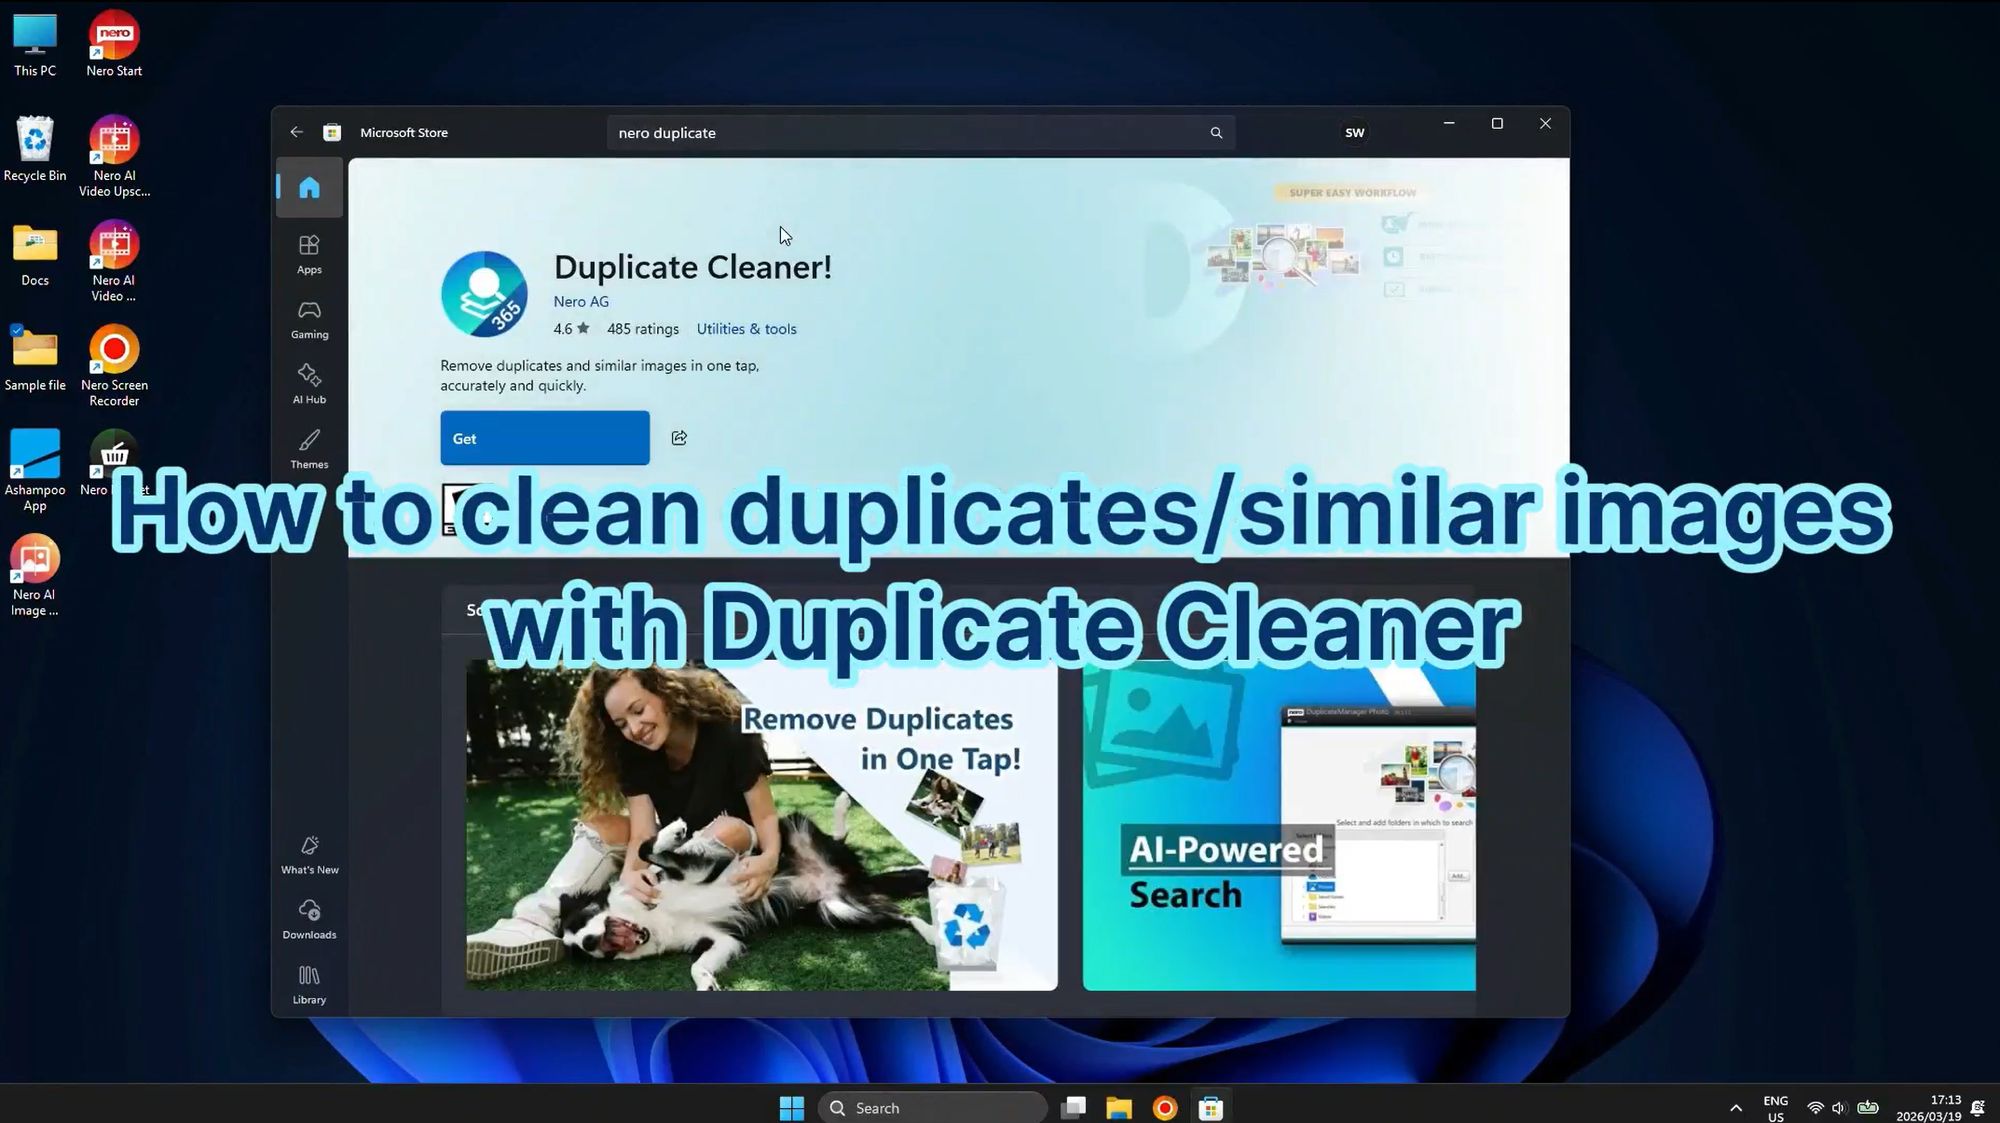
Once installed, launch the application from your Start menu or desktop shortcut.
Step 2: Choose Folders to Scan
When you open the duplicate manager, you'll see the main interface with the option to "Choose a folder to clean." This is where you select which drives or folders you want to scan for duplicate files.
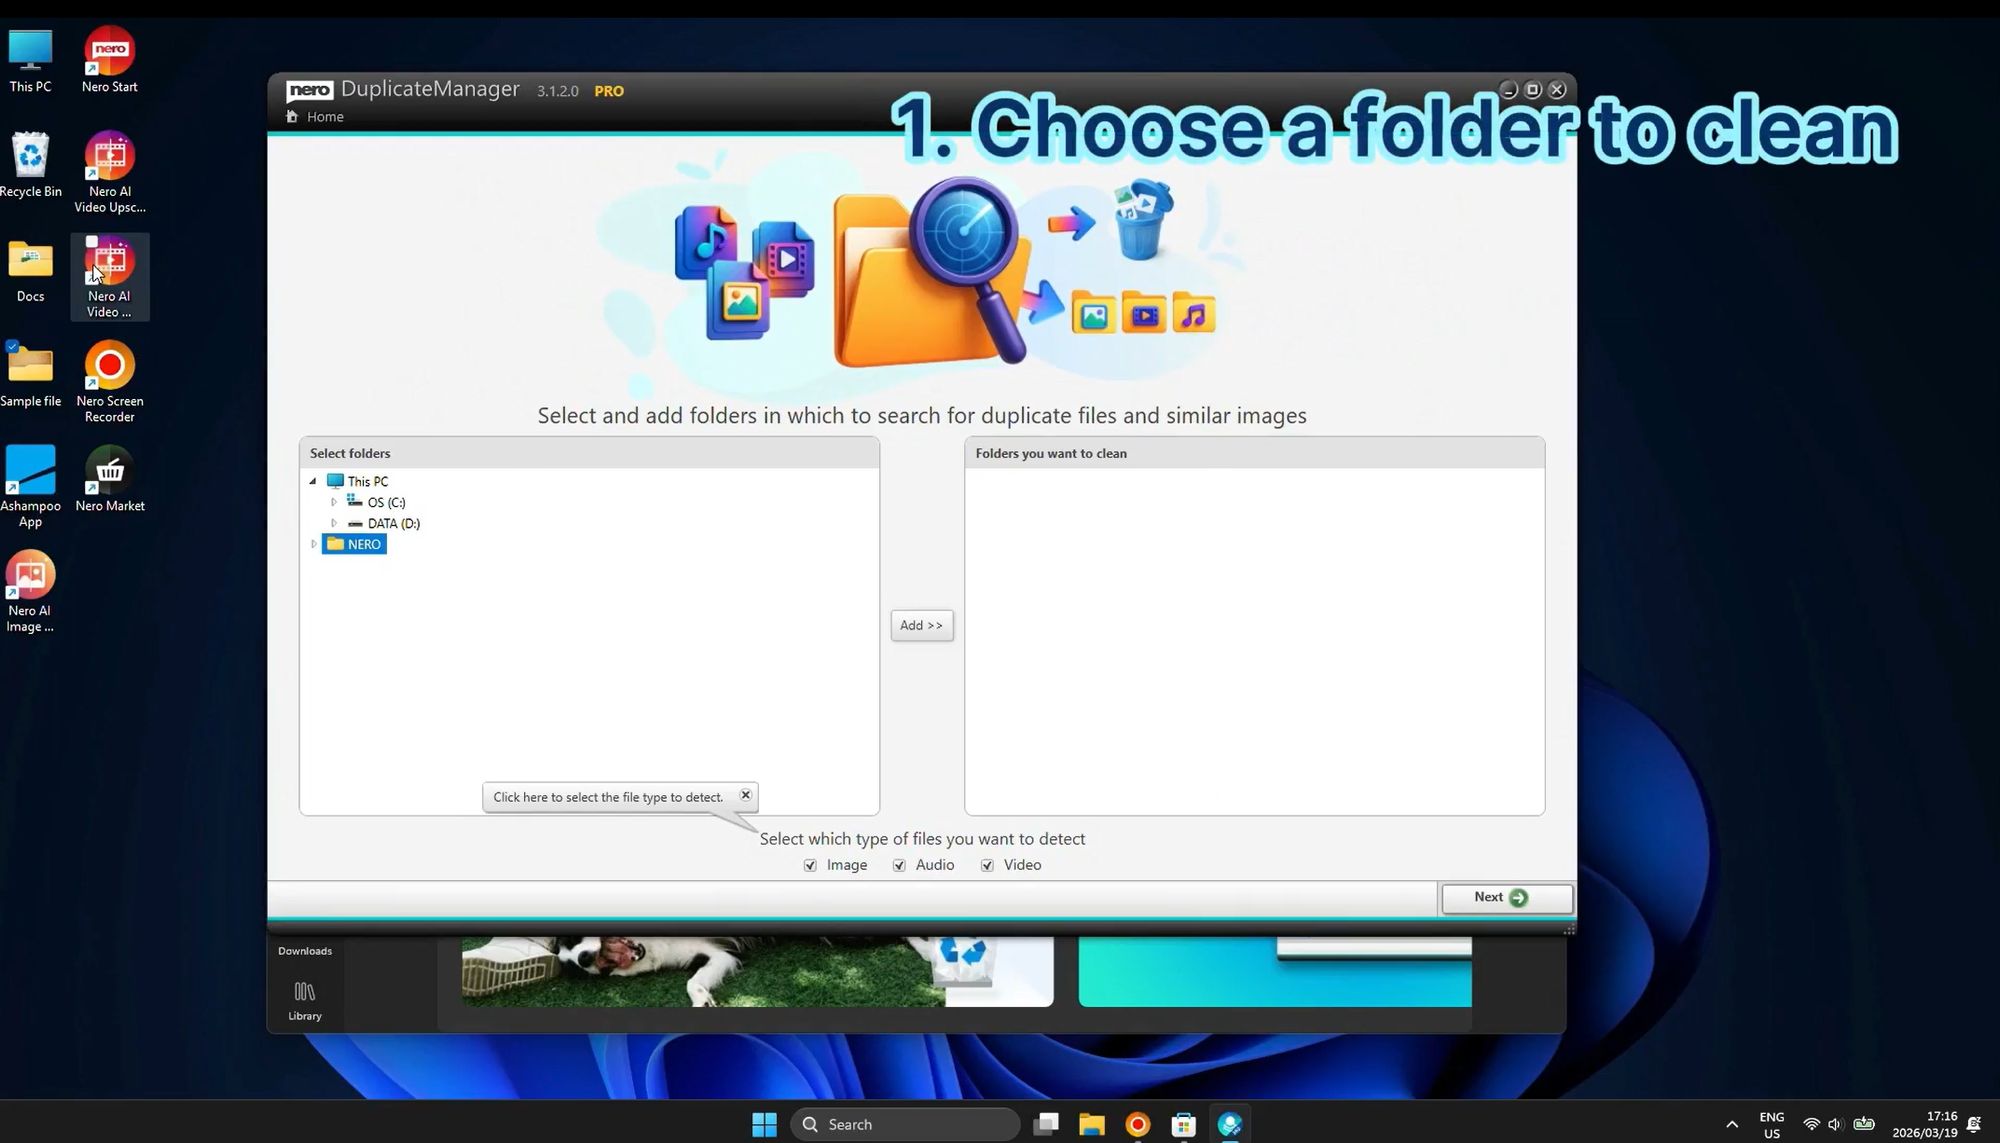
Pro Tip: Instead of scanning your entire C: drive (which can take hours), focus on specific folders where duplicates are most likely to accumulate:
Downloads folder - where you repeatedly save files from the internet
Pictures/Photos folder - where duplicate images pile up
Videos folder - where large duplicate video files waste space
Documents folder - where you might have multiple versions of the same file
You can add multiple folders by clicking the "Add Folder" button or dragging folders directly into the interface.
Step 3: Select File Types to Detect
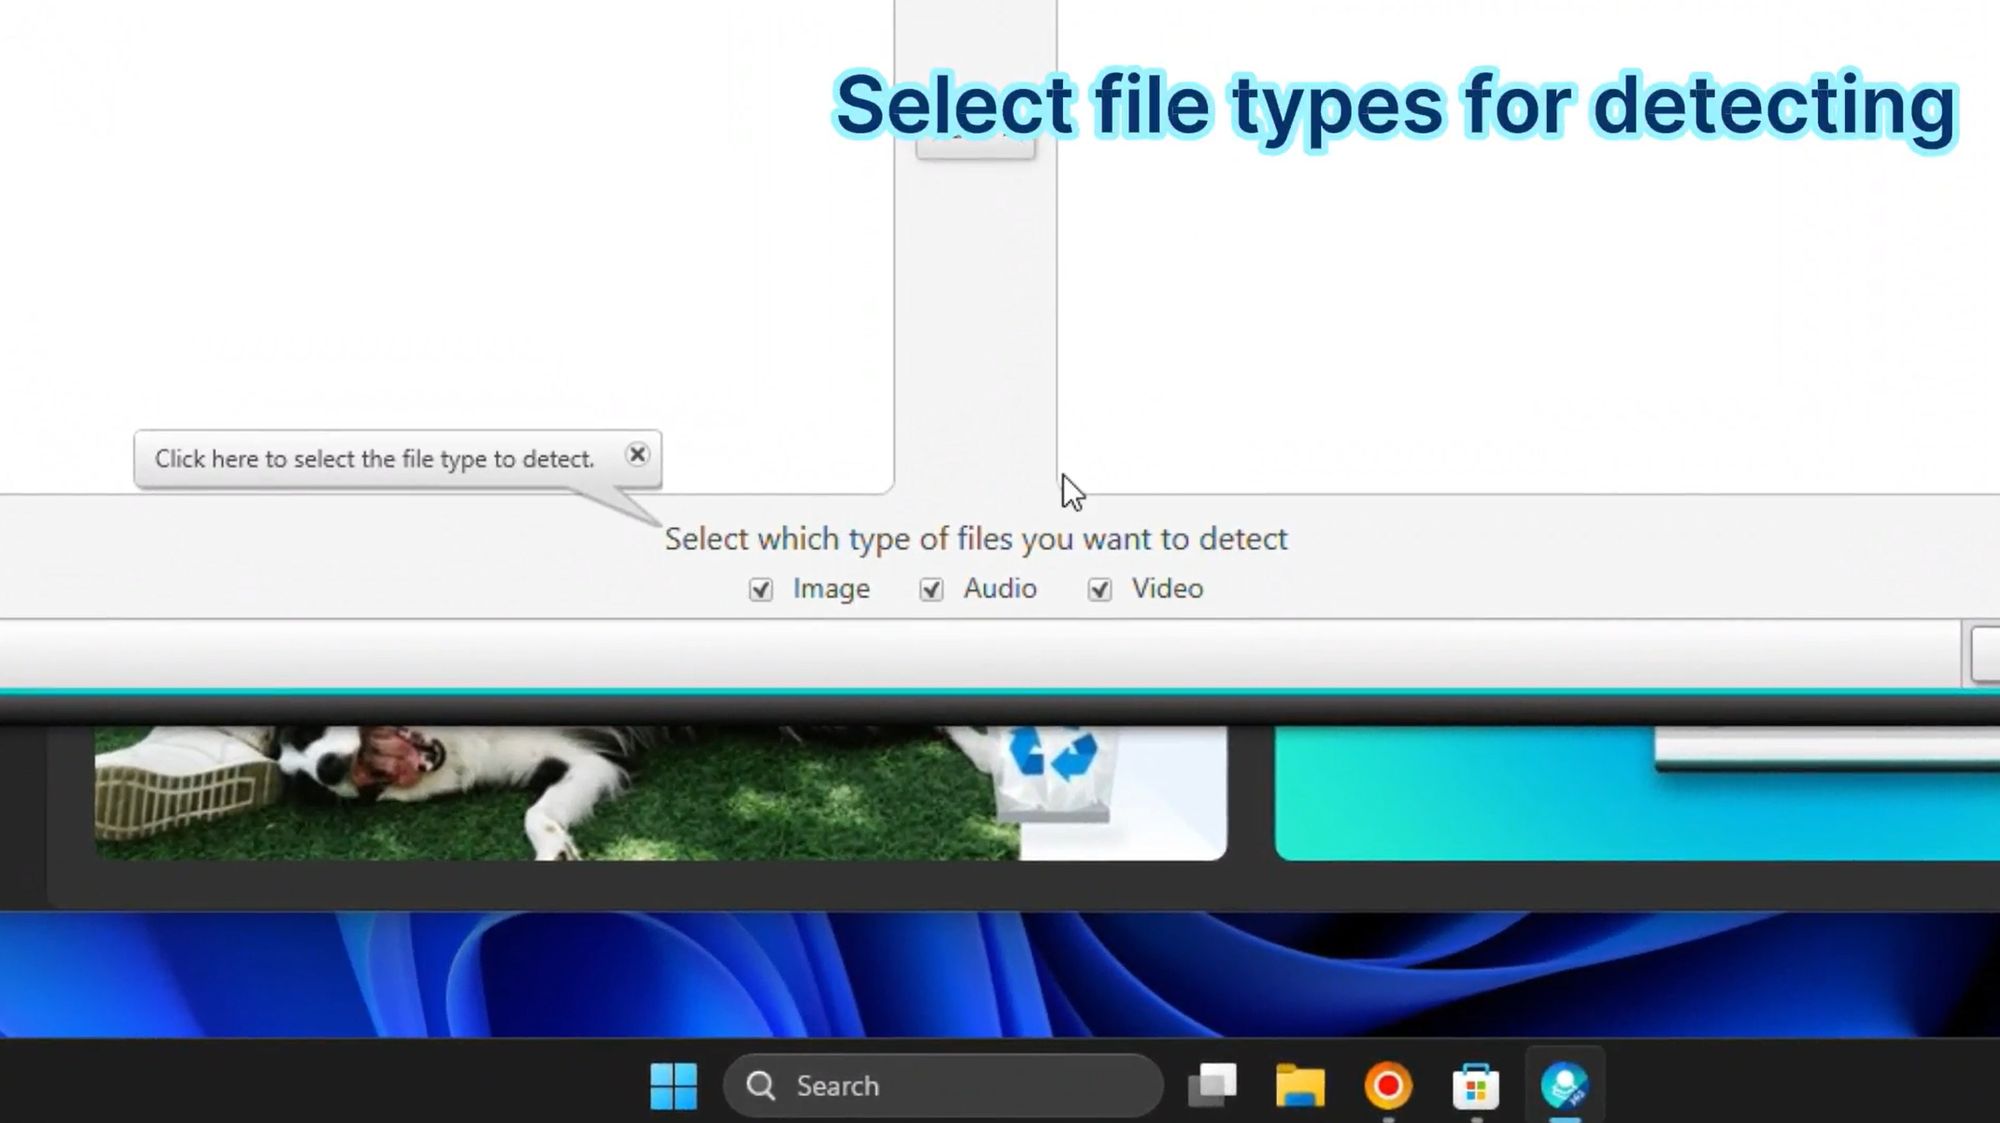
Next, you need to tell the software what types of files you want to scan. The duplicate cleaner supports three main categories:
Images - JPG, PNG, and other photo formats
Audio - MP3 and other music files
Video - MP4 and other video formats
Simply check the boxes for the file types you want to scan. If you're looking to free up the most space, start with videos since they typically consume the most storage, followed by images and audio files.
Click "Next" or "Start Scan" to begin the detection process. Depending on the size of your folders and the number of files, this can take anywhere from a few seconds to several minutes.
Step 4: Review Detected Duplicate Files by Type
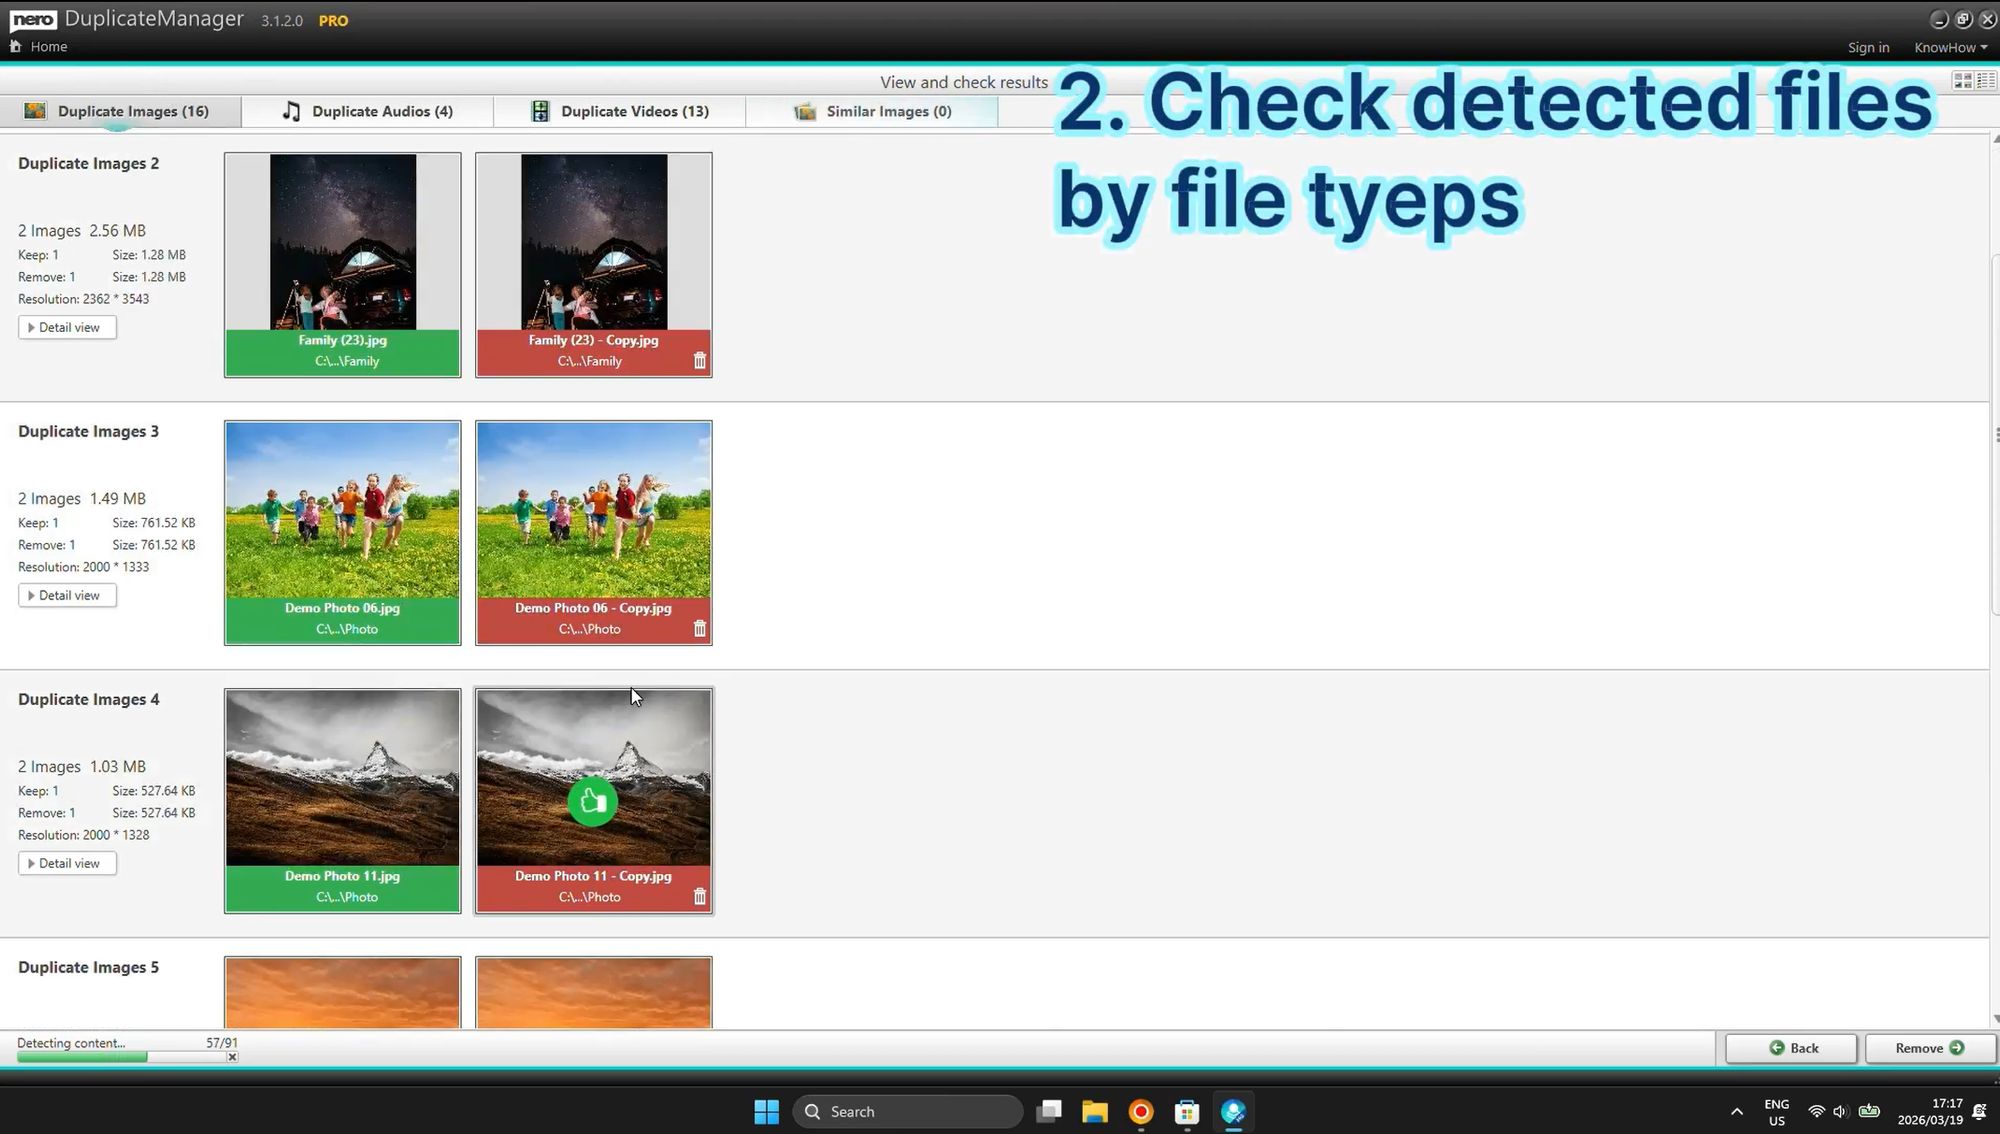
Once the scan completes, the software will display all detected duplicates organized by file type. You'll see separate tabs for:
Duplicate Images - showing how many duplicate photos were found
Duplicate Audios - listing duplicate music and audio files
Duplicate Videos - displaying duplicate video files
Similar Images - AI-powered detection of visually similar photos (even if they're not exact copies)
Each duplicate group shows you:
File names and locations
File sizes
Creation and modification dates
Preview thumbnails (for images and videos)
This organized view makes it easy to understand exactly what duplicates exist on your system and how much space they're consuming. The software uses byte-to-byte comparison to ensure accurate detection, so you won't accidentally delete files that just have similar names.
Step 5: Switch Between Different View Modes
The duplicate cleaner offers multiple view modes to help you organize and review your duplicates more effectively:

Click the view toggle icon in the top-right corner to switch between:
List view - shows files in a detailed list with full paths
Grid view - displays thumbnails for easy visual comparison
Location view - organizes duplicates by where they're stored on your computer
Switching views helps you make better decisions about which files to keep and which to delete, especially when dealing with photos where visual comparison is important.
Step 6: View Duplicate Videos in Detail
If you selected video files in your scan, you can now review all duplicate videos found on your system:
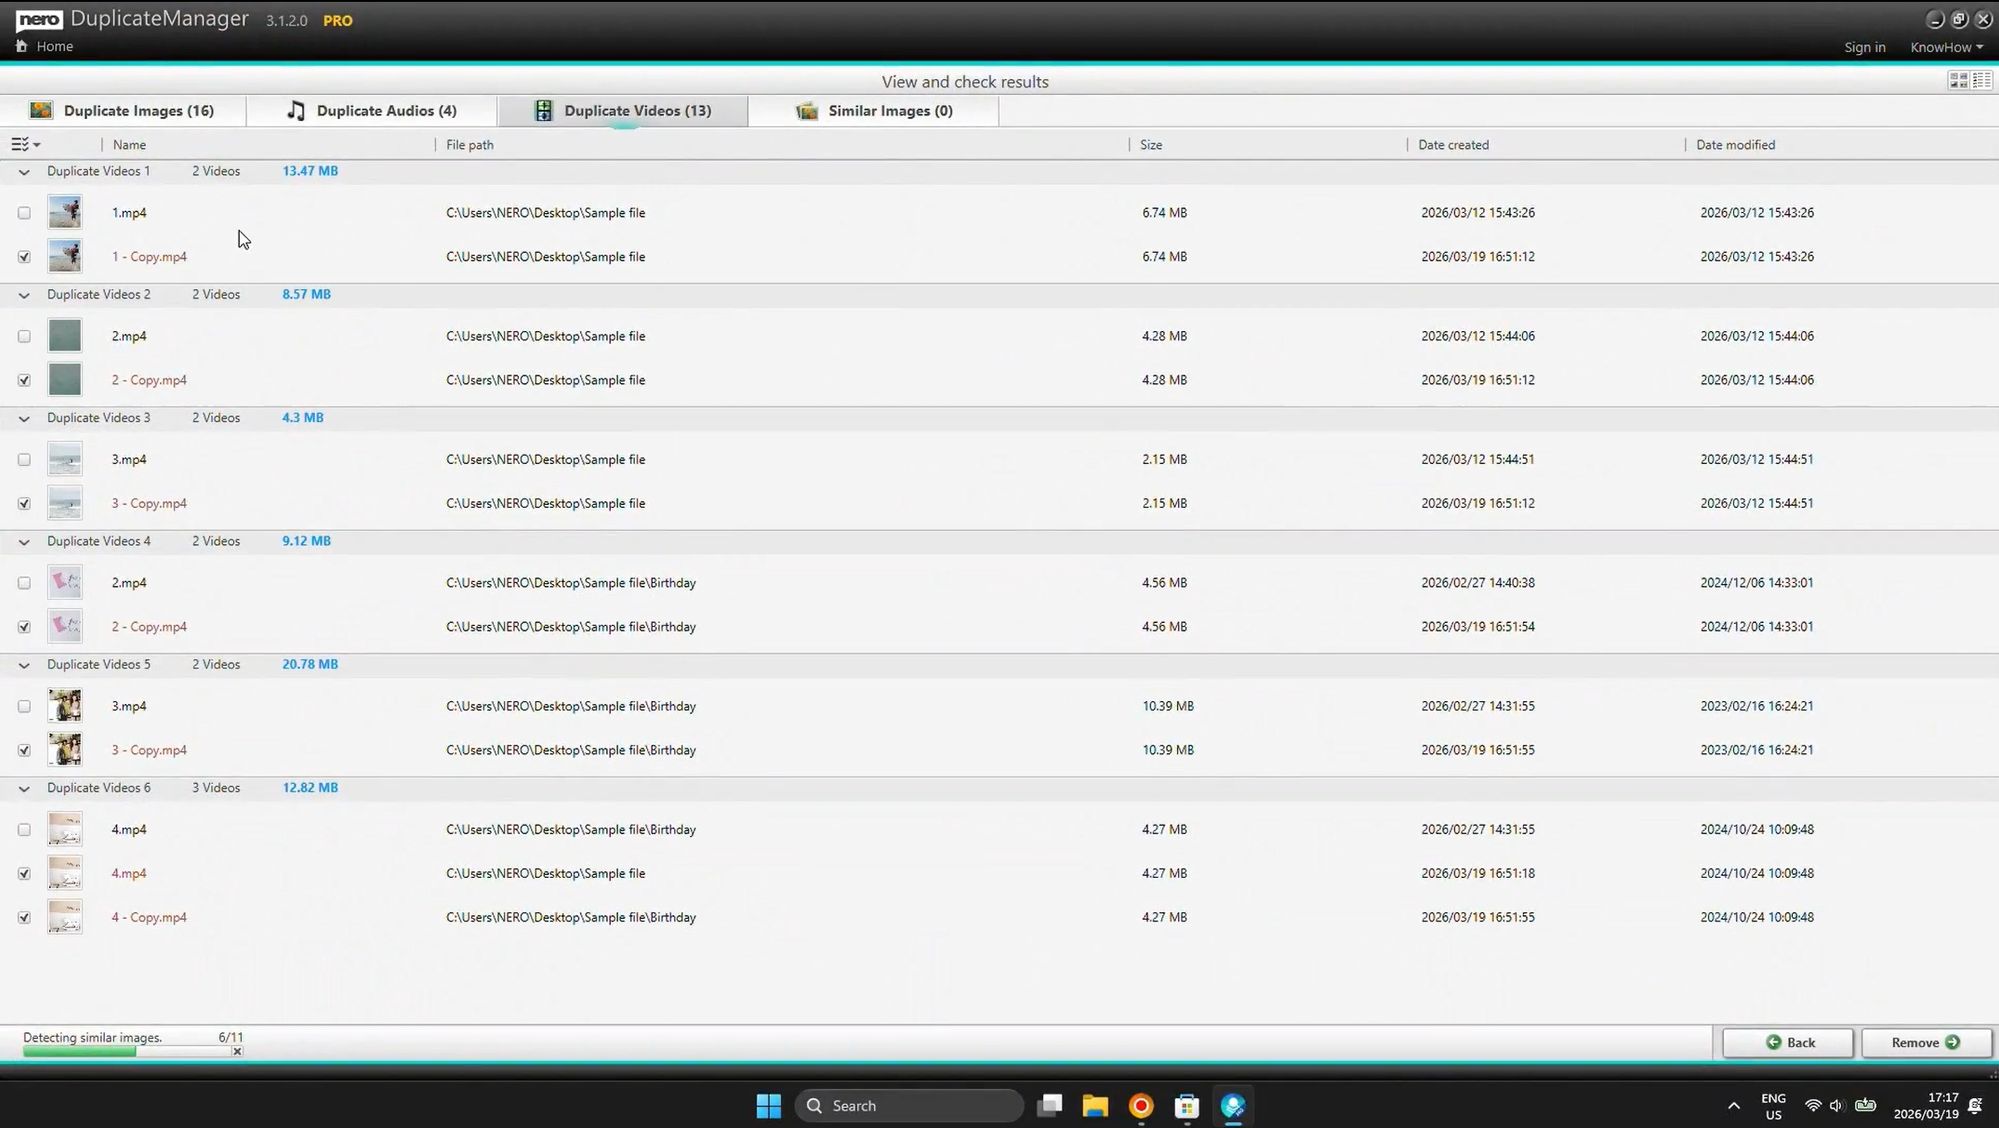
The video duplicates view shows:
Original video files and their copies (labeled as "Copy")
Full file paths showing exactly where each duplicate is stored
File sizes (videos can be several gigabytes each!)
Creation and modification dates
Important: Video files are typically the biggest space hogs on your PC. A single duplicate 4K video can consume 5-10GB of storage. By removing these duplicates, you can often free up 20-50GB or more in just a few clicks!
Step 7: Use Quick Selection Tools
Now comes the decision-making part: which duplicates should you keep, and which should you delete? The software provides powerful quick selection tools to make this process fast and easy:
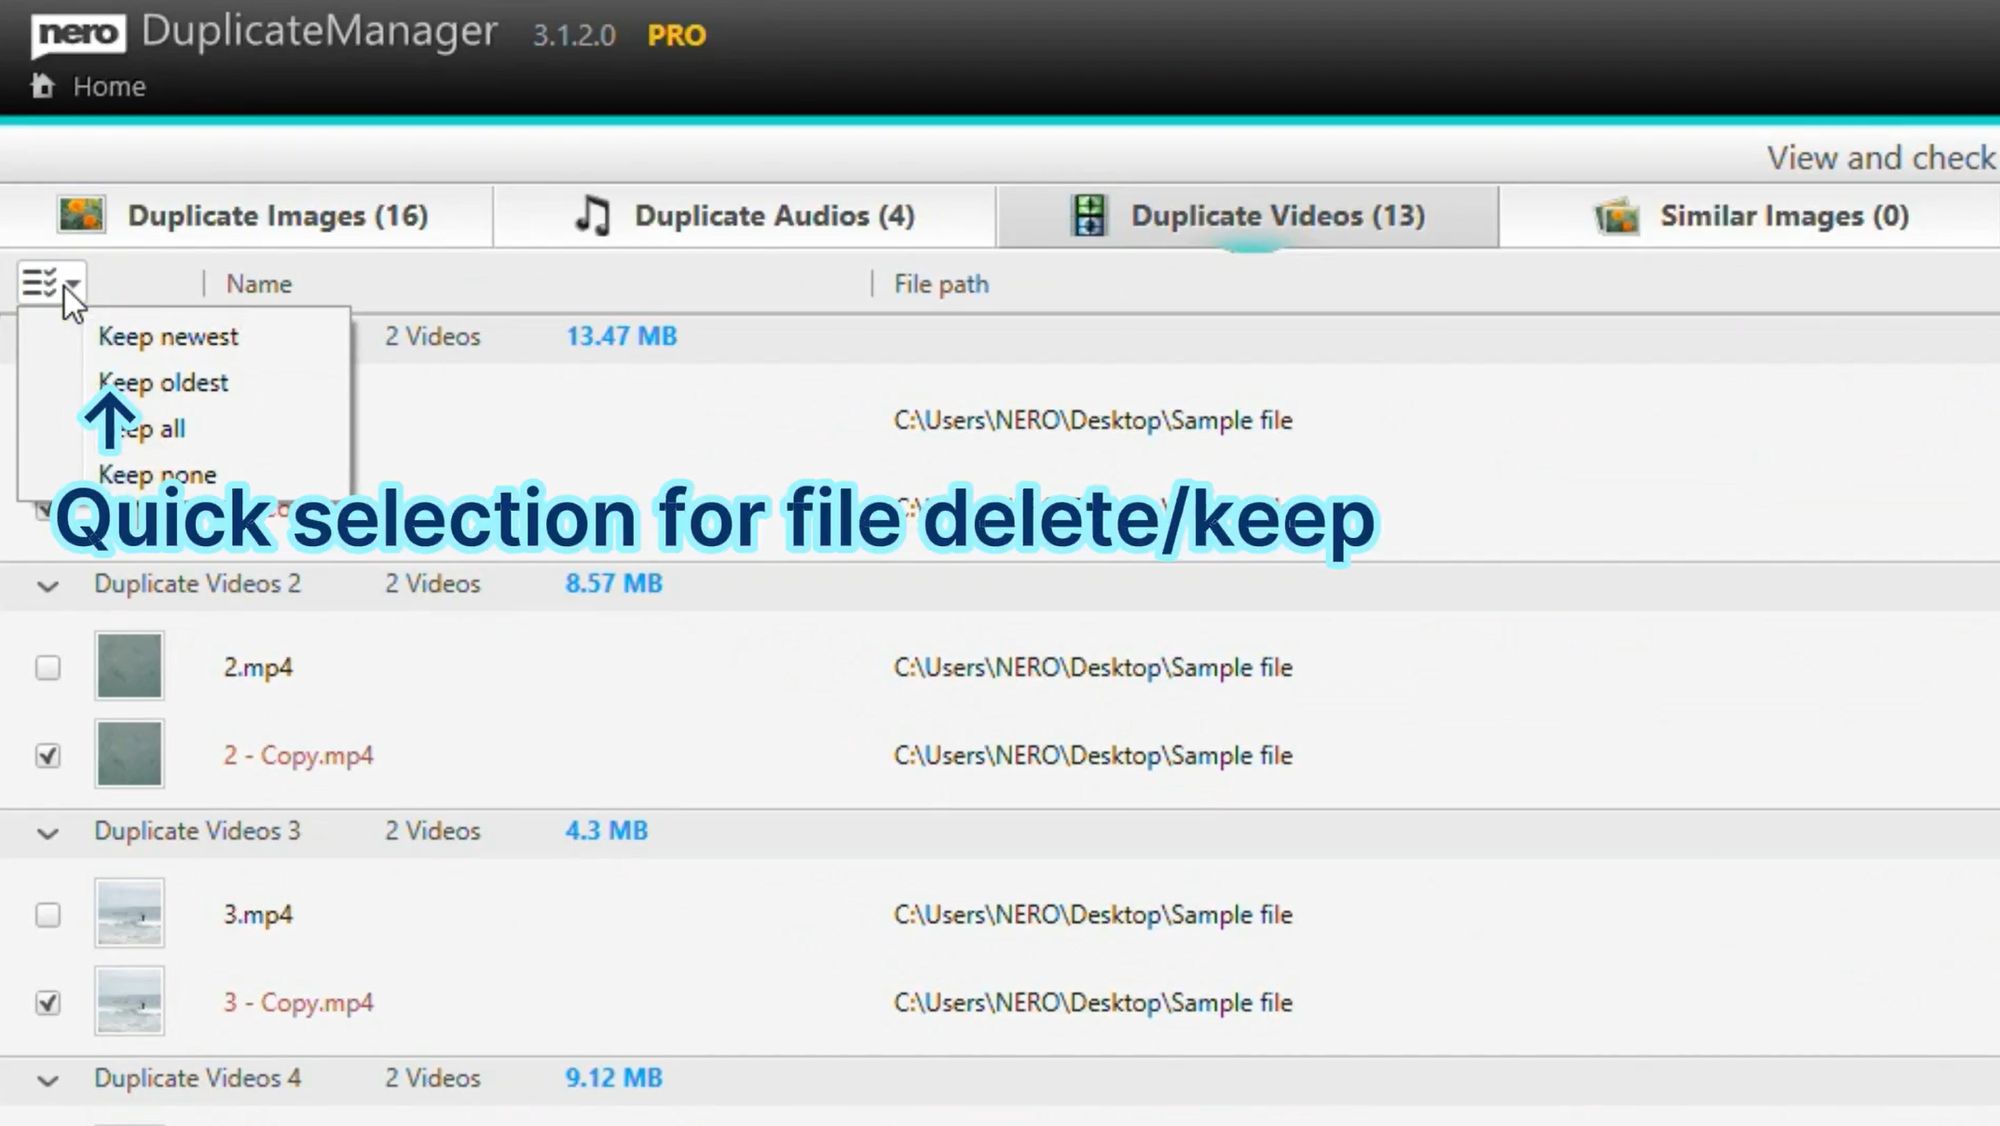
Automatic Selection Options:
Keep newest - Automatically selects the most recently modified file to keep
Keep oldest - Keeps the original file and marks copies for deletion
Keep all - Unselects all files (useful if you change your mind)
Keep none - Marks all files for deletion (use with caution!)
Best Practice: For most users, "Keep newest" is the safest option because it preserves the most recent version of your files, which is likely the one you've been working with. However, if you want to keep the original and delete later copies, use "Keep oldest" instead.
You can also manually select or deselect individual files by clicking the checkboxes next to each file. This gives you complete control over what gets deleted.
Step 8: Review Similar Images and Delete or Keep
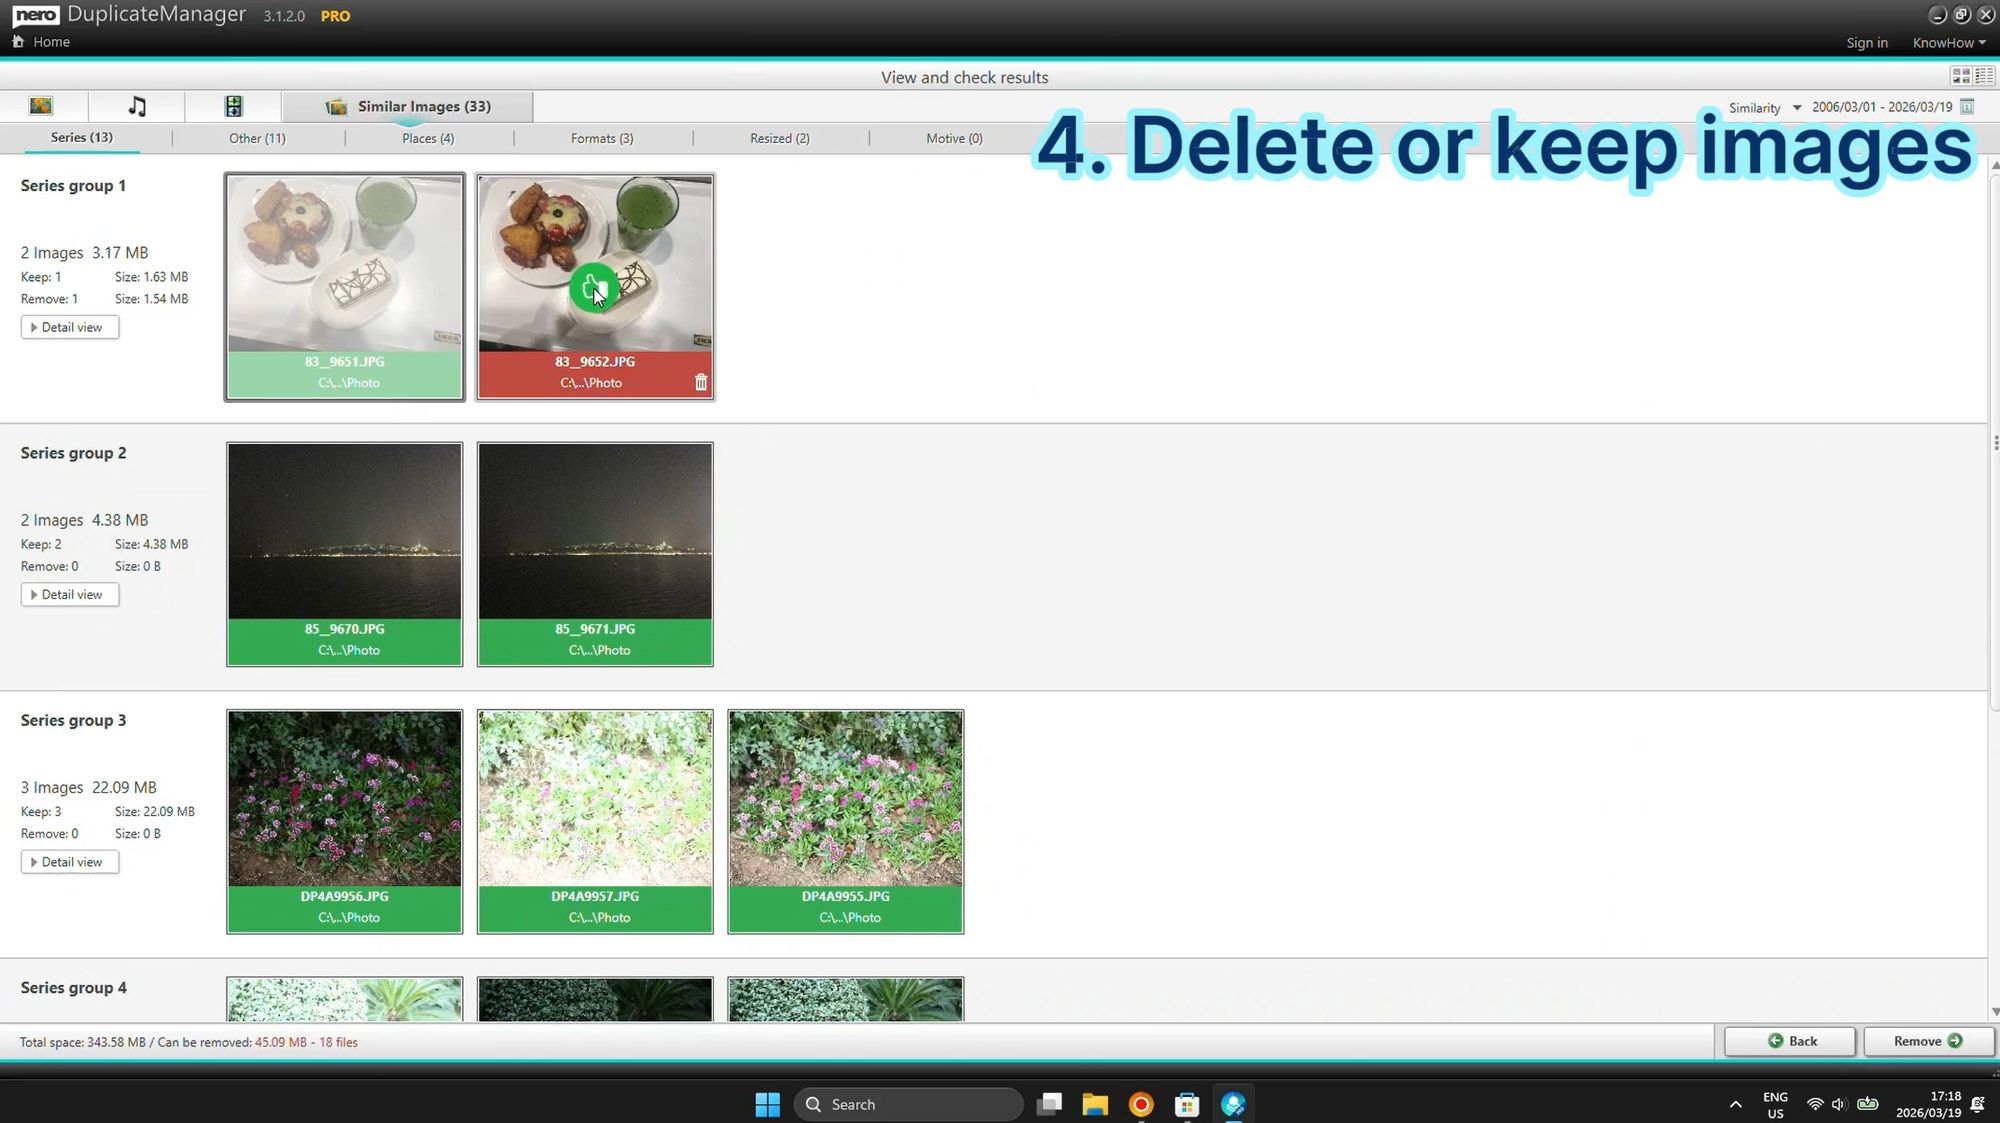
One of the most powerful features is the AI-powered similar image detection. This goes beyond finding exact duplicates and identifies photos that are visually similar, even if they've been:
Resized or cropped
Edited or retouched
Saved in different formats (JPG vs PNG)
Rotated or flipped
Part of a photo series (burst shots)
The similar images are organized into groups:
Series - photos taken in quick succession (like burst mode on your phone)
Formats - same image saved in different file formats
Resized - different sized versions of the same photo
Other - other types of similar images
For each group, you can preview the images side-by-side and decide which version to keep. This is especially useful for photographers or anyone who takes lots of photos, as it helps you keep only the best shot from a series and delete the rest.
Step 9: Organize Images by Location
If your photos have GPS metadata (geolocation data), the duplicate cleaner can organize them by where they were taken:
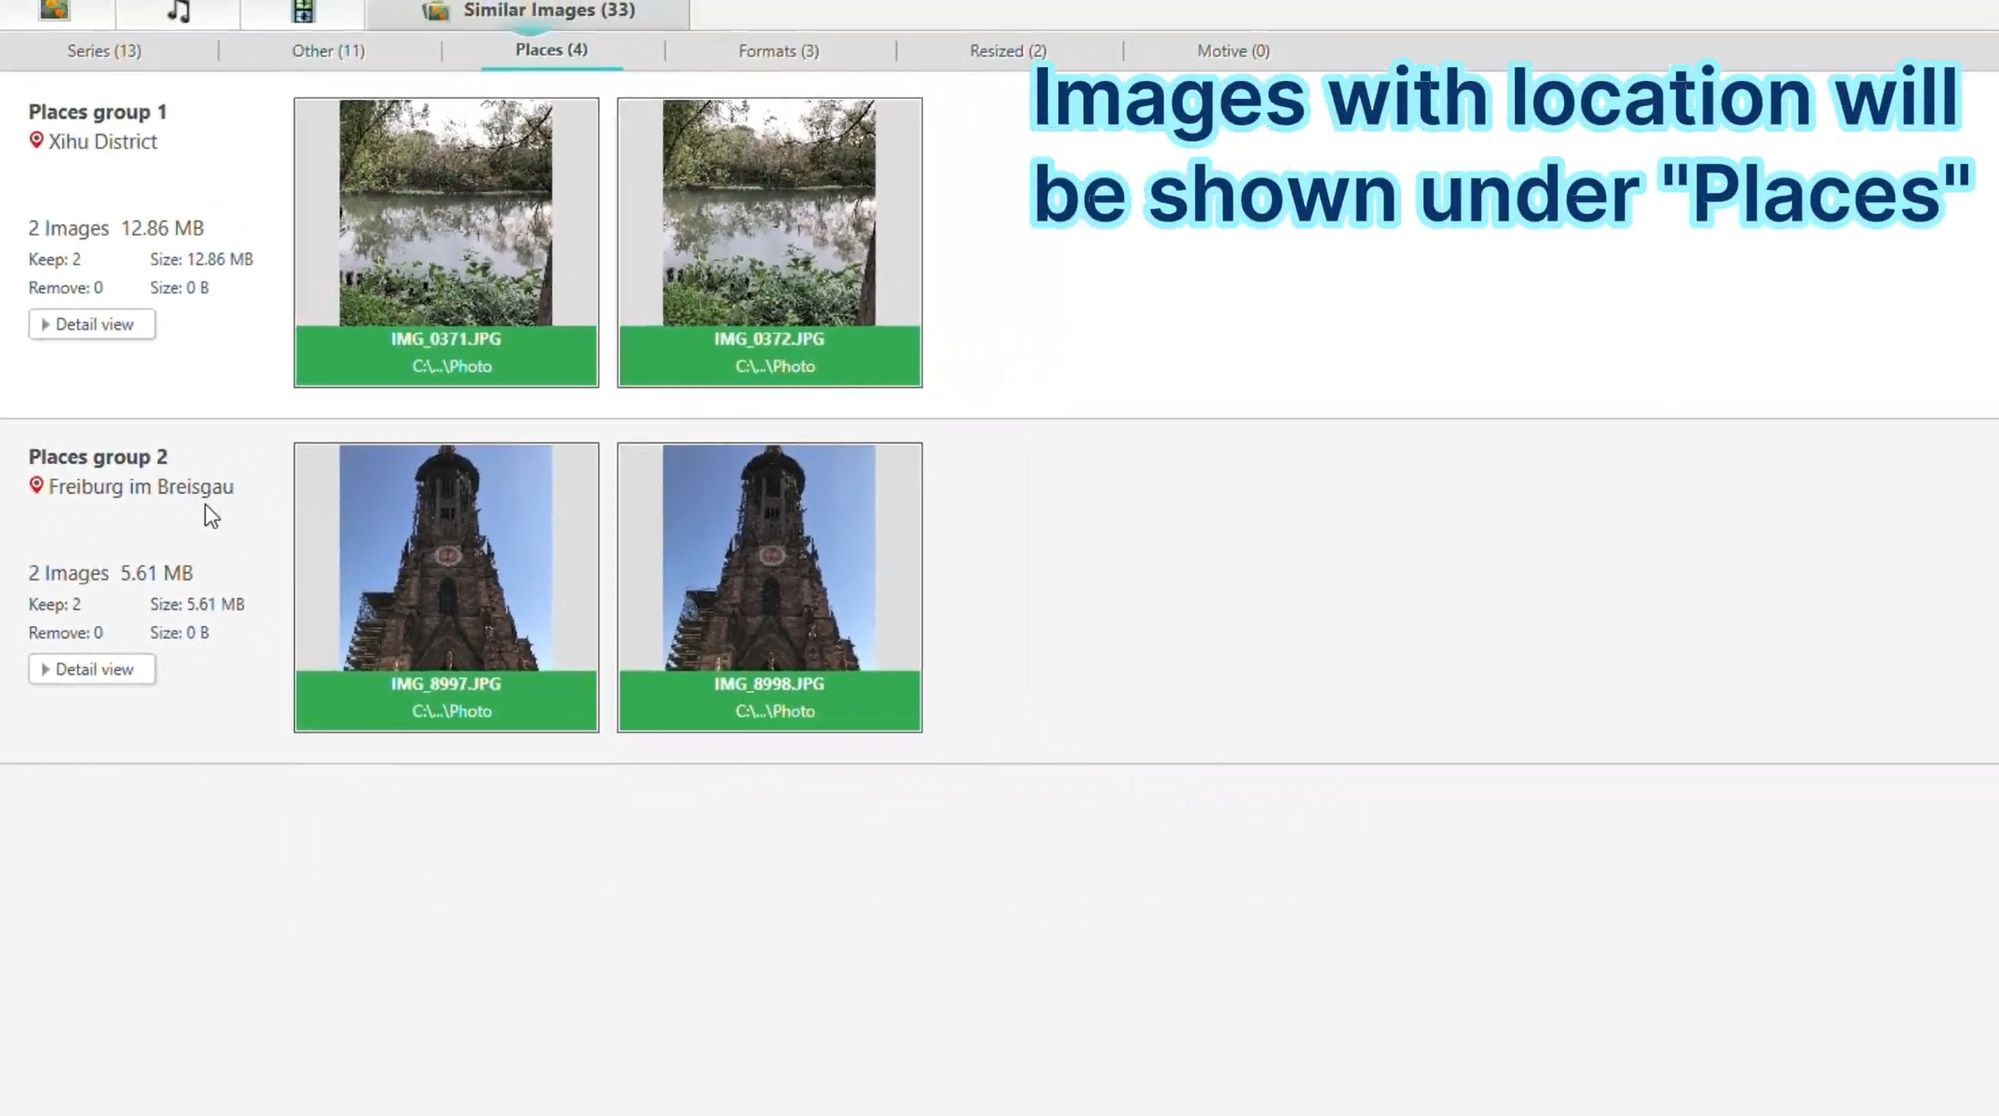
The Places tab groups your duplicate photos by location, such as:
City or district names (e.g., "Xihu District", "Freiburg im Breisgau")
Specific landmarks or addresses
Countries or regions
Each location group shows:
Number of duplicate images
Total file size
Individual file names and paths
Options to keep or remove files
This location-based organization is incredibly helpful if you've traveled and taken many photos in the same places. You can quickly identify and remove duplicate vacation photos, keeping only the best memories while freeing up valuable storage space.
Step 10: Click "Remove" to Delete Selected Duplicates
Once you've reviewed all duplicates and made your selections, it's time to actually delete them:

Click the "Remove" button (usually located at the bottom-right of the interface). The software will prompt you to confirm the deletion.
Safety Feature: By default, deleted files are moved to the Recycle Bin, not permanently deleted. This means if you accidentally delete something important, you can easily restore it from the Recycle Bin. This is a crucial safety feature that prevents data loss.
The deletion process typically takes just a few seconds, even for hundreds of files. You'll see a progress indicator showing how many files have been removed.
Step 11: View Statistics and See How Much Space You Saved
Congratulations! You've successfully cleaned up your duplicate files. Now let's see the results:
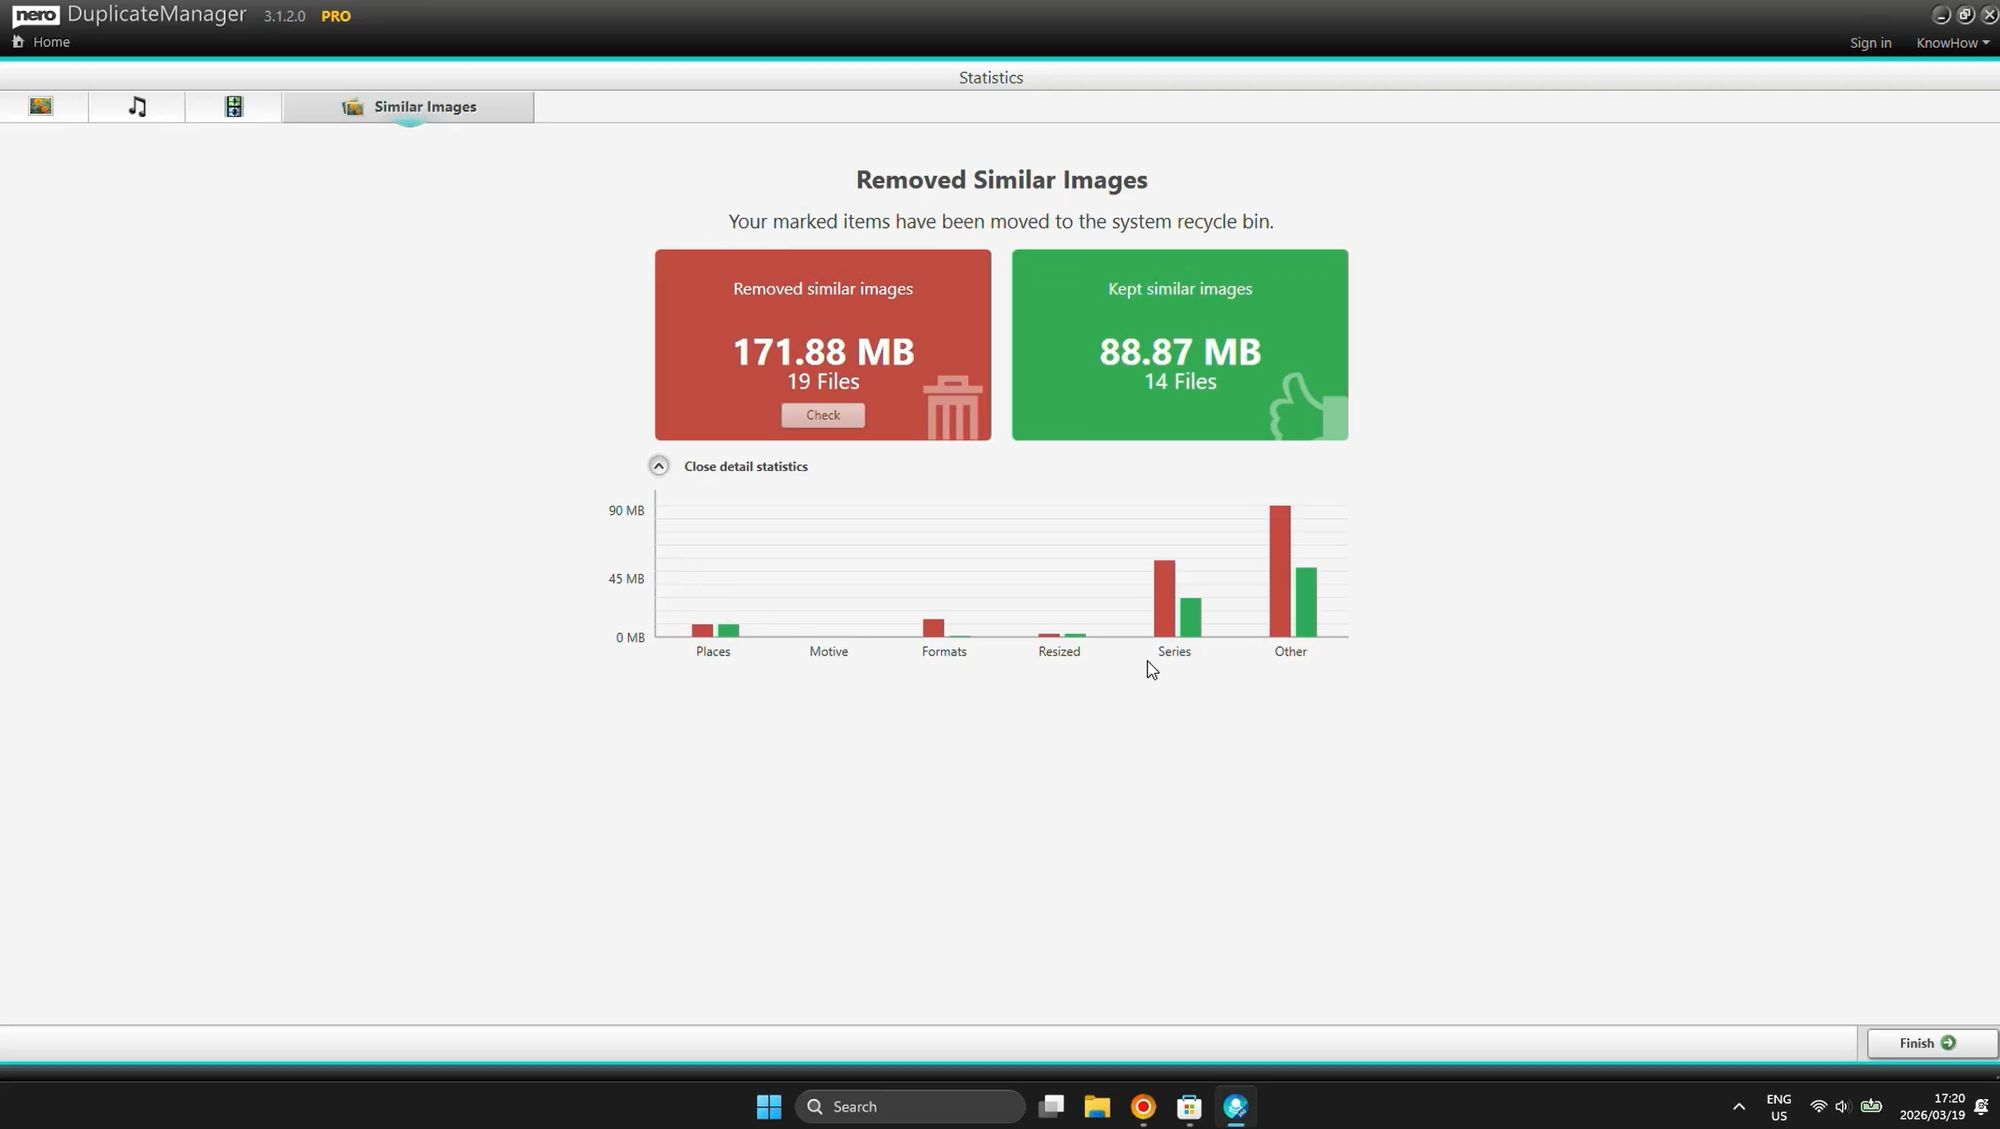
The statistics screen shows you:
Total space freed - how many MB or GB you've recovered (in this example, 171.88 MB!)
Number of files removed - how many duplicate files were deleted (19 files in this case)
Files kept - how many original files were preserved (14 files, 88.87 MB)
Breakdown by category - showing which types of duplicates were found:
Places (location-based duplicates)
Motives (similar subject matter)
Formats (different file formats)
Resized (different sizes)
Series (photo bursts)
Other
This visual summary helps you understand exactly what was cleaned and validates that the process worked correctly. Many users are surprised to discover they've freed up several gigabytes of storage space, especially if they've never cleaned duplicates before!
Frequently Asked Questions
Q: Is it safe to delete duplicate files?
A: Yes, as long as you're deleting duplicates from your personal folders (Documents, Pictures, Videos, Downloads). Avoid scanning system folders like Windows, Program Files, or System32, as some system files are intentionally duplicated for stability.
Q: Will deleted files be permanently removed?
A: No, by default they go to the Recycle Bin, so you can restore them if needed.
Q: How much space can I expect to free up?
A: This varies widely, but most users free up 5-50GB, depending on how long duplicates have been accumulating. Users with large photo or video collections often recover 100GB or more.
Q: Can I scan external hard drives or USB drives?
A: Yes! Simply add those drives to your scan folders.
Q: Does this work on Windows 11?
A: Absolutely! The duplicate cleaner is fully compatible with both Windows 10 and Windows 11.
Conclusion
Duplicate files are a hidden problem that affects nearly every Windows user. By following this step-by-step guide, you can quickly identify and remove duplicate photos, videos, and documents, freeing up valuable storage space and improving your PC's performance.
The entire process takes just 5-10 minutes and can recover gigabytes of wasted space. Whether you're running out of disk space, trying to organize your media library, or just want a cleaner PC, removing duplicates is one of the easiest and most effective maintenance tasks you can perform.
Ready to get started?
Download the Free Duplicate Cleaner
Upgrade to PRO for Advanced Features
Start cleaning your Windows PC today and enjoy the extra storage space!


