Video Upscaler
Quick Start
Use this guide to import, upscale, and enhance your first video.
Import Your File
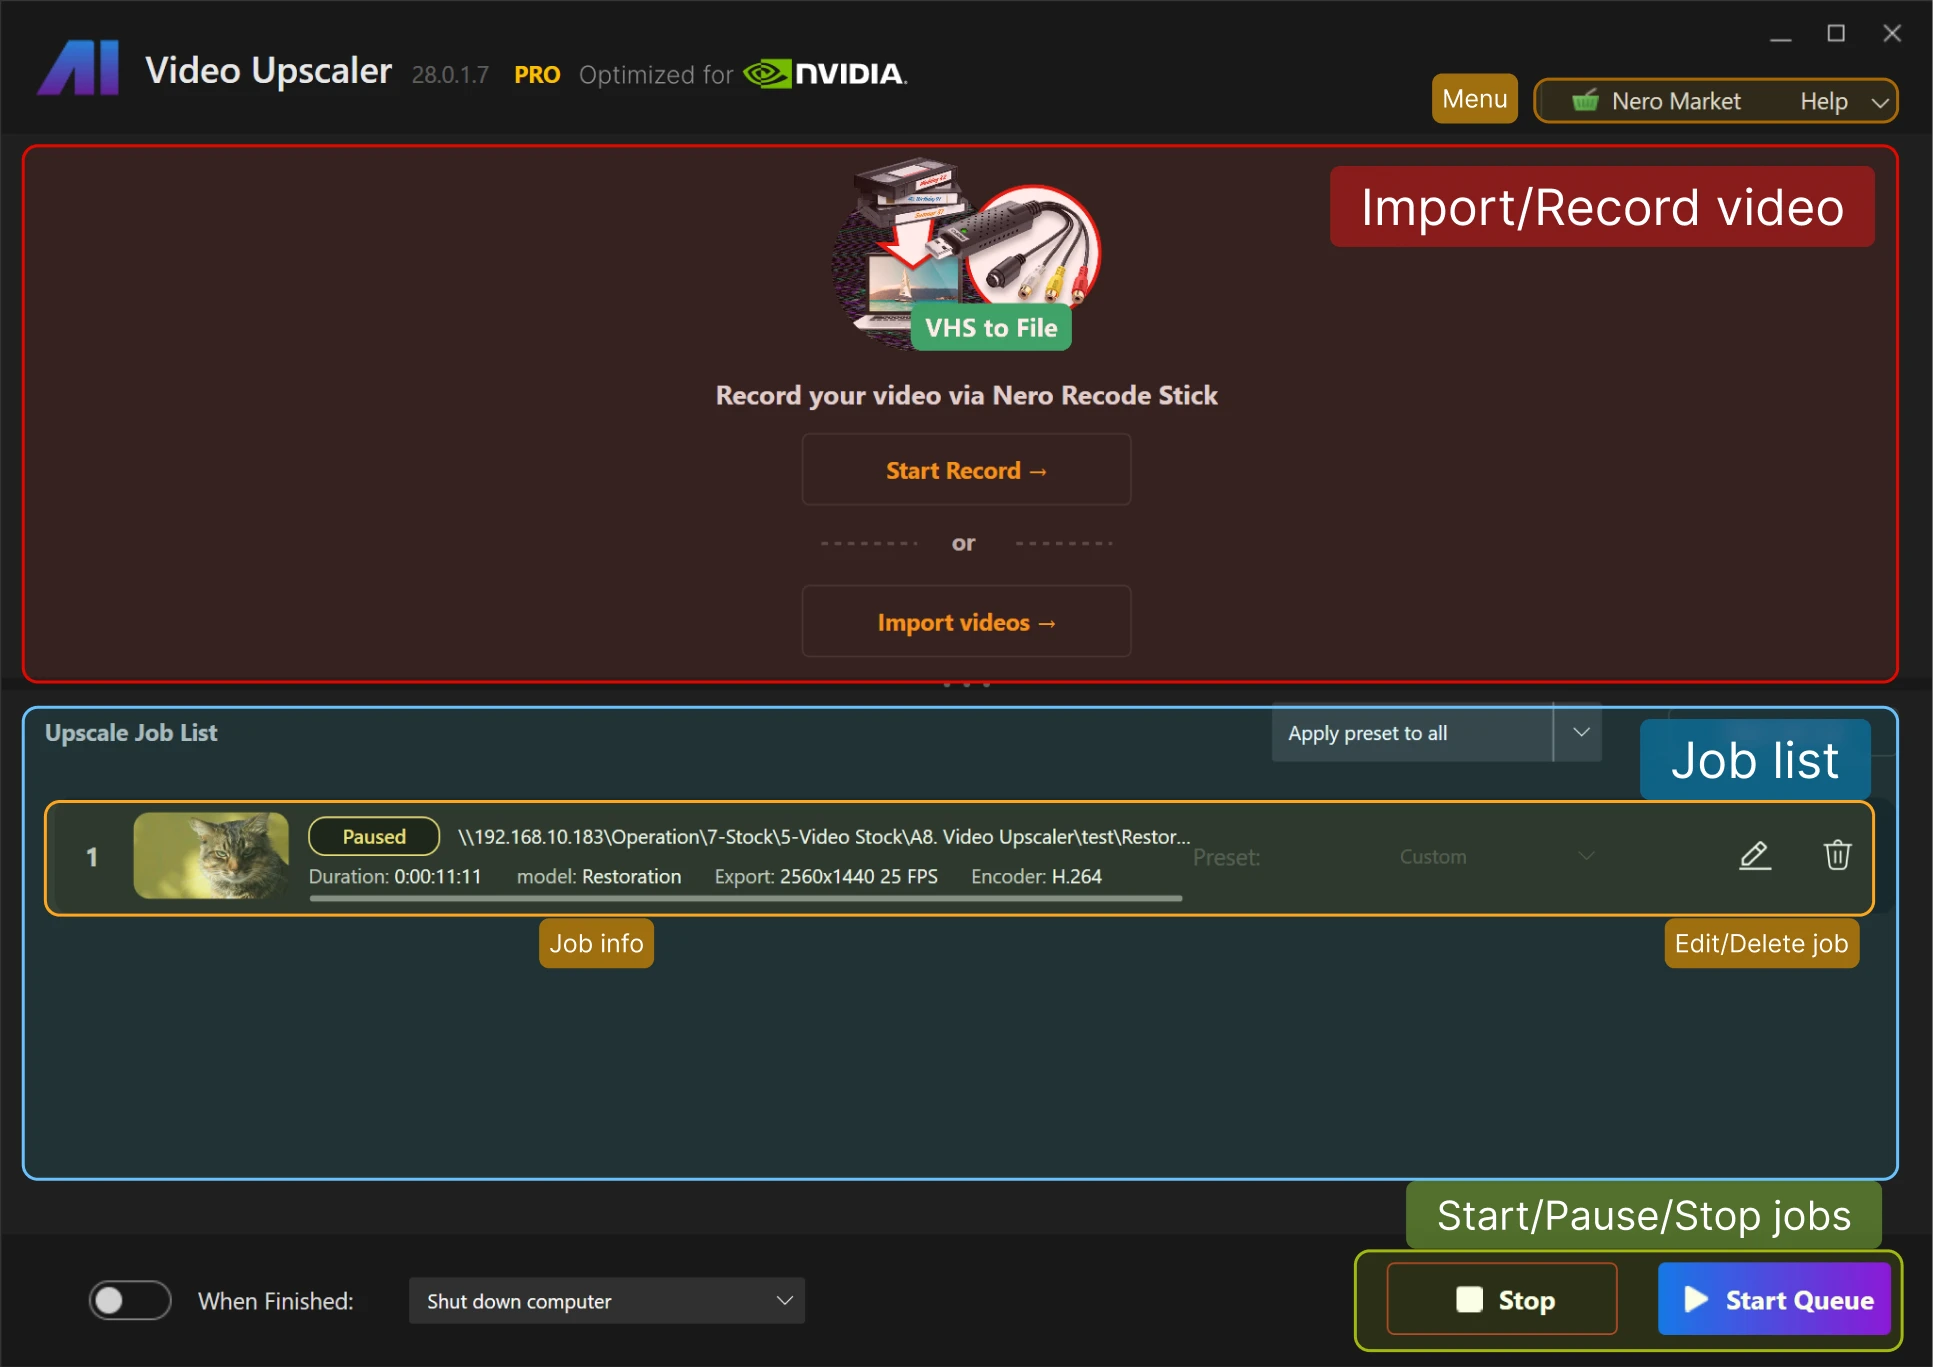
There are two ways to bring files into Nero AI Video Upscaler
Start record: record a video by Nero Recode Stick or other video input sources like camera.
Import video: open a video file to import to the application. Drag and drop a video file to the application is also supported. For multiple video files, you can drag and drop the folder containing the video files or open multiple files.
Nero AI Video Upscaler supports importing various video formats, including:
3GP (3g2, .3gp, .3gp2, .3gpp)
Advanced Streaming Format (.asf, .wma, .wmv)
AVI (.avi)
MPEG-4 (.m4a, .m4v, .mov, .mp4)
Matroska Video (.mkv)
DV Video
H.264
H.263
MJPEG
MPEG-4 Part-2/v1/v2/v3
Windows Media Video (WMV)
HEVC*
AV1*
VP9*
MPEG-2*
*Requires installing additional Video Extensions from Microsoft Store.
Nero AI Video Upscaler Workspace Overview
(Note: Some UI elements or features in this guide may differ from the current product version due to continuous updates across distribution channels.)
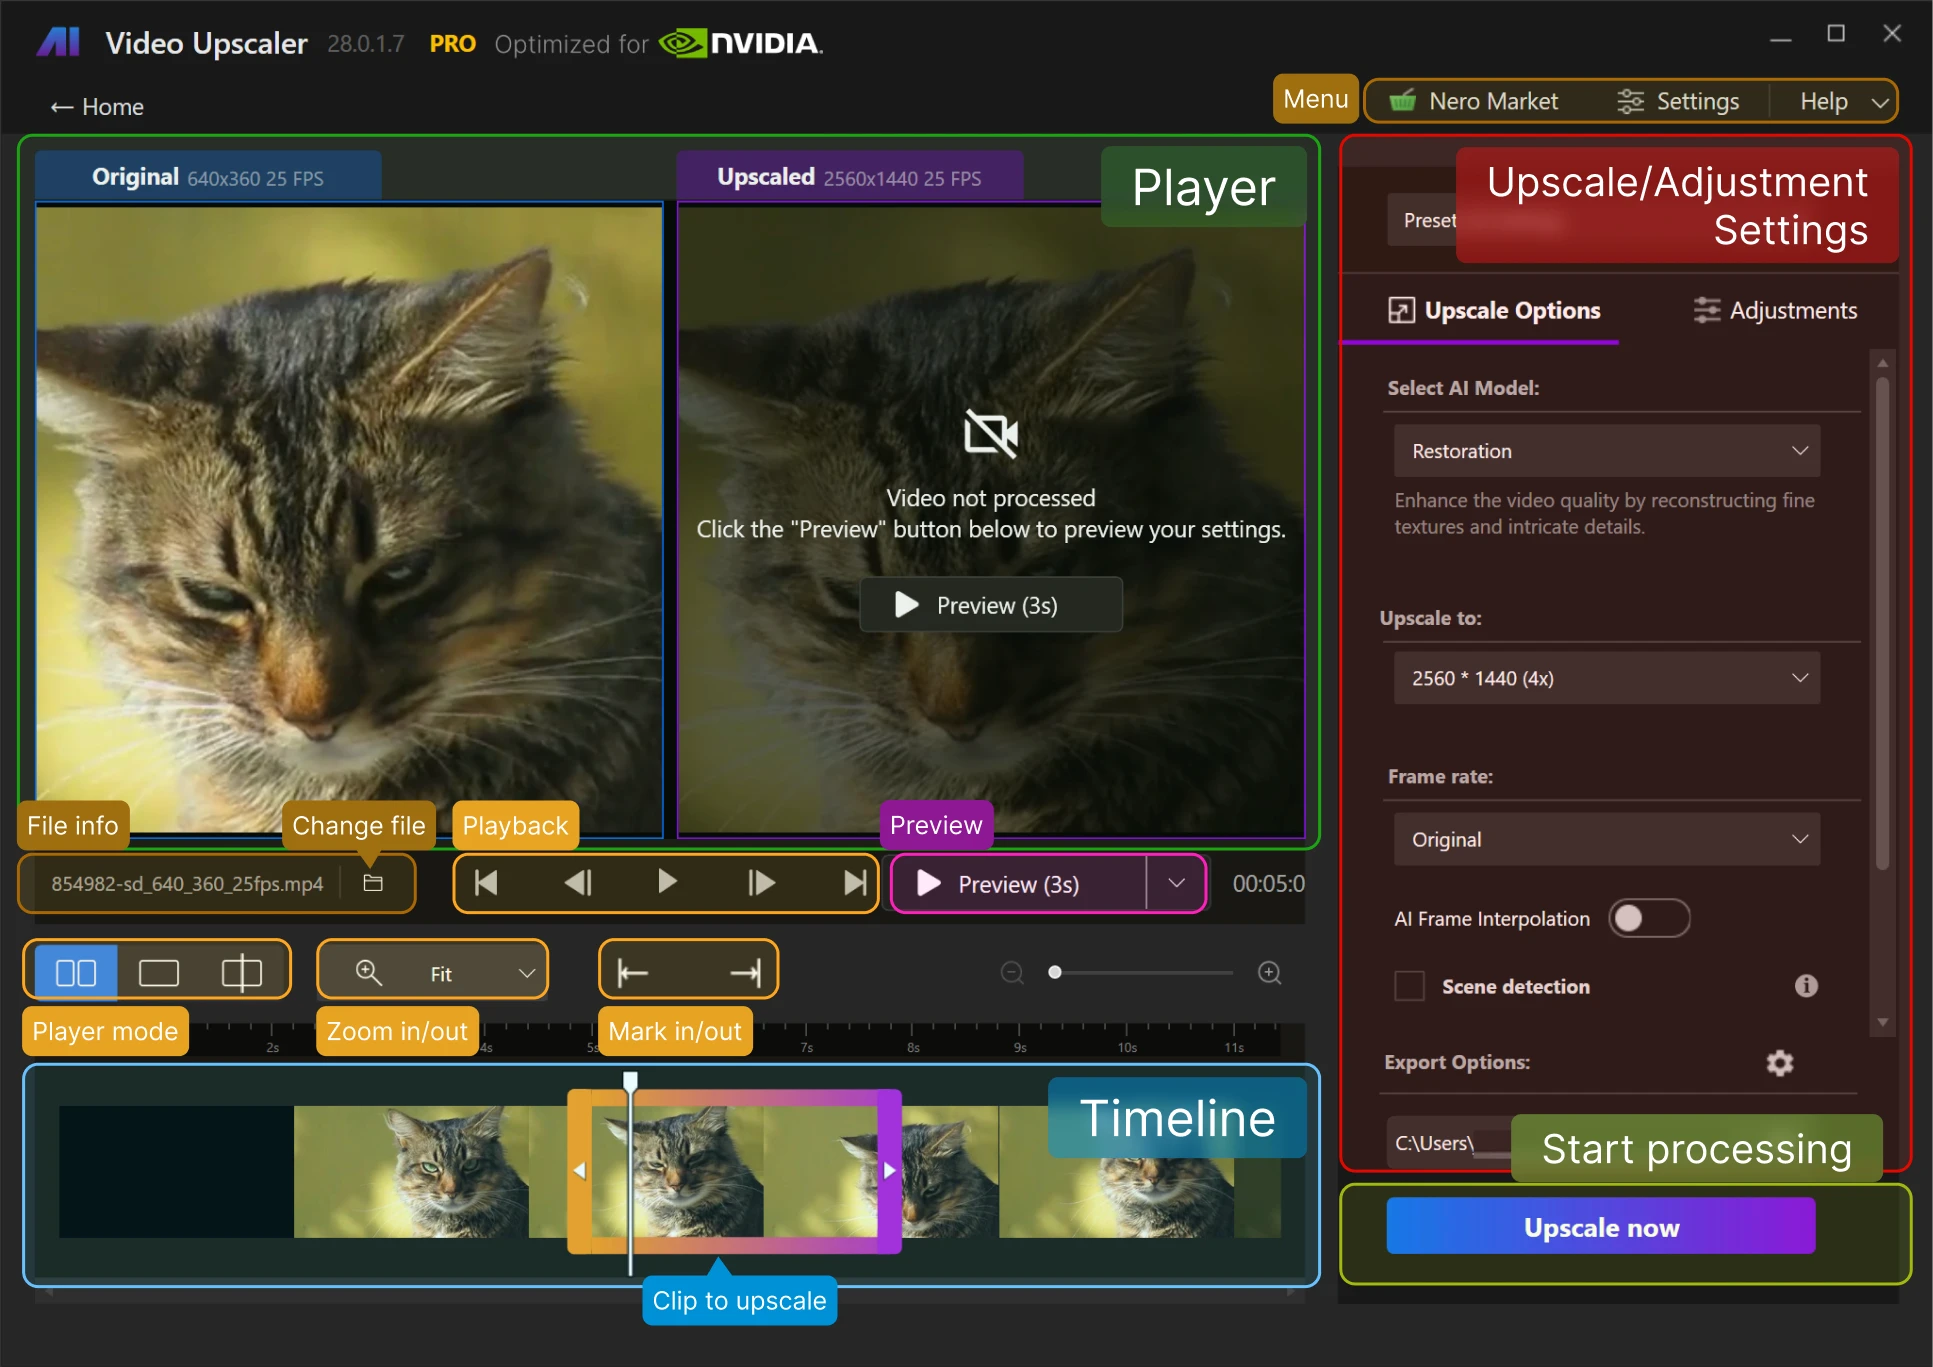
Set Upscale Options Menu

Set the AI models:
Fast: general purpose model, fast processing speed.
Animation: special model for 2D cartoon or animation video enhancement.
Realistic: special model for reality video footages.
Versatile: It will enhance the video quality with less sharpness and keep more details.
Face Enhancement: Specifically improves facial clarity, perfect for close-ups.
Restoration (New): restore the micro details in video footages.
Set output resolution. from 720*576 to 7680*4320, 11 options for the selection.
Set the video encoder: H.264 for more compatibility, H.265 for better size efficiency.
Set the folder location
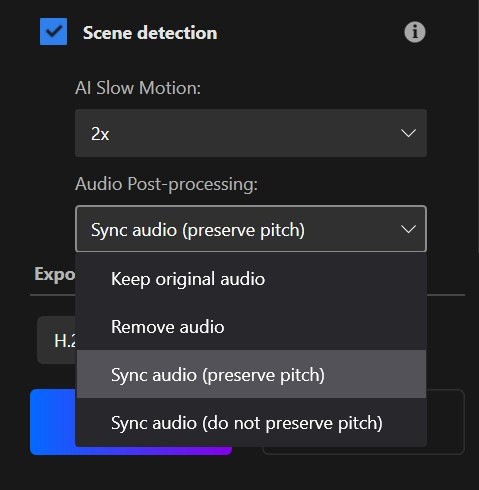
AI Frame Interpolation & AI Slow Motion
Turn on the AI Frame Interpolation option to improve video smoothness. If needed, activate AI Slow Motion to create slow-motion effects.

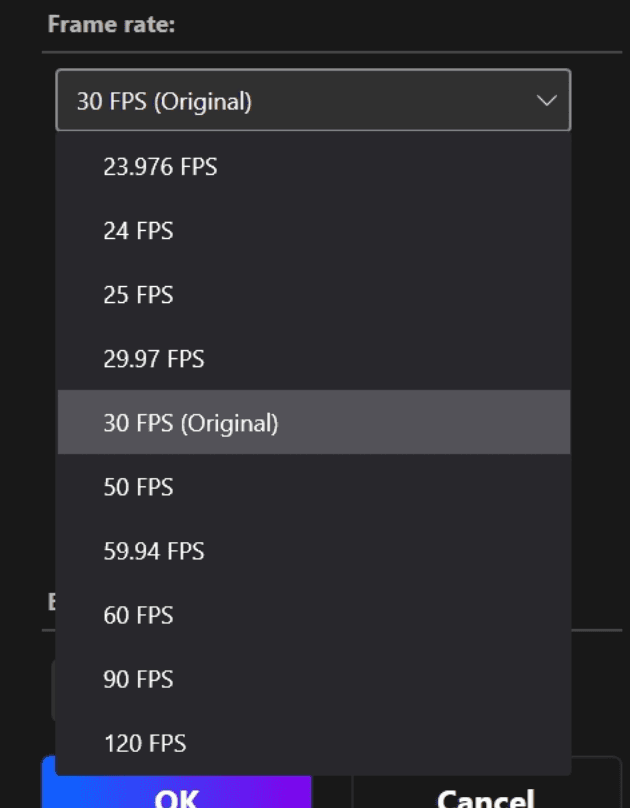
Choose your desired frame rate from the drop-down menu, with options ranging up to 120 FPS.
*The maximum selectable FPS depends on the resolution, encoder, and hardware support.
Customize the audio settings by selecting either Preserve Pitch or Do Not Preserve Pitch based on your preference.
Preview Your File
To generate a preview, select the desired resolution and output settings and press the Preview button.
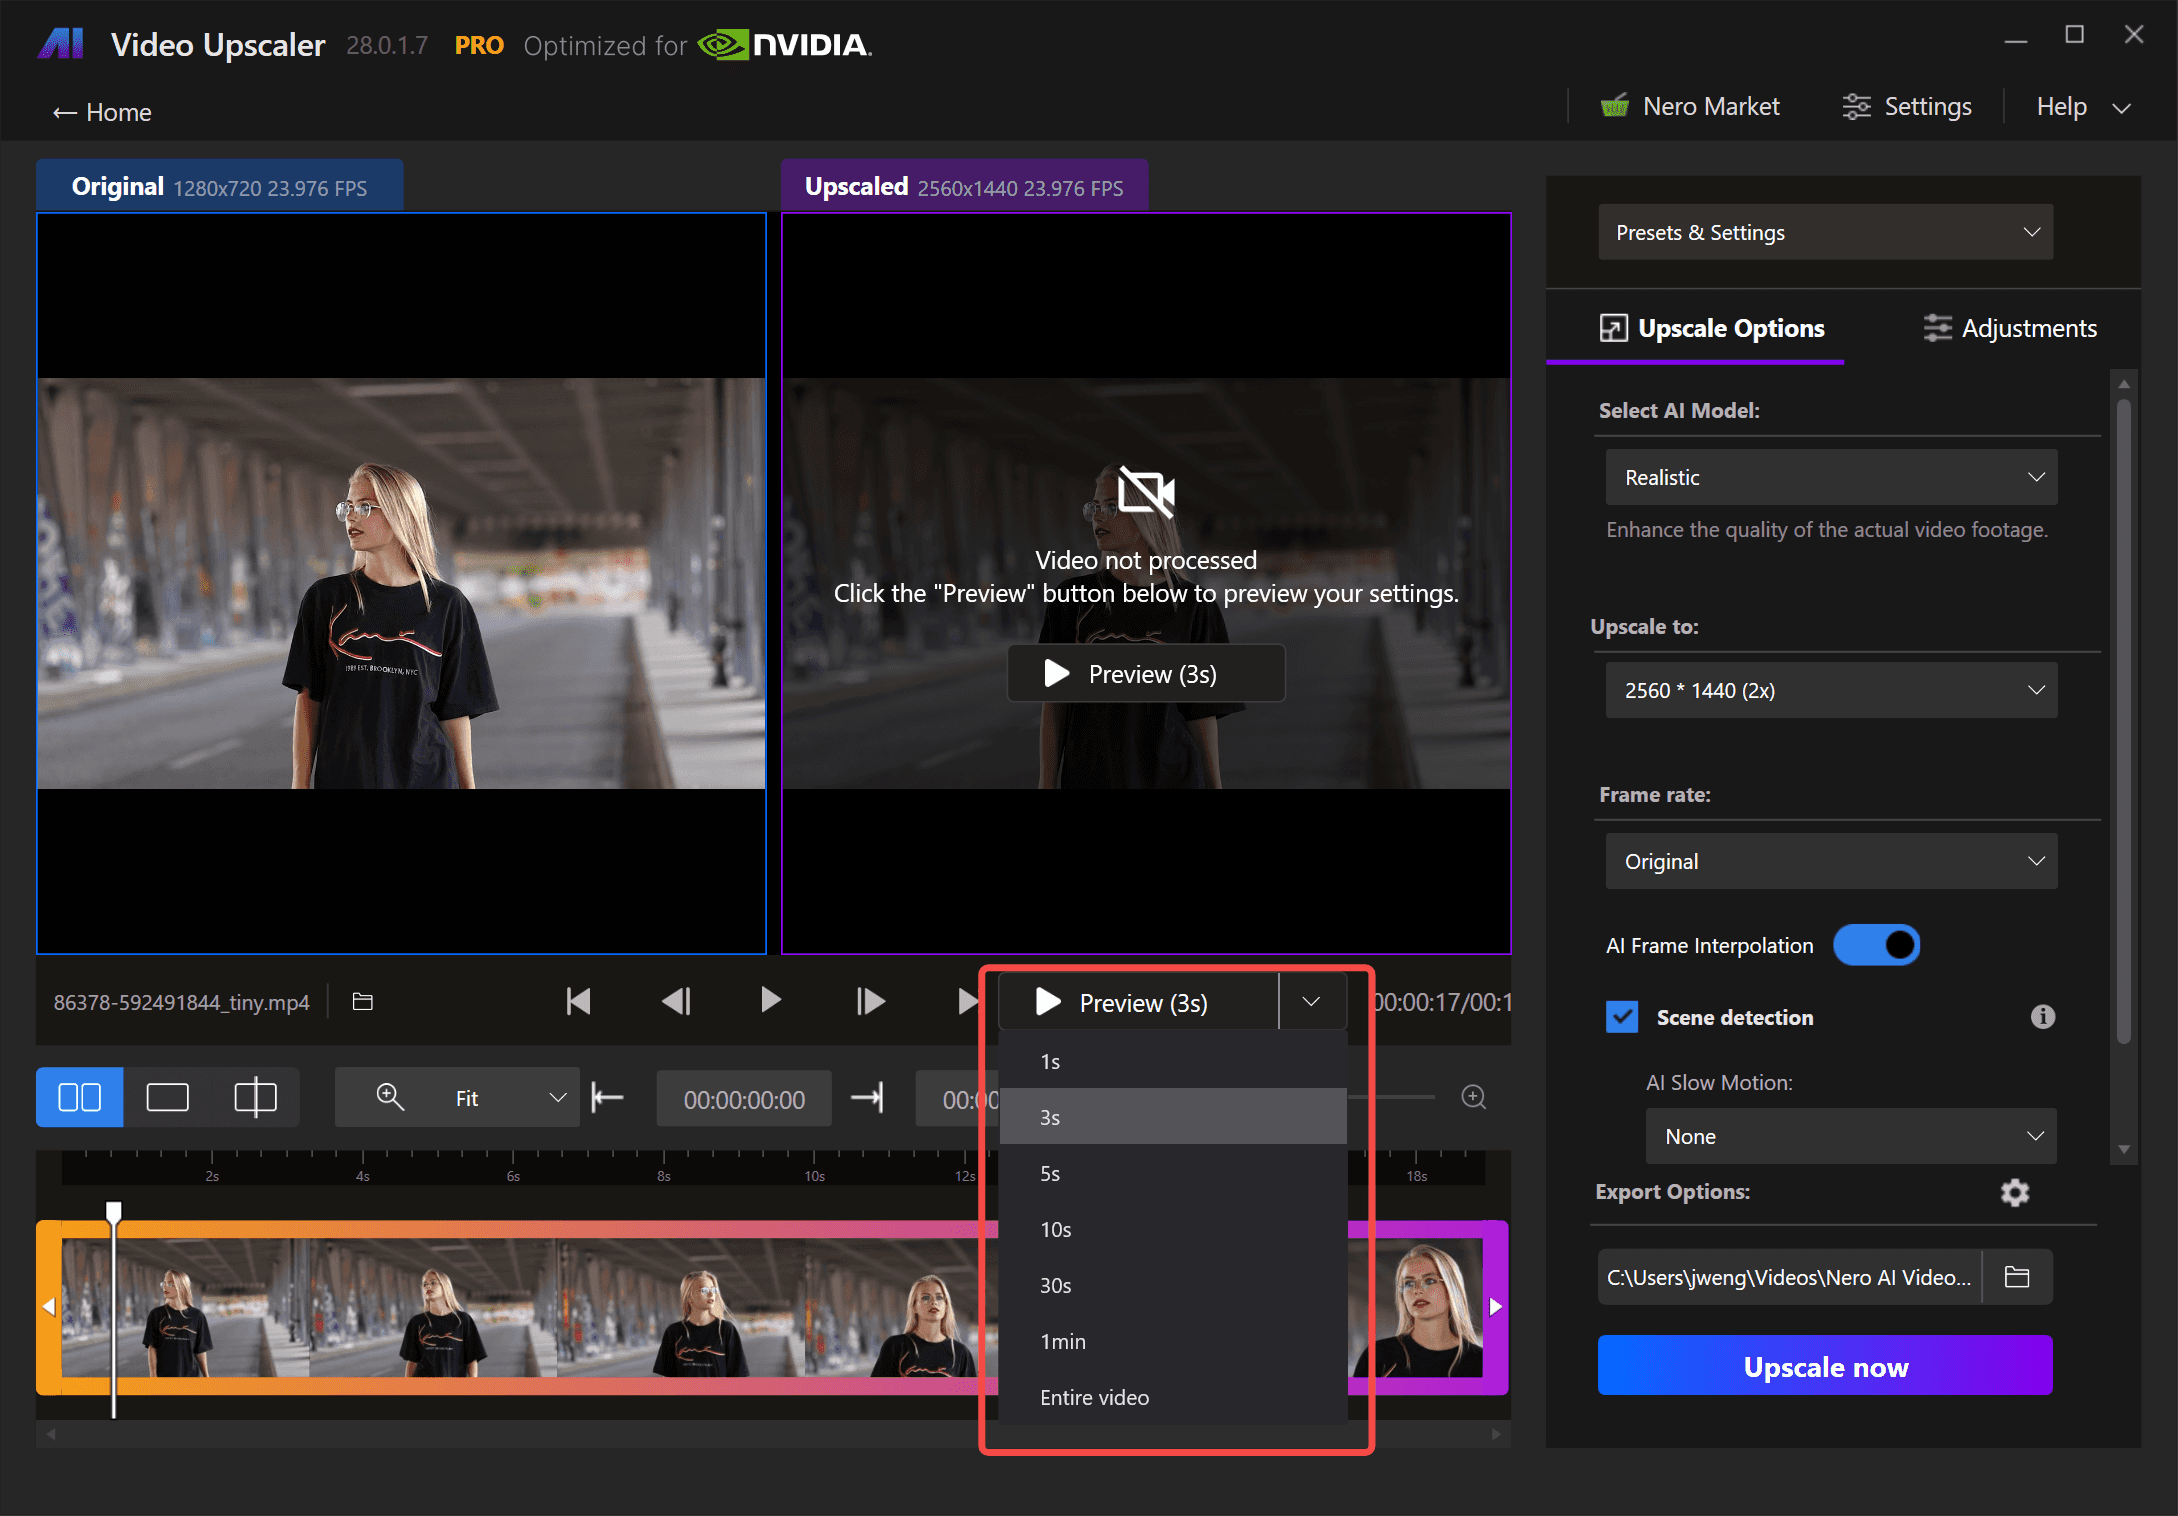
Select the preview second, from 1s, 3s, 5s, 10s, 30s, 1min, to the whole video. Adjust the view and zoom to inspect the results.
A progress round cycle and an ETA will appear for each preview file.
A purple check mark indicates that the preview is complete.
Single click on the preview, you will see the whole preview video.
Add to the Job List
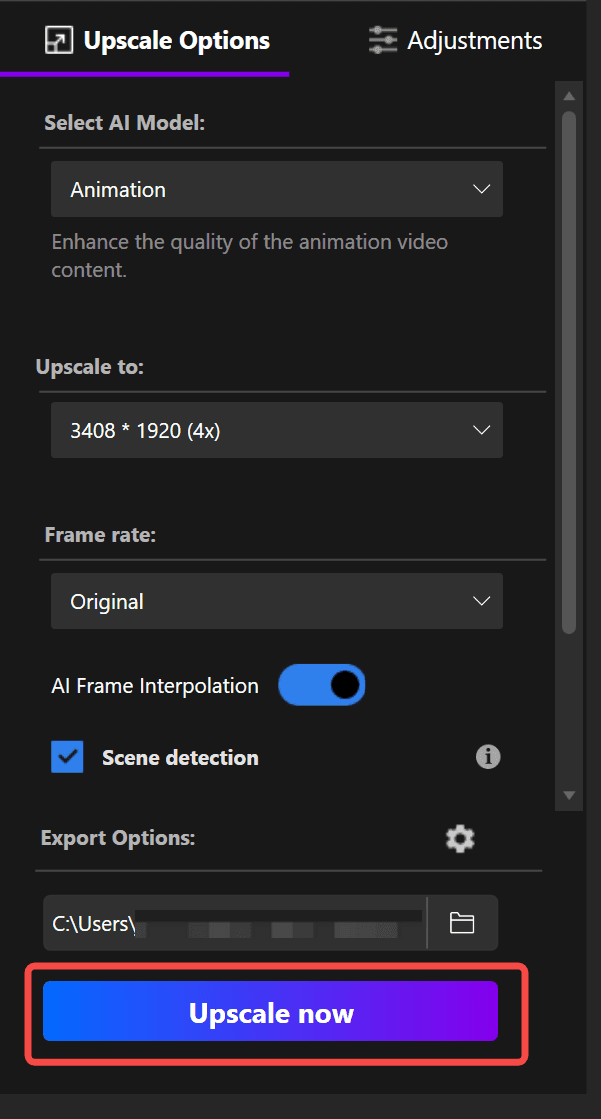
Once you have found the best settings for your file and you have inspected the preview, you are ready to Upscale by clicking the "Upscale now".
Save and Apply Presets
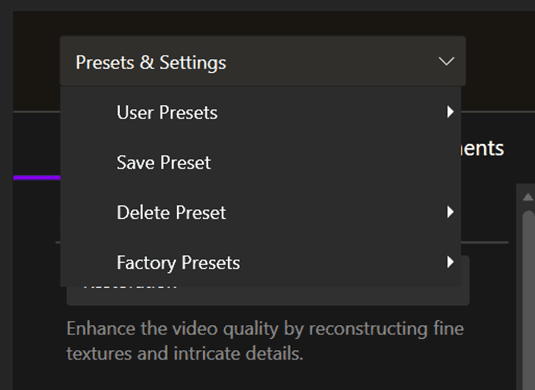
If you want to reuse the video upscaling settings from the current video for other videos, you can open the “Presets & Settings” menu to save the current settings as a preset. To apply the saved presets, you can choose from the “User Presets” or “Factory Presets” list.

You can also apply the saved presets to one or all of the videos in the queue.
Start the Upscale and Export you File
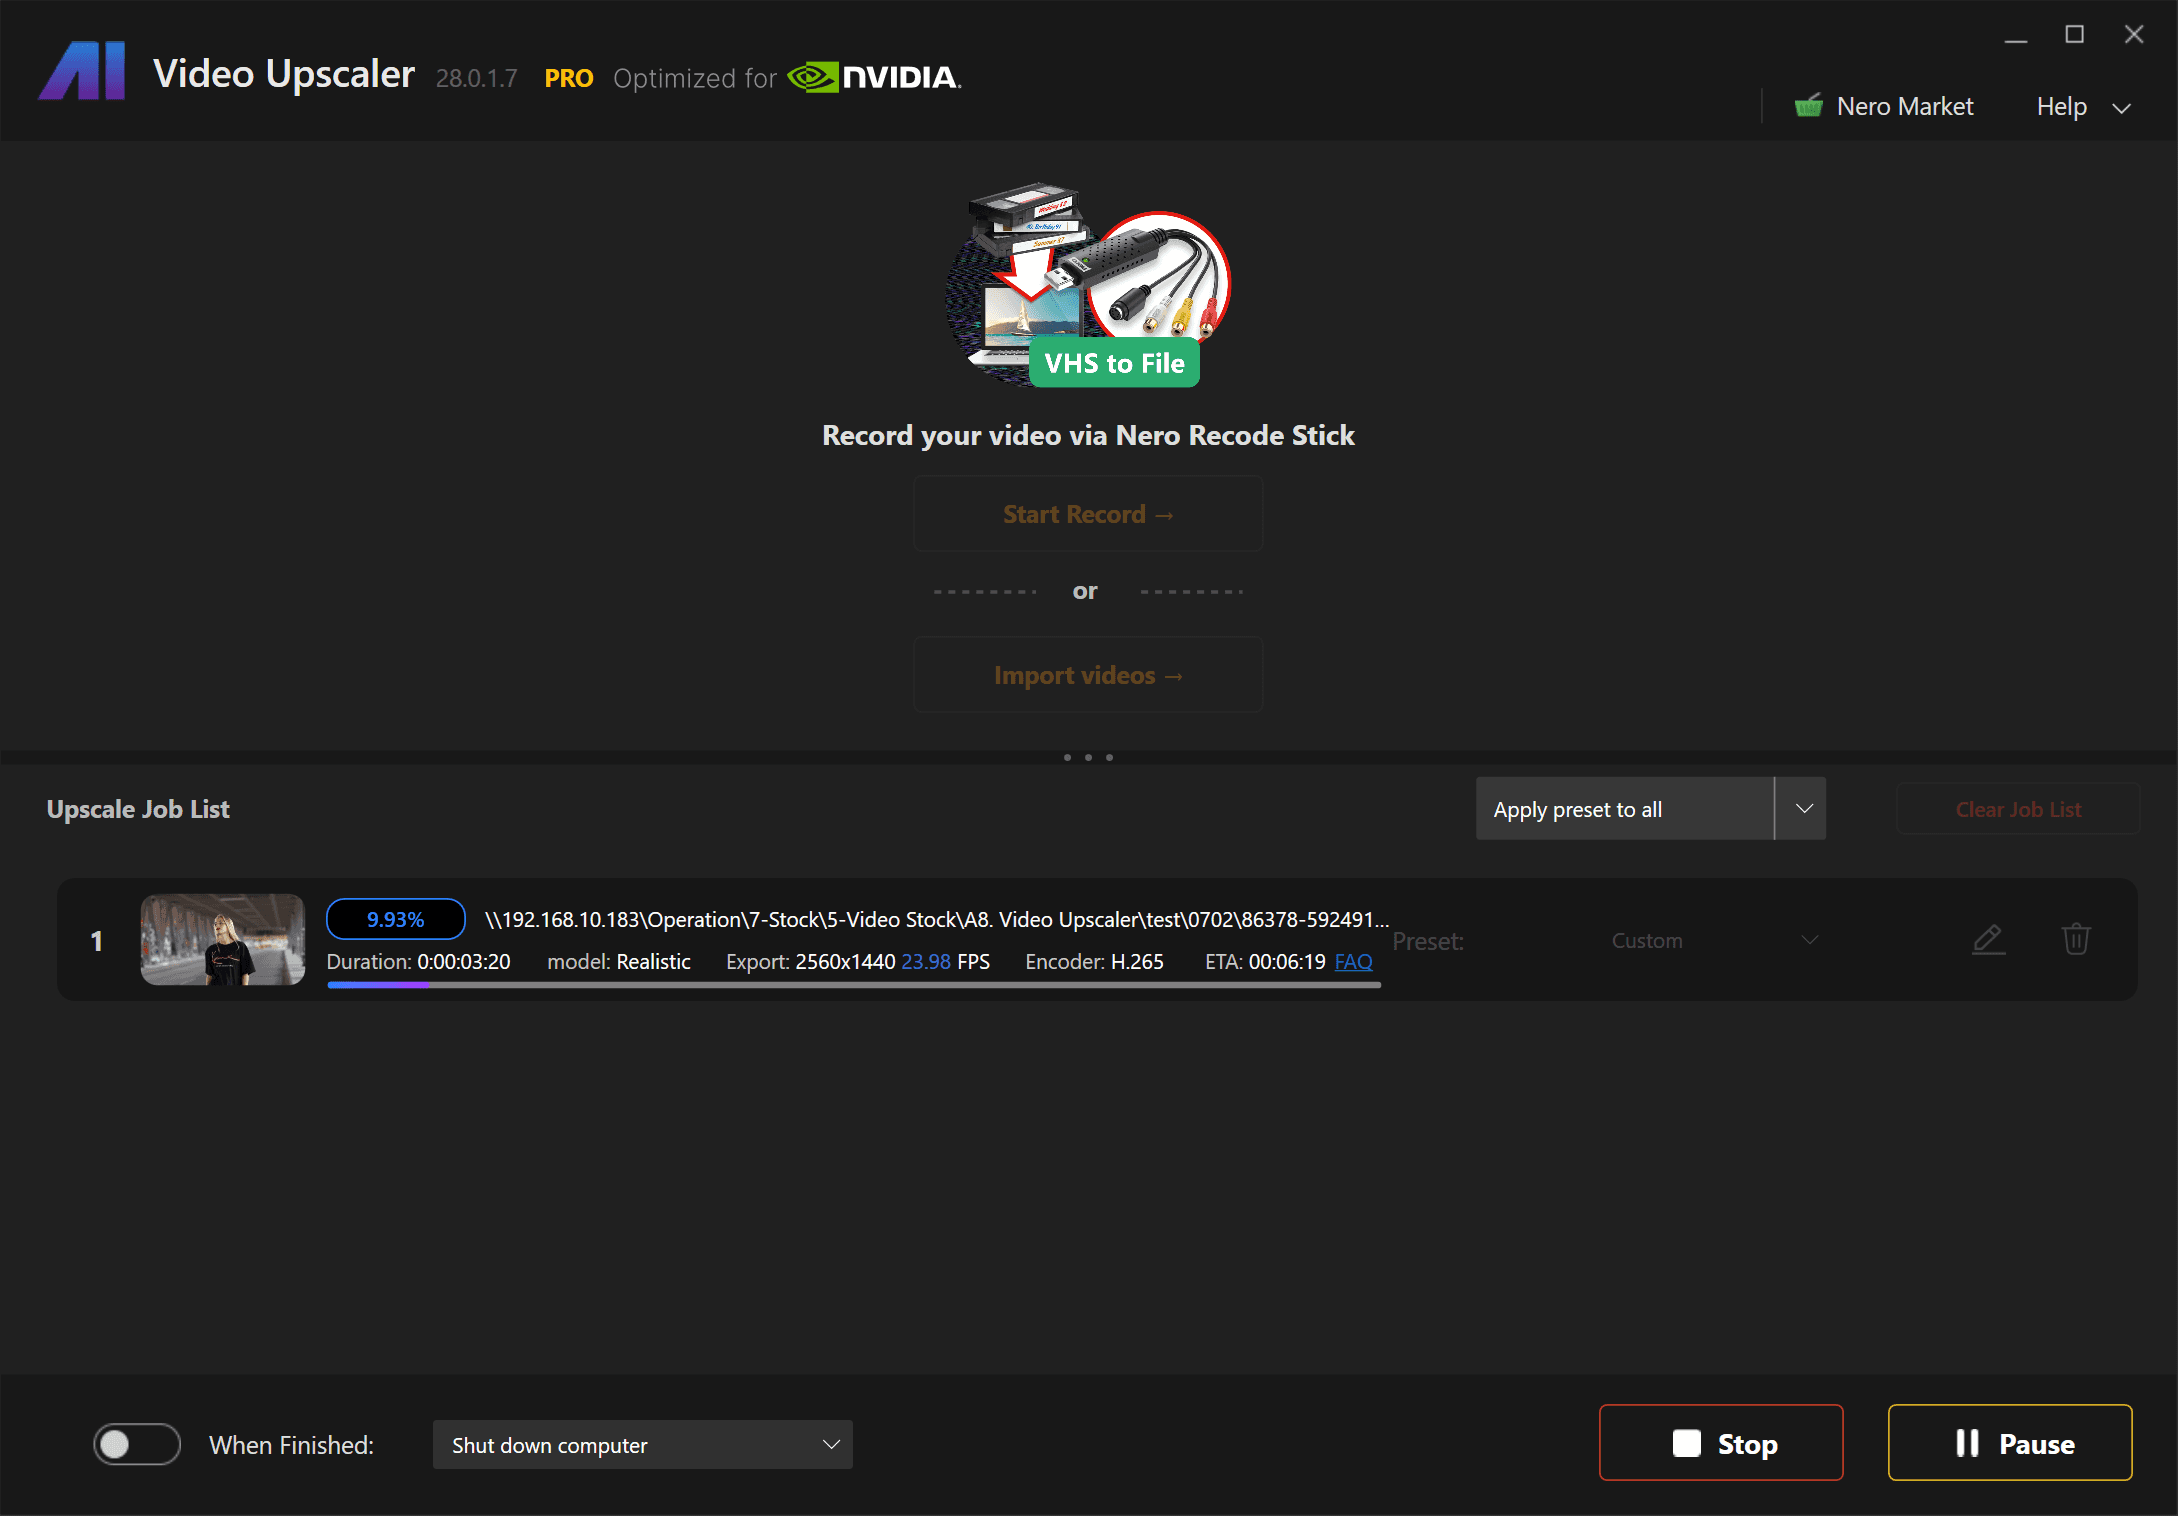
Your file is ready to upscale and the progress bar will show you the status.
You can also open the option for "When finished",

Congratulations! Your video has been successfully upscaled. The upscaled file is automatically saved in your chosen folder.

You can now import your new file to begin using the upscaled version.
Disclaimer
Due to ongoing product version updates and variations between distribution channels (including but not limited to Nero, Microsoft Store, and Steam), certain feature descriptions, screenshots, or usage instructions may differ from the functionality presented in the actual product. Such differences do not constitute a defect, non-conformity, or performance issue of the product and shall not serve as a basis for after-sales claims, refunds, or warranty requests.