Image Upscaler
Quick Start
Use this guide to import, upscale, and enhance your first image.
Import Your File
Browse from Local File: Click to add your image files (jpg, png, bmp, webp) into Image Upscaler. Importing multiple images at once is also supported.

Fine-tune Upscale Options
Select Upscale Size
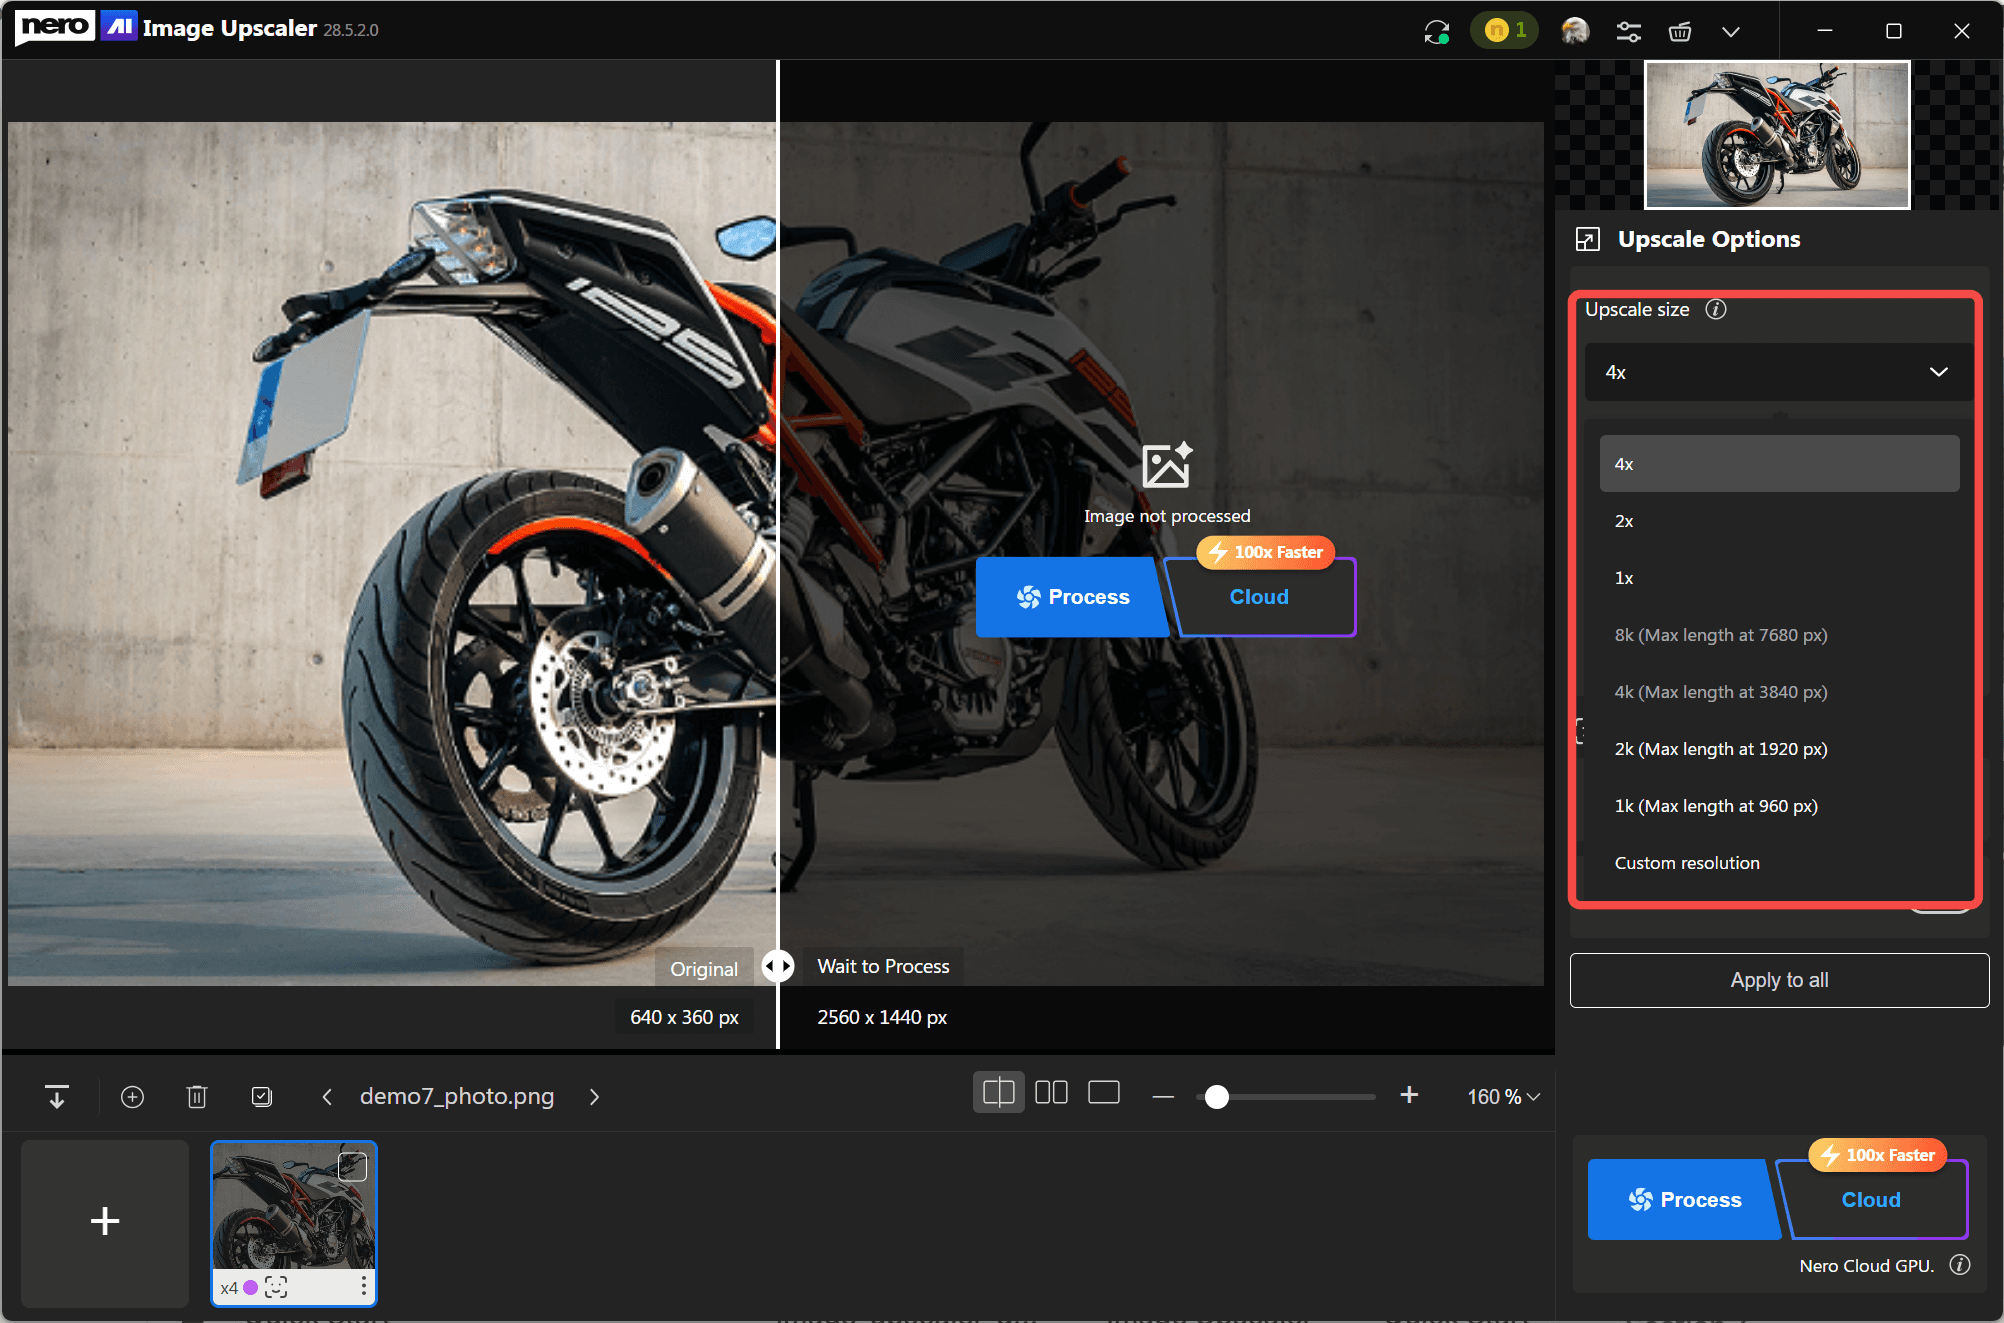
You can enlarge your images by choosing a preset scale or setting a custom resolution.
1× / 2× / 4×
2K / 4K / 8K (auto-adjusted by maximum length)
Custom Resolution – Manually define output width and height.
Example: A 640×360 image upscaled 4× will become 2560×1440.
Choose an AI Model
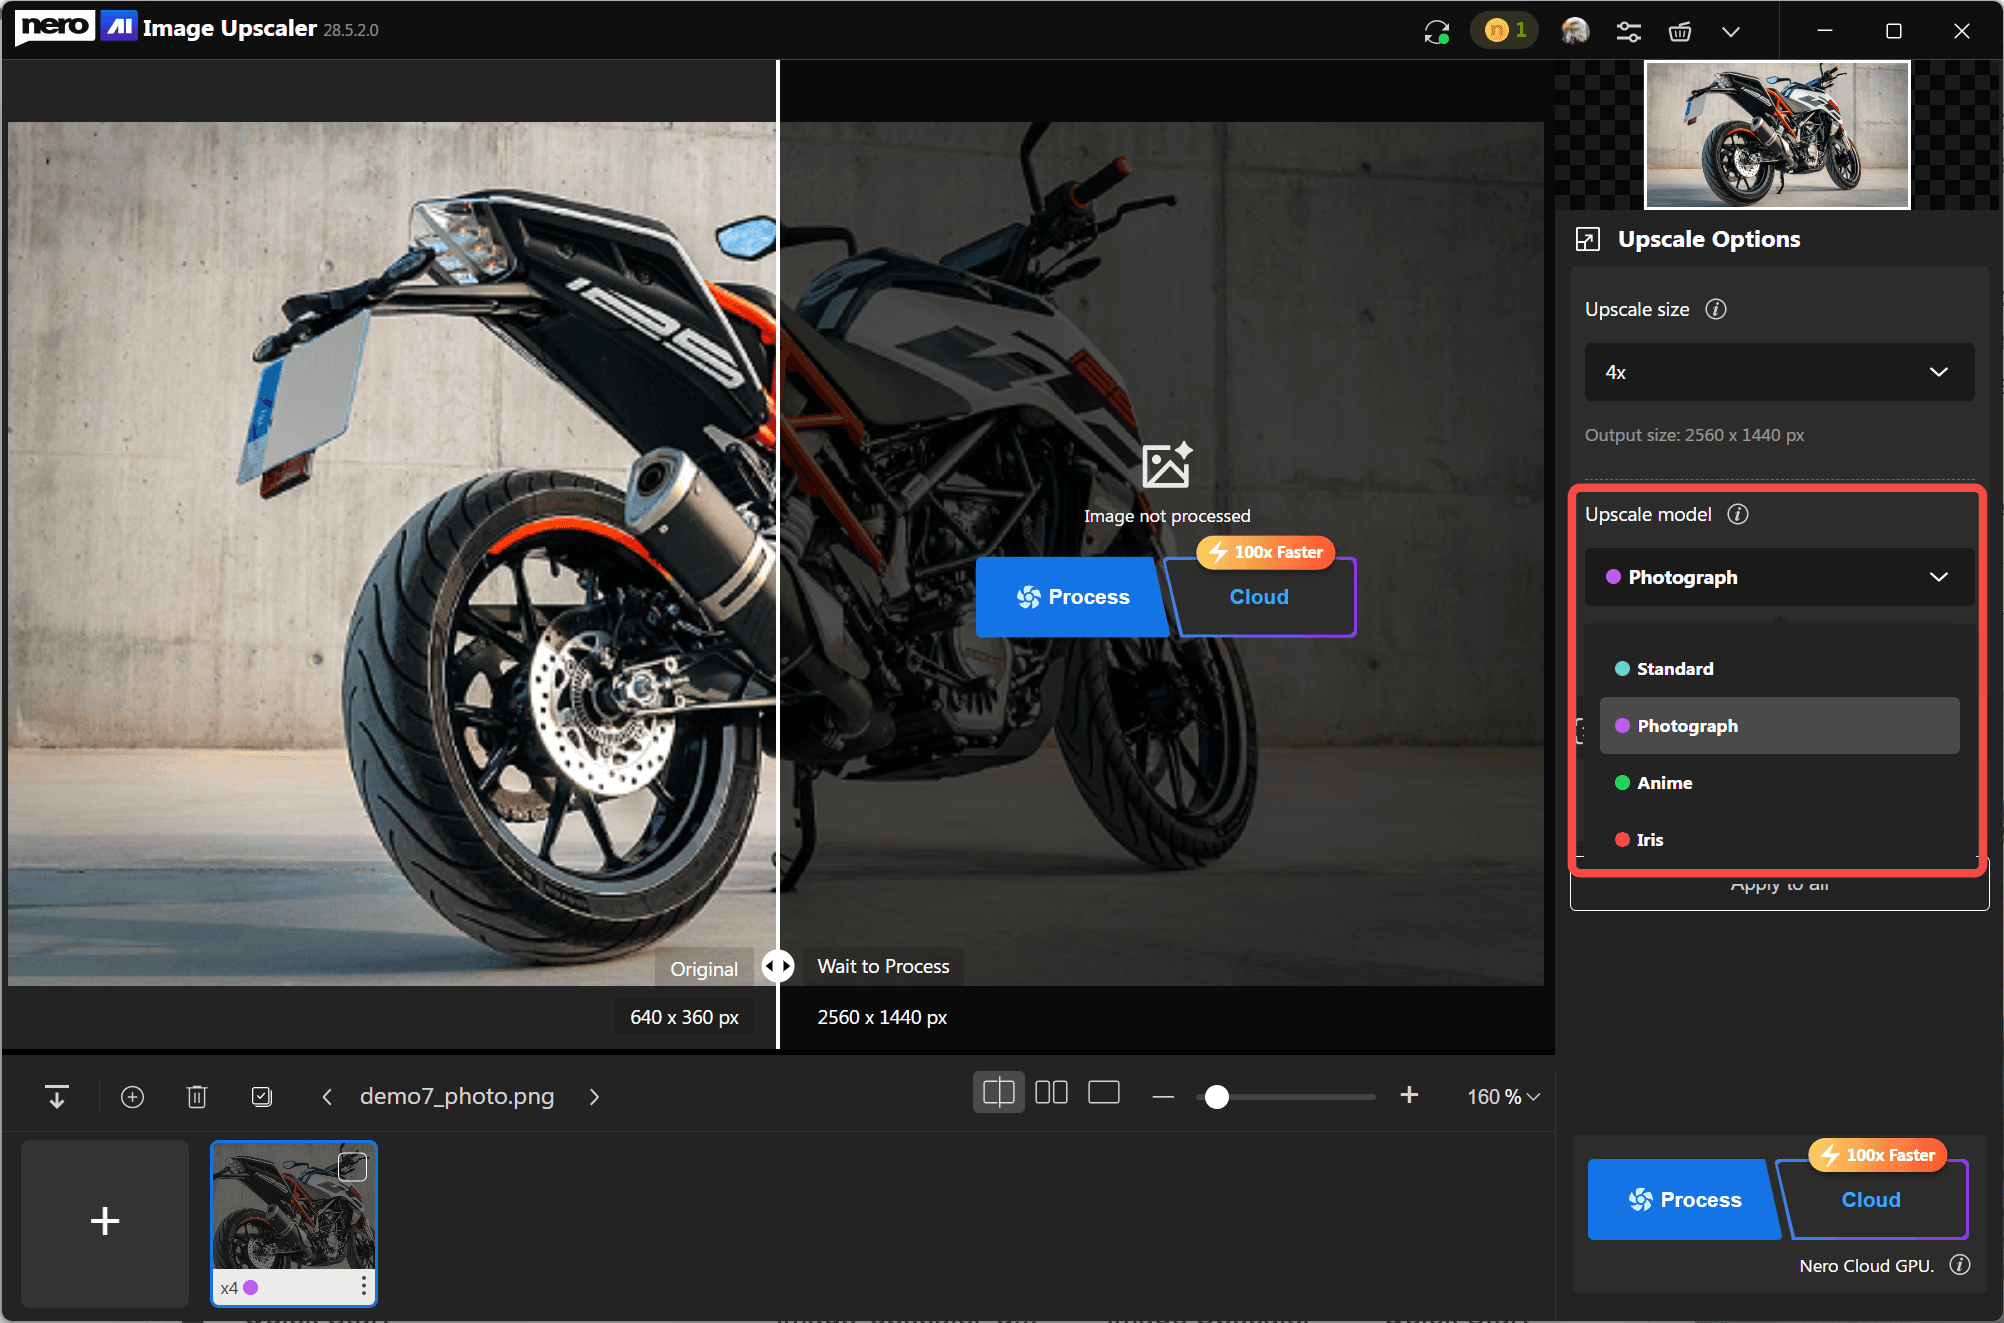
Select the model that best fits your image type under Upscale Model.
Standard – Balanced option for general photos such as scenery, architecture, or products.
Photograph – Produces smoother results, ideal for portraits, nature, and everyday photos.
Anime – Optimized for illustrations, comics, or anime-style artwork.
Iris – Designed for extremely low-resolution or compressed images, enhancing sharpness and detail.
You can preview and switch models before processing to compare results.
Face Options (Pro Feature)
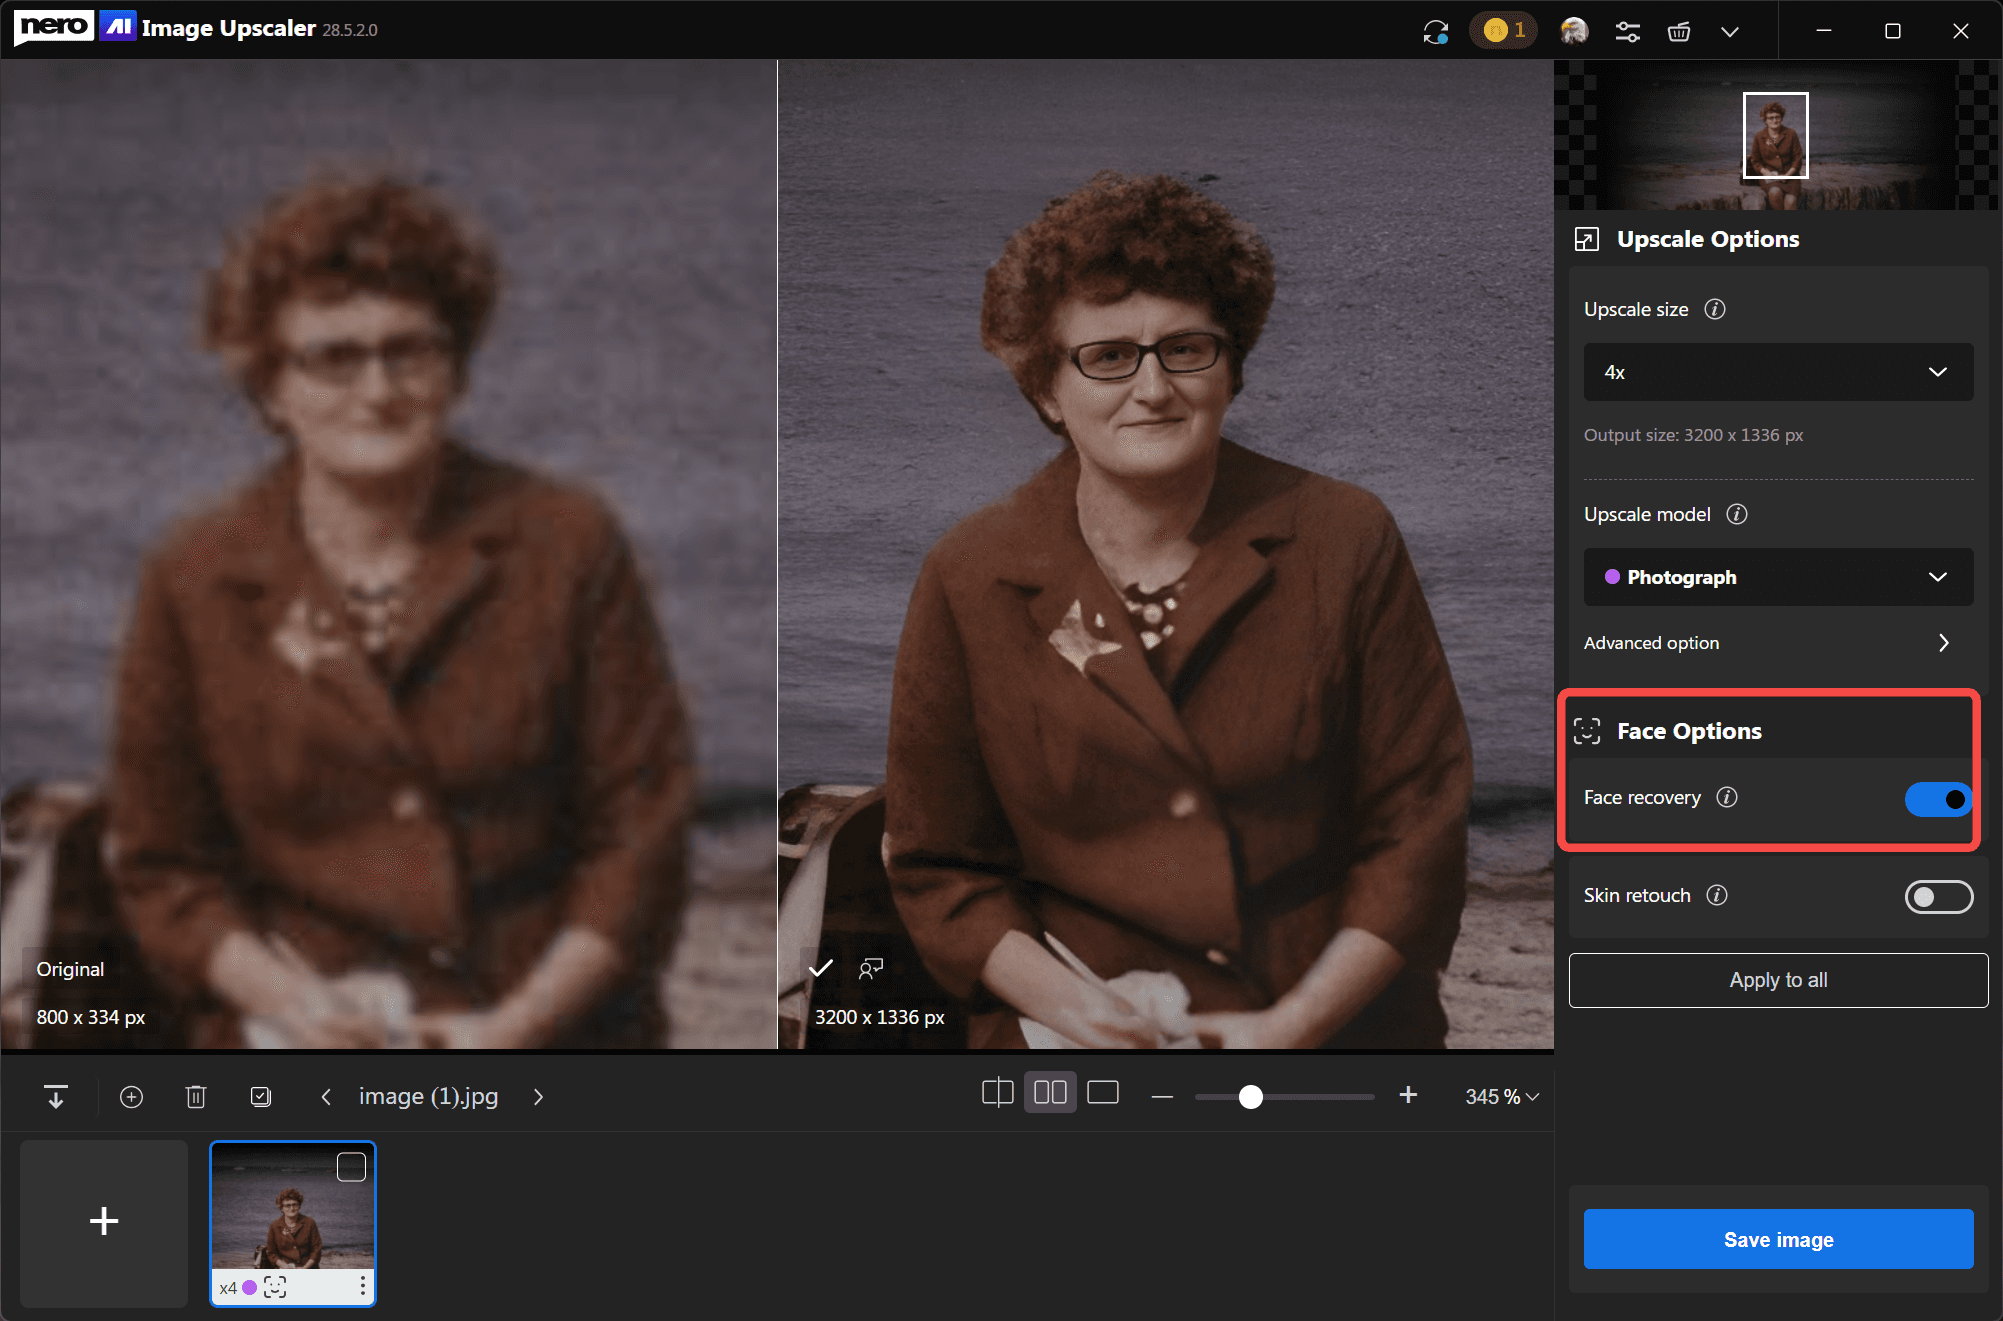
If your image includes people, you can use Face Options to enhance facial details.
These options can be applied together with any AI model.
Face Recovery – Restores blurry or unclear faces, improving facial structure and clarity.
Skin Retouch – Smooths skin tones naturally while preserving realistic facial features.
💡 Tip: Perfect for selfies, portraits, and group photos to achieve a refined, professional look.
Choose Upscale Mode
There are two ways to process your images:
Local Process
The upscaling runs on your own computer using your GPU, if available.Requires NVIDIA GTX1080 or higher for acceleration.
Speed depends on your hardware.
Compatible with CPU mode if GPU is not available.
Cloud Process
The image is processed on Nero’s secured EU-based Cloud GPUs.Usually 10× faster than GTX1080 and 100× faster than CPU.
Works on any PC, even without a dedicated GPU.
Requires Nero Credits per process.
Available in the Pro version.
💡 Tip: Cloud mode is ideal for large batches or high-resolution projects where speed is important.
Start Processing
After adjusting all options:
Click Process for local upscaling.
Or click Cloud for high-speed cloud processing (Pro version required).
Once completed, you can compare the original and processed images using the split view slider.
Before & After View
After choosing the upscaling mode you need, click Start Processing and wait for the result.
Nero AI Image Upscaler provides three Before & After views: Single, Slider, and Split. You can switch between these views to examine the details of your result and determine if the upscaling meets your needs.


Save Your Work
Save Options (Before Export)

You can customize how your upscaled images are saved by opening the Options menu.
Here you can:
Keep or modify the original filename.
Add suffixes like “by Nero AI Image Upscaler.”
Include upscale model and resolution in filenames automatically.
Set the Export folder, where final upscaled images will be saved.
Change the temporary folder (recommend at least 10 GB of free space).
Save Your Image


After the upscaling is completed, click the Save Image button at the bottom right to export your enhanced image.
It will be saved automatically.
Once the image is saved, a Save As button will appear below the preview.
Click it if you want to change the image format, file name, or save location.
This will open the Save As dialog, where you can make adjustments before saving again.
💡 Tip: You can preset filename rules and export folders under Options → Save Options for consistent saving behavior.